Halloween entryway ideas for apartments usually stop at a lease-compliance checklist: Command hooks, no nails, battery candles, done. This post picks up where those leave off and actually styles the space, with 24 renter-safe looks built surface by surface from the door face inward, and it covers the case those pages skip entirely: an entry with no console and no floor room, where the door itself is the only surface you've got. Every idea here hangs, leans, clings, or stands freestanding, so nothing touches your deposit. Written by a renter who has lost deposit money to wall damage and now decorates like the landlord is inspecting on November 1. Save this one to Pinterest so you can pull it back up when you start decorating.
1. Wrap the Whole Door in Matte Black Kraft Paper
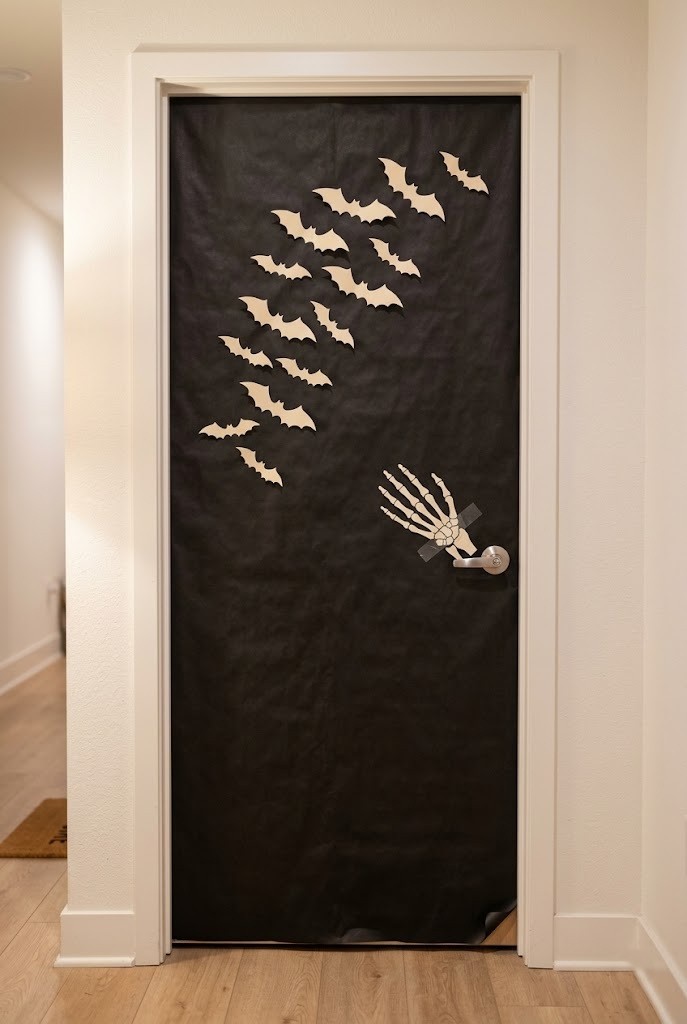
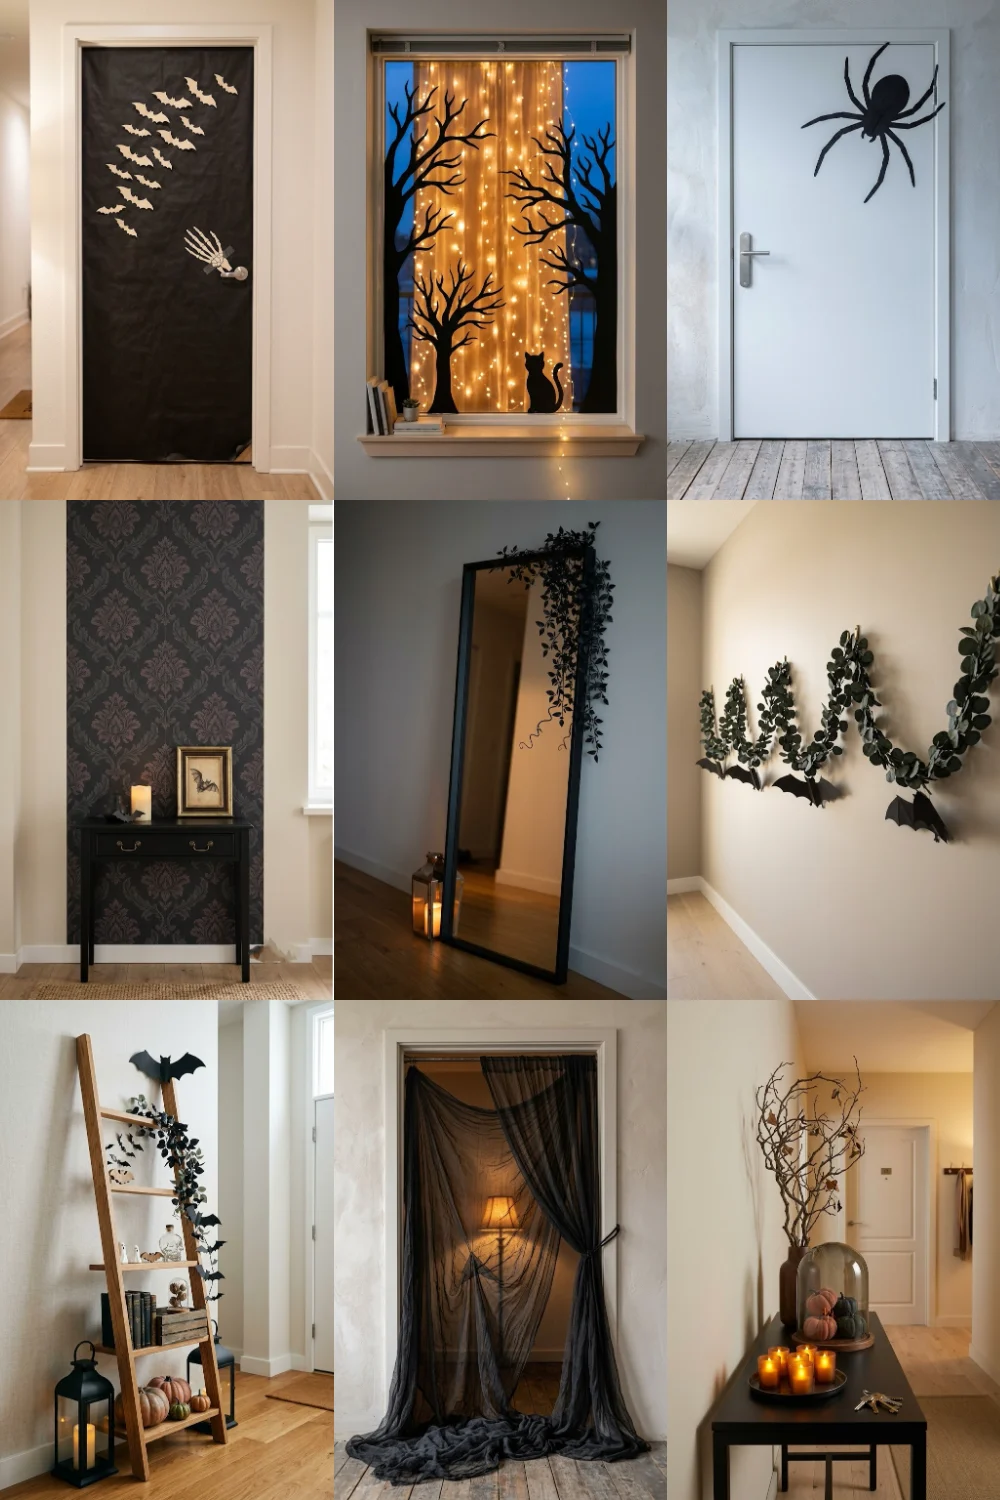
Covering the door face in matte black kraft paper turns a plain slab into a full backdrop for about eight dollars, and it peels off clean on November 1. Buy a roll of black kraft, matte side out so it reads velvet instead of shiny gift wrap, cut it to the door minus half an inch on every edge, and hold it with removable washi tape around the perimeter only. Layer a paper skeleton hand or a die-cut bat cluster on top. That half-inch gap keeps tape off the frame's painted edge, which is exactly where deposit damage tends to start. Real tape lifts paint, so skip it.
2. Hang an Oversized Black Wreath From an Over-the-Door Hook
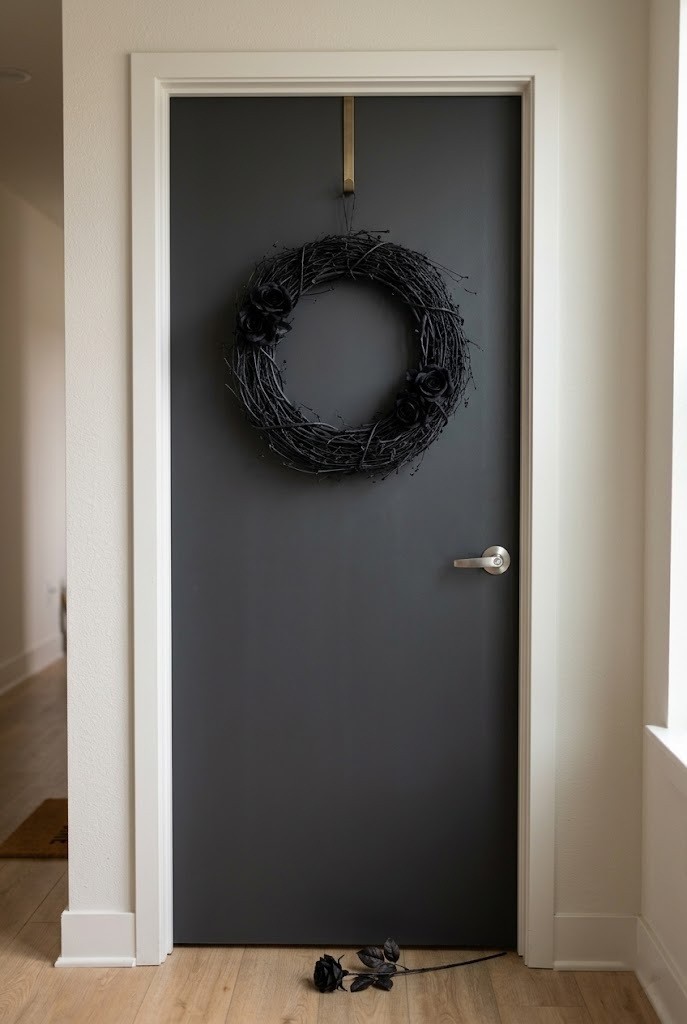
An over-the-door hook holds a large black wreath with zero hardware in the wall, and the single hook hangs on the door's top edge where no one inspecting for damage will look. Go bigger than feels right: an 18 to 22 inch wreath reads intentional on a full door, where a 14 inch one looks lost. Twisted grapevine spray-painted flat black, or a faux black-magnolia wreath, both photograph well. The one metal hook arm sits over the top rail and closes when the door shuts, so nothing rubs the paint. Weight limit on most over-door hooks is around 15 pounds, well past any wreath.
3. Curtain the Door in a Black Gauze Tapestry on a Tension Setup
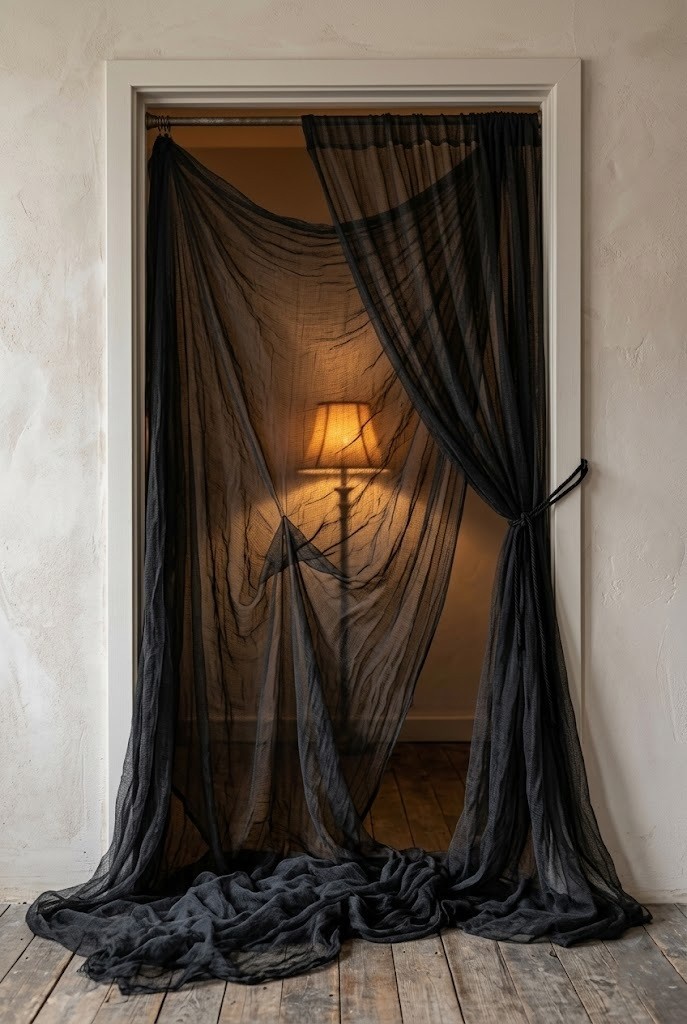
A length of black gauze or a printed tapestry hung across the door reads dramatic and hides a dated builder-grade door completely, mounted on a spring tension rod inside the frame or on two over-door hooks. For a 36-inch door, three yards of cheesecloth dyed or bought black gives you enough to swag and pool slightly at the floor. Let it hang loose rather than pulling it taut; the sag is what makes it look like fog instead of a bedsheet. Tie one side back with black cord to reveal a battery lantern behind it. Everything mounts and un-mounts in under two minutes with no residue.
4. Cling Bats and Frost to the Door's Glass Panel
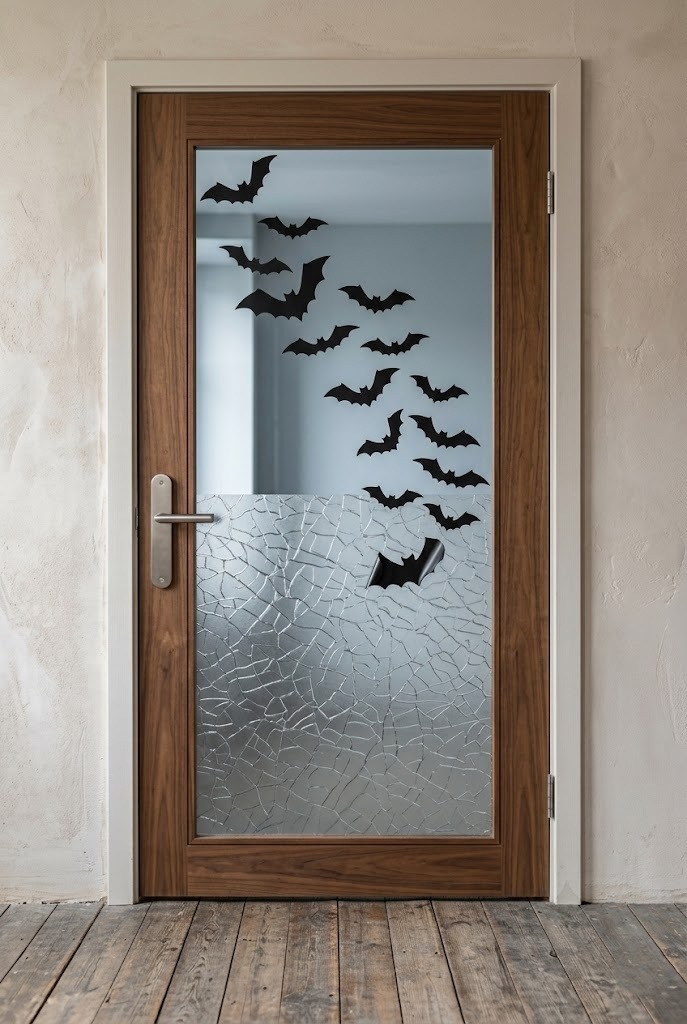
Static-cling window film needs no adhesive at all, so a glass door panel or sidelight becomes a display surface that leaves nothing behind. Static clings press on with water and a credit-card squeegee, peel off in seconds, and store flat between wax paper for next year. Cluster a flight of black bats climbing one corner rather than spacing them evenly; a diagonal drift reads like movement, a grid reads like a sticker sheet. Frosted "cracked glass" film across the lower half adds a haunted-house look without blocking all the light. On a fully solid door, apply the same clings to a nearby mirror instead.
5. String a Tattered BEWARE Banner Across the Door Face
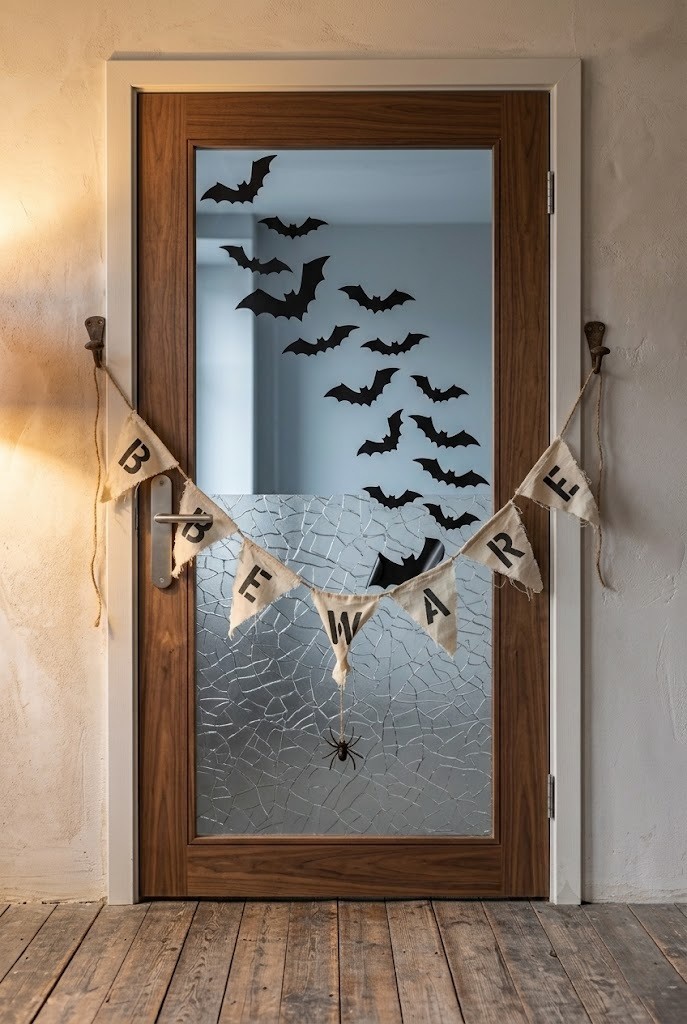
A hand-torn muslin banner spelling a short word reads custom and costs almost nothing, strung between two over-door hooks so no fixings touch the wall or the door face. Cut pennants from cheap muslin or a torn pillowcase, singe or fray the edges, and stencil letters with black craft paint. Keep the word short, four or five letters, so the pennants stay large and legible from across a hallway. Hang the twine with a deliberate droop in the middle; a taut straight line looks like a kid's birthday party, a low swag looks intentional. The whole thing rolls up and stores in a sandwich bag.
6. Drape a Faux Black Floral Swag Over the Top of the Door
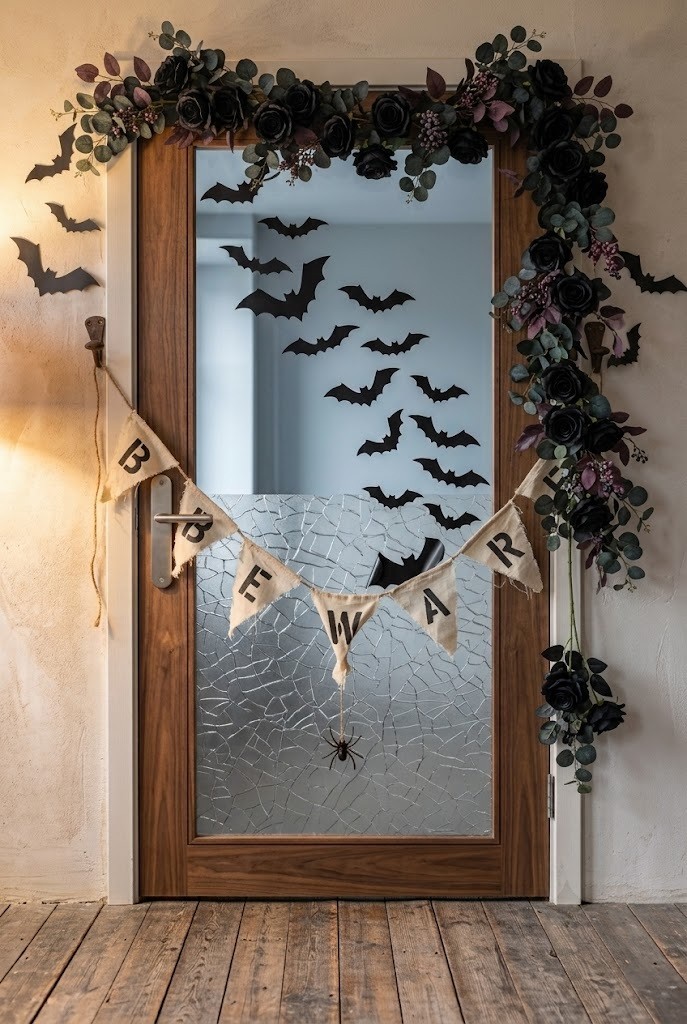
A garland of faux black florals laid over the door's top edge softens the whole entry and needs nothing but the door itself to hold it. A botanical, less costume-y cousin of the over-door wreath in idea 2, this look leans on faux black roses, dark dahlias, and trailing eucalyptus dyed charcoal. Drape a six-foot faux garland over the top rail so it dips at both upper corners, then let a few stems trail a third of the way down each side. The trick is asymmetry: heavier on one corner, thinner on the other. Faux black florals from the craft store are the buy here, reusable for years.
7. Press a Removable Giant Spider Decal Onto the Door
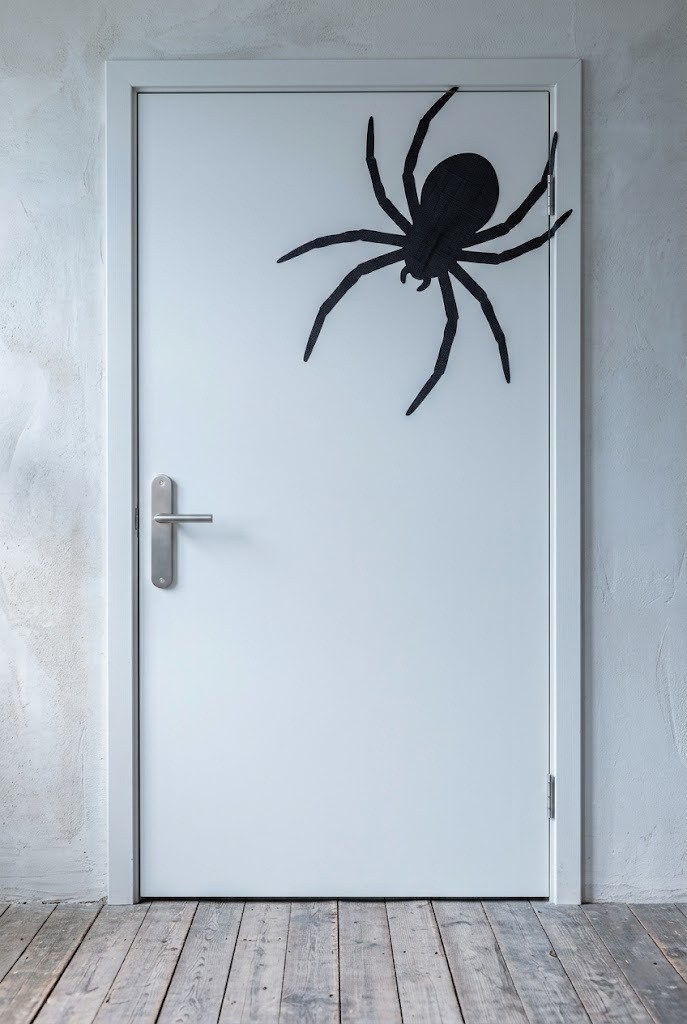
Peel-and-stick wall decals rated as removable turn the flat door into a single graphic statement, and the good ones lift off without residue if you buy the fabric-based kind, not cheap vinyl. One oversized spider, two to three feet across, placed off-center and slightly high, reads far better than a scatter of small stickers. Warm the door with a hairdryer for ten seconds before peeling the decal off later; gentle heat releases the adhesive cleanly. Test a corner on the door's edge first: if it tugs at all, switch to static clings from idea 4 instead. Reposition-friendly decals let you slide it before committing.
8. Hang a Cobweb Veil and a Lantern From One Over-Door Hook
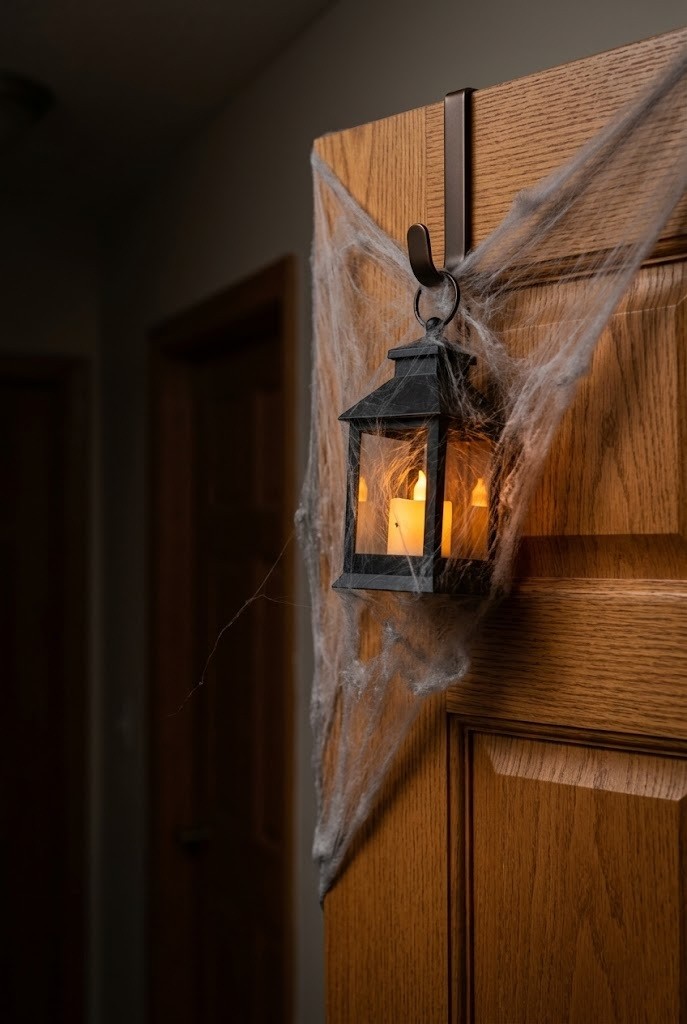
A stretched cobweb draped from the door's top corner with a single flameless lantern suspended in it frames the entry with light and needs exactly one over-door hook. Pull cotton spiderweb thin, thin enough to see the wall through it, and anchor it at the top corner so it fans diagonally across a third of the door, echoing the framed backdrop from the wrapped door in idea 1. Loop a flameless lantern on a short chain from the same hook so it nests inside the web. Cheap web pulled thick looks like pillow stuffing; the whole effect lives in how sheer you stretch it. Flameless lanterns keep an open flame off the fabric.
9. Cluster Thrifted Frames and Spooky Printables With Adhesive Strips
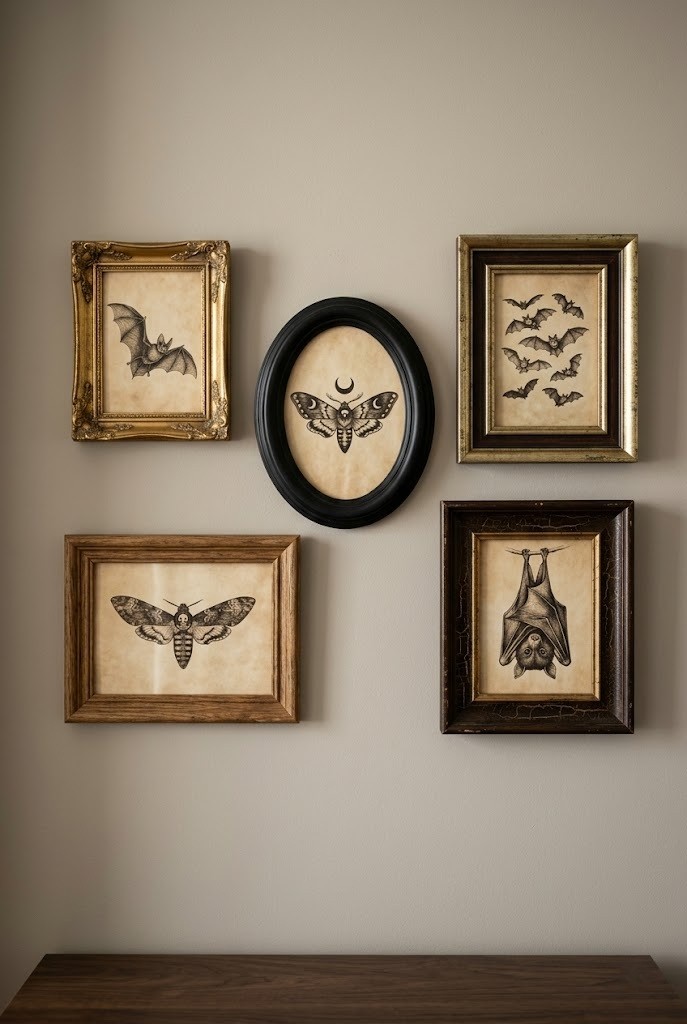
A tight gallery cluster of mismatched thrift-store frames holding free Halloween printables gives a bare entry wall a curated look, all hung on damage-free adhesive strips rated for the frame weight. Print vintage-style botanical bats, moth diagrams, or faux antique portraits at home, slot them into three to seven frames of different sizes, and arrange them on the floor first until the shapes balance. Damage-free adhesive strips hold roughly one pound per pair for small frames; double up for anything heavier and press for thirty full seconds. Keep two inches of gap between frames so the wall reads as a group, not a pile. Everything comes down clean with a slow straight pull.
10. Swag a Bat Garland Along the Wall on Command Hooks
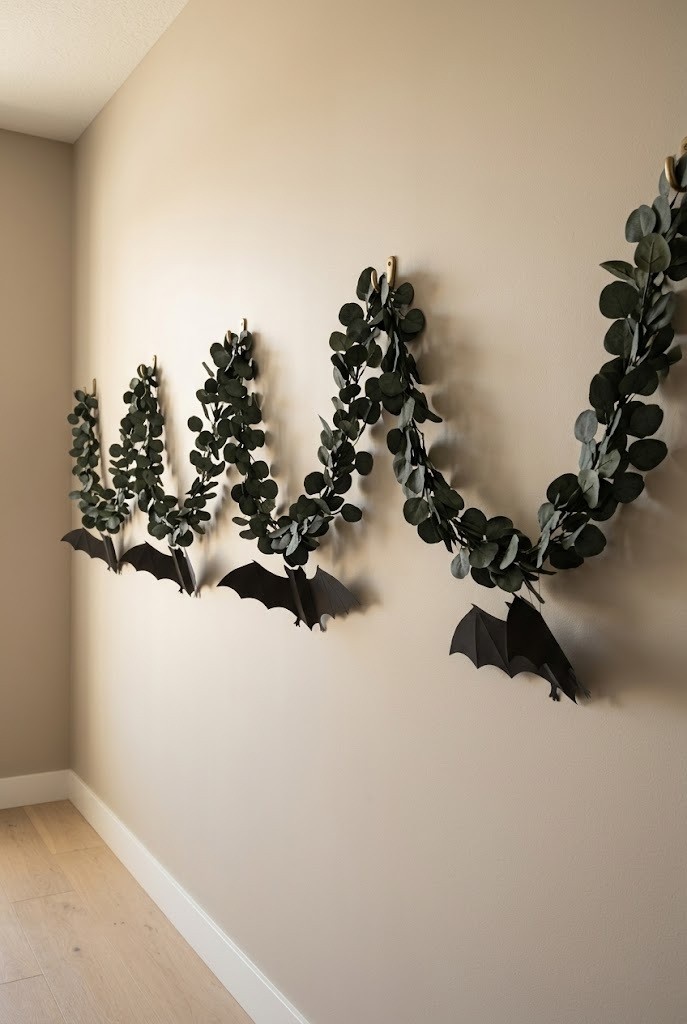
A garland of faux black eucalyptus and paper bats swagged along the entry wall draws the eye up and away from a cramped floor, hung on a row of small damage-free hooks. Space three or four mini hooks evenly, drape the garland so it dips between them in gentle loops, and wire a few oversized bats to the low points. The loops matter: even dips of four to six inches read rhythmic, while random sag looks like it fell. On a short wall, one long swag beats two short ones. This pairs cleanly under the frame cluster wall for a layered corner.
11. Float a Vignette on an Adhesive or Tension Shelf
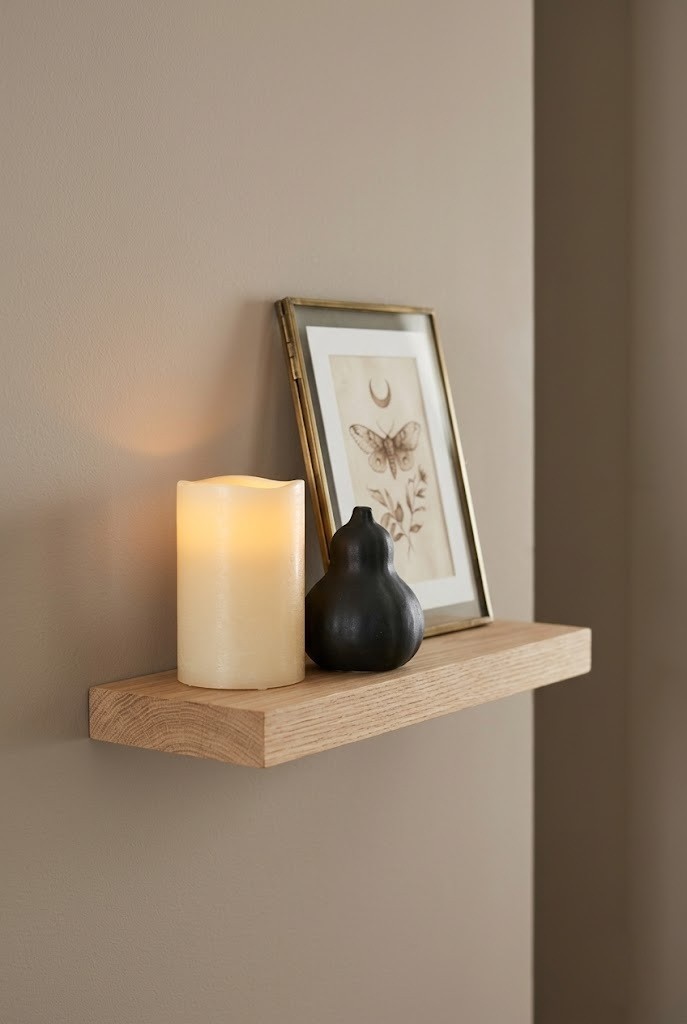
A single damage-free adhesive shelf or a tension-mounted ledge gives you a display surface on a wall that has none, holding a small Halloween vignette above the floor. Adhesive shelves rated for three to five pounds handle a battery candle, a tiny gourd, and a framed print with room to spare; stay under the rated weight and the shelf outlasts the season. Style it with the rule of three, varying heights, and let one item lean rather than sit square. Set beneath the frame cluster in idea 9, it turns a flat wall into a two-tier display. Mount it at eye level, around 60 inches, so the vignette actually reads.
12. Panel One Wall With Removable Peel-and-Stick Wallpaper
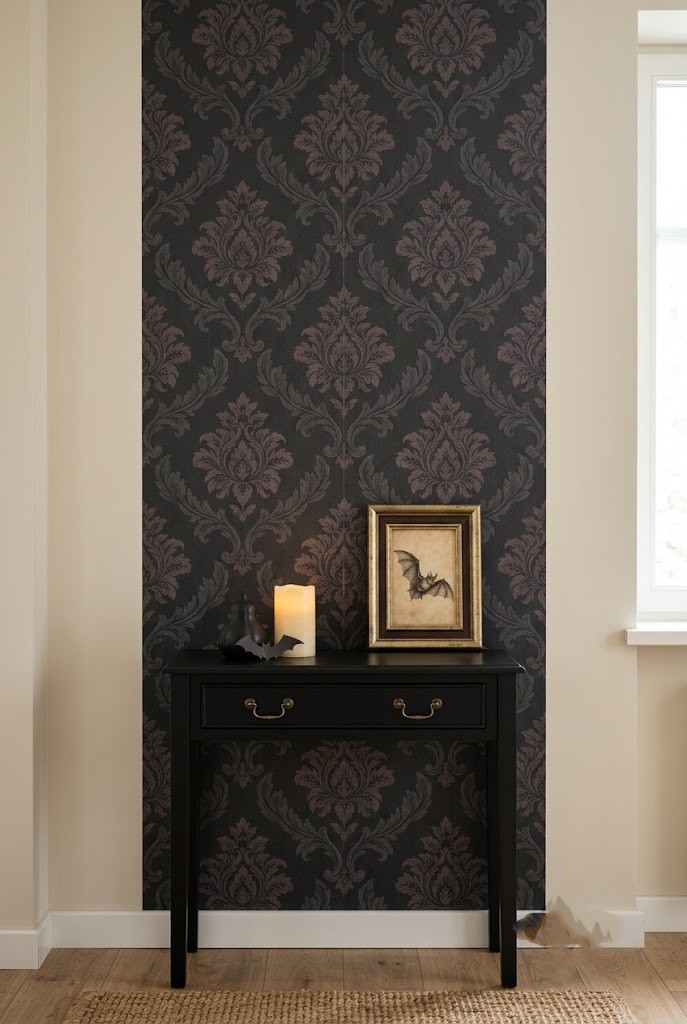
A single accent panel of removable peel-and-stick wallpaper behind the entry gives a seasonal look real depth, and the renter-safe kind lifts off in one piece when you're done. Choose a moody damask, a bat-repeat, or a faded-portrait print, and panel just one section, four to five feet wide, rather than a whole wall; a contained block reads like art, a full wall reads like a commitment you can't undo fast. Line up the first drop with a level and overlap seams by an eighth of an inch. Test a small strip in a low corner for a week first to confirm your wall's paint releases it cleanly.
13. Tape Silhouette Cutouts and Battery Lights in the Entry Window
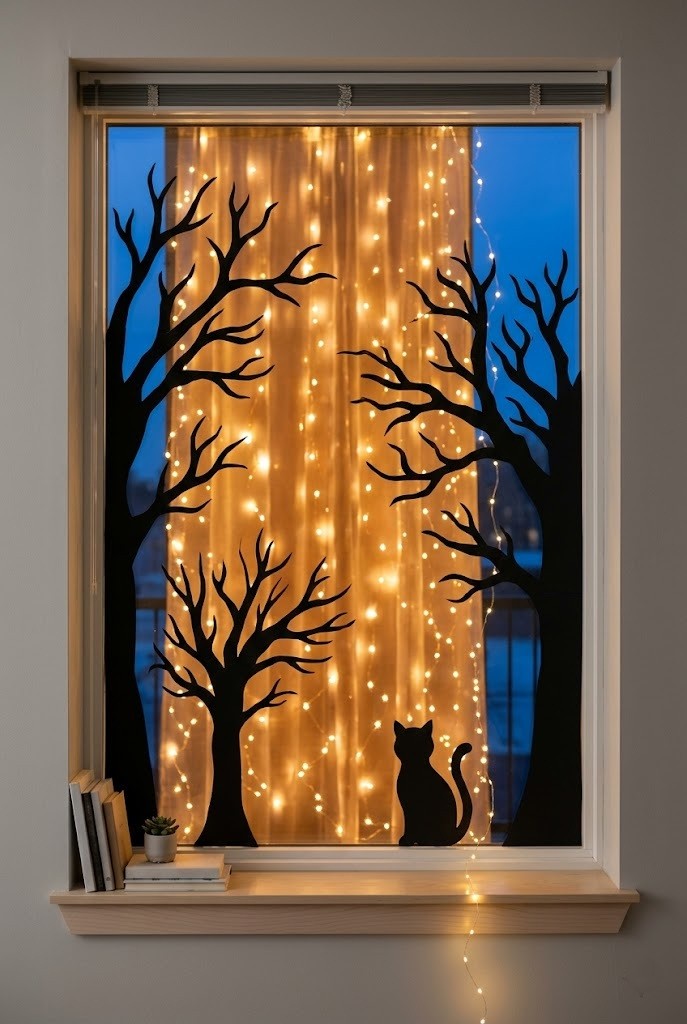
Black cardstock silhouettes backlit by battery string lights turn an entry window into a glowing scene visible from inside and out, taped only to the glass, never the frame. Cut a skyline of bare trees, a cat, or a witch from black cardstock, tape them to the inside of the glass with removable dots, and tack a curtain of warm battery lights behind them. The silhouettes read as pure shadow once the lights glow at dusk. Keep tape on the glass itself, which wipes clean, and off the painted sash. Warm-white lights look eerier here than cool white, which skews toward holiday cheer.
14. Mount Flameless Sconce Lanterns on Adhesive Hooks
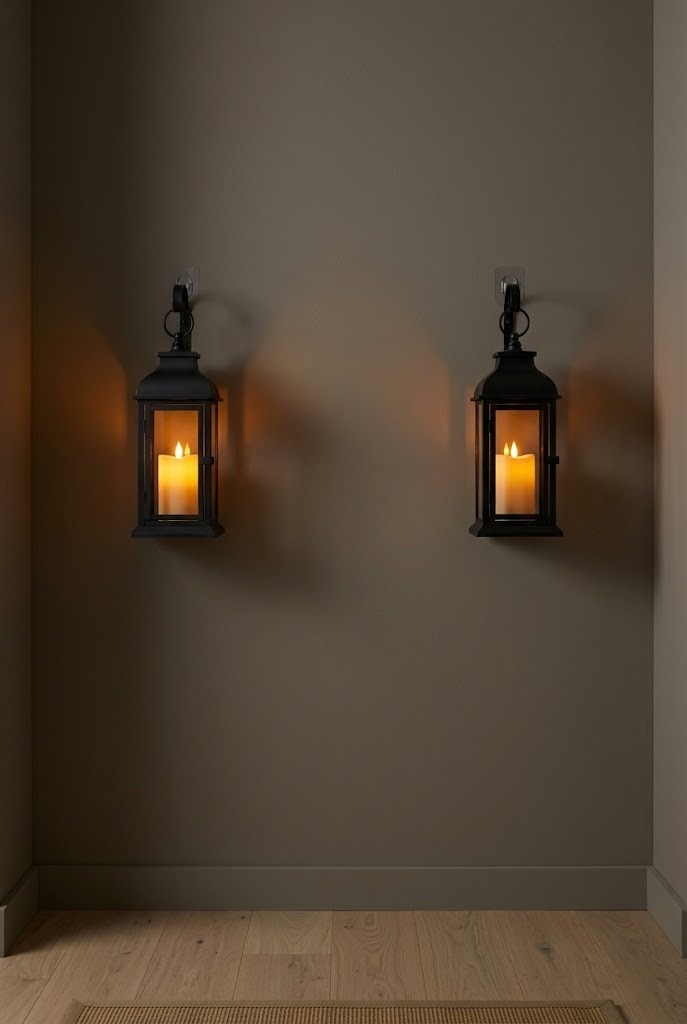
A pair of flameless wall lanterns on damage-free hooks flanks the entry with warm light and reads like real fixtures without any wiring or drilling. Buy lightweight lanterns, well under the hook's weight rating, and hang them symmetrically about a foot above eye level so the glow washes down the wall. Battery pillar candles with a flicker mode sell the flame illusion better than a steady LED. Set both on the same timer so they switch on together at dusk. Because there's no cord and no wall box, you can move the whole pair to the next apartment. Match the lantern finish to your door hardware for a pulled-together look.
15. Style a Narrow Freestanding Console for a Tight Hallway
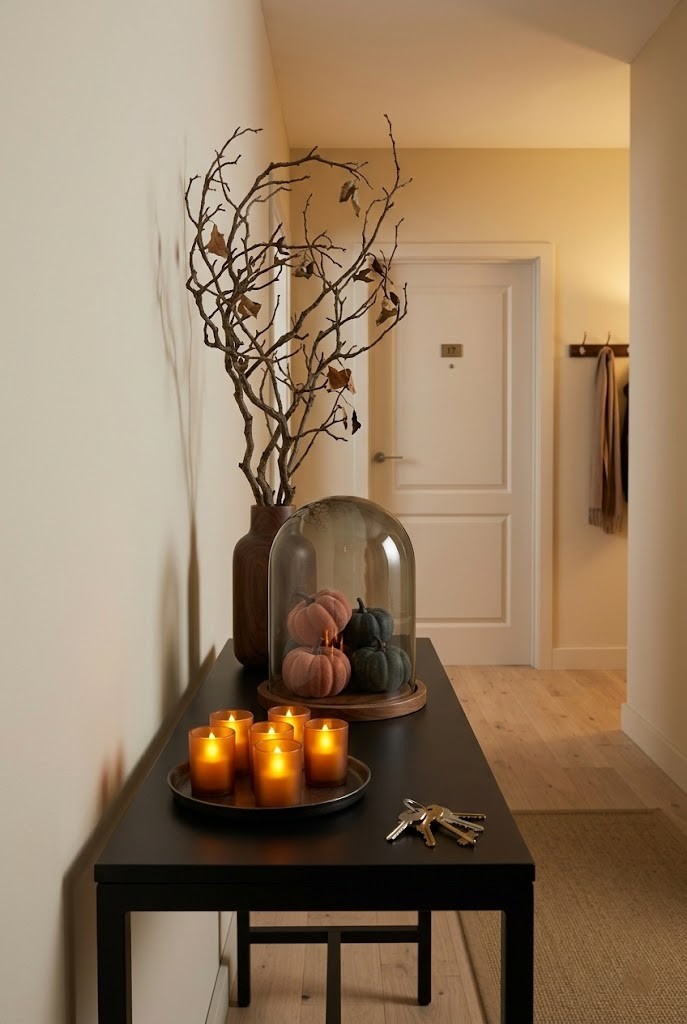
A slim freestanding console, ten to twelve inches deep, gives a hallway a real styling surface without a single screw in the wall, and it moves with you to the next place. Anchor a Halloween vignette on top with the classic tall-medium-short trio: a branch arrangement or lamp at one end, a cluster of pumpkins or a cloche in the middle, and a low tray of battery votives up front. Leave a third of the surface empty so keys and mail still have a landing spot. A console this narrow won't block a hallway that's at least 36 inches wide, which most rental corridors are.
16. Turn a Bar Cart Into a Rolling Halloween Entry Station
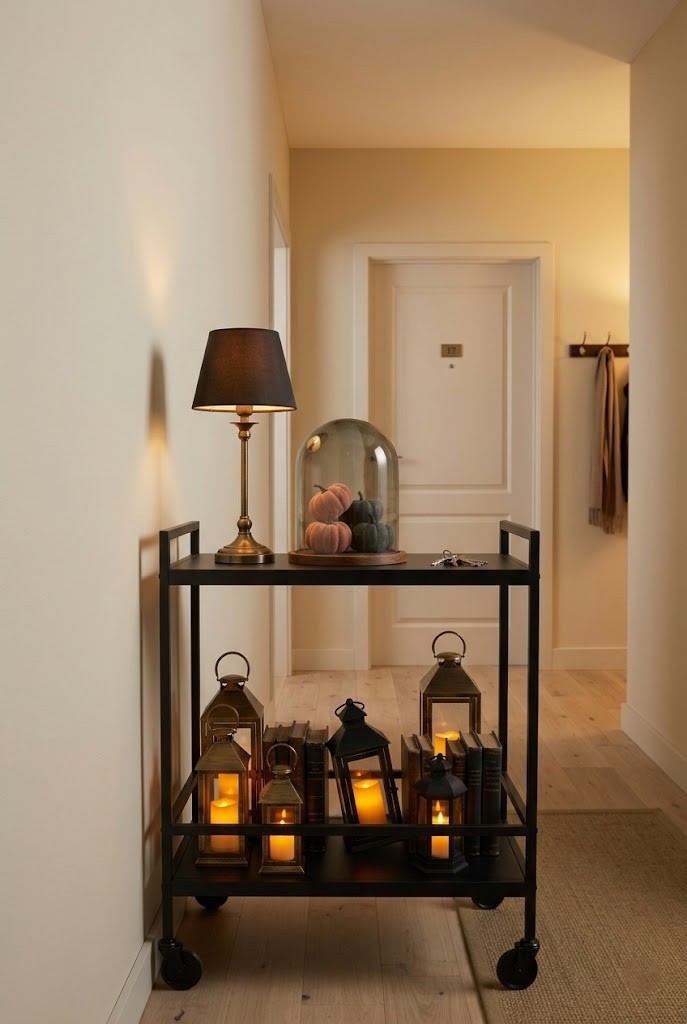
A two-tier bar cart works as a movable entry console and gives you a second shelf most console tables don't have, all with zero wall contact. Style the top like the console in idea 15 with a lamp and a cloche, then use the lower shelf for a row of flameless lanterns, a stack of dark books, or a basket for gloves and keys. The metal frame reads more gothic than a wood console, especially in black or aged brass. Wheels mean you can roll it aside when you're hauling groceries through a narrow entry. Weight the bottom shelf so a top-heavy cart doesn't tip on uneven rental floors.
17. Build a Cloche-and-Candle Vignette on Your One Small Surface
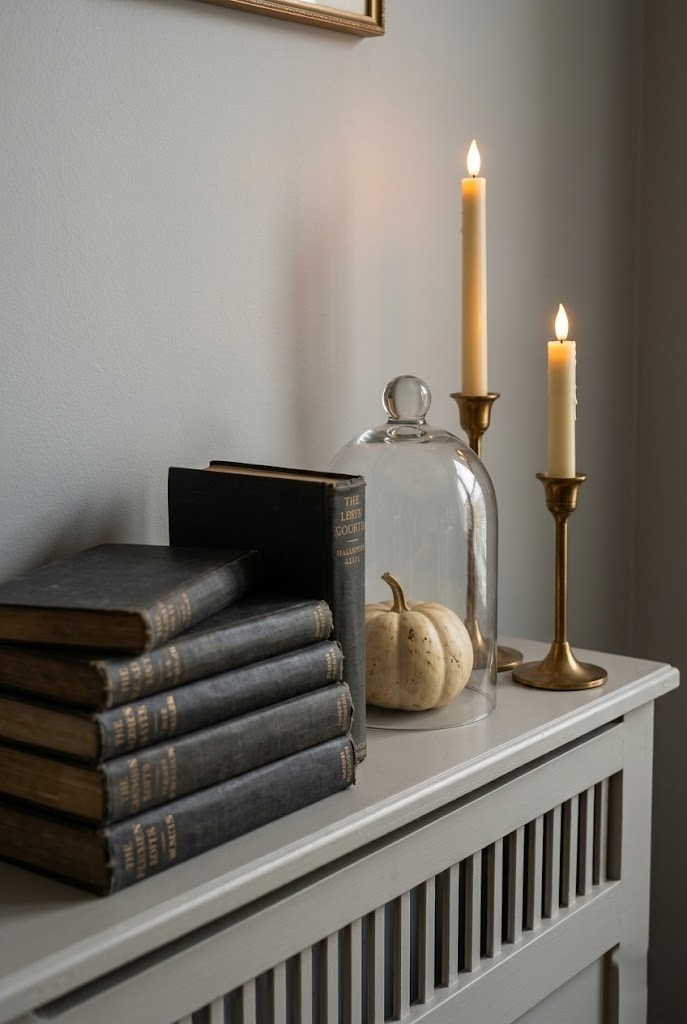
When the only surface is a radiator cover, windowsill, or shoe bench, a single tight vignette does all the work: a stack of dark books, a glass cloche over a small oddity, and two battery LED taper candles. This is the answer for entries with almost no room, the case those checklist posts skip entirely. Battery LED taper candles at staggered heights give the flicker without a fire risk near fabric or a low ceiling. Put something unexpected under the cloche, a black bird, a single pale gourd, an old key. Keep the whole grouping inside a one-foot square so it reads composed instead of scattered.
18. Lean a Ladder Shelf for Freestanding Vertical Display
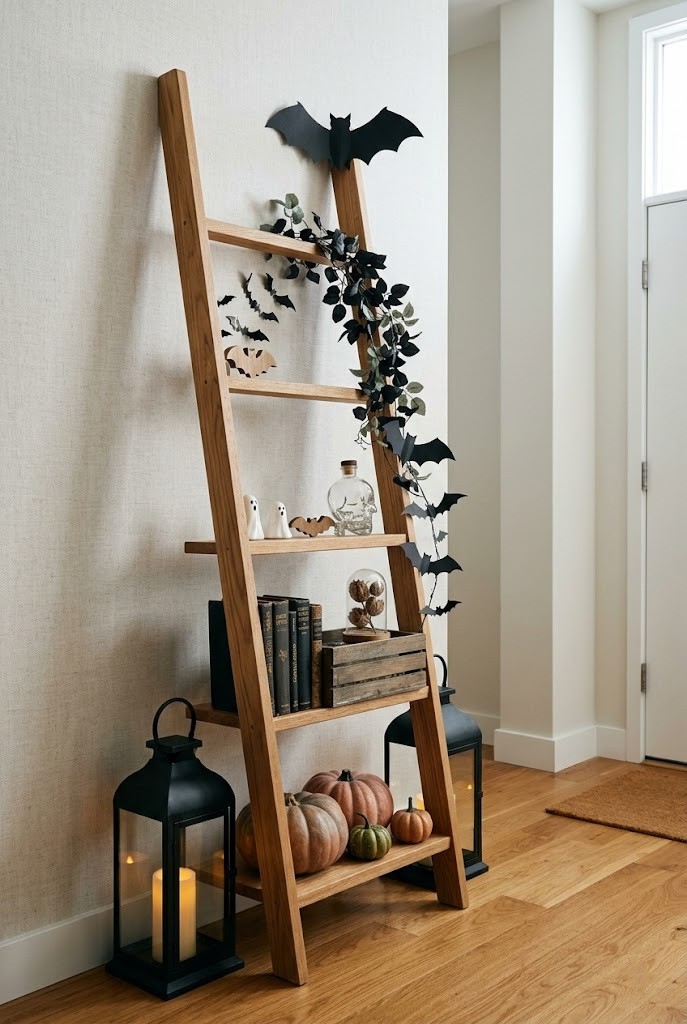
A leaning ladder shelf stands on the floor and rests against the wall with no fasteners, turning vertical space into four or five display tiers in a footprint barely a foot deep. Distribute the Halloween styling so it climbs: heavier objects like a lantern or a pumpkin cluster on the lower rungs, lighter paper bats and a trailing faux vine up top, so the whole thing doesn't look bottom-empty. A ladder shelf leaning at the right angle is stable, but on slick rental floors add a felt pad or a rubber gripper under each foot so it can't slide. Anchor it beside the door where a bulky console wouldn't fit.
19. Corral the Whole Look on a Single Styled Tray
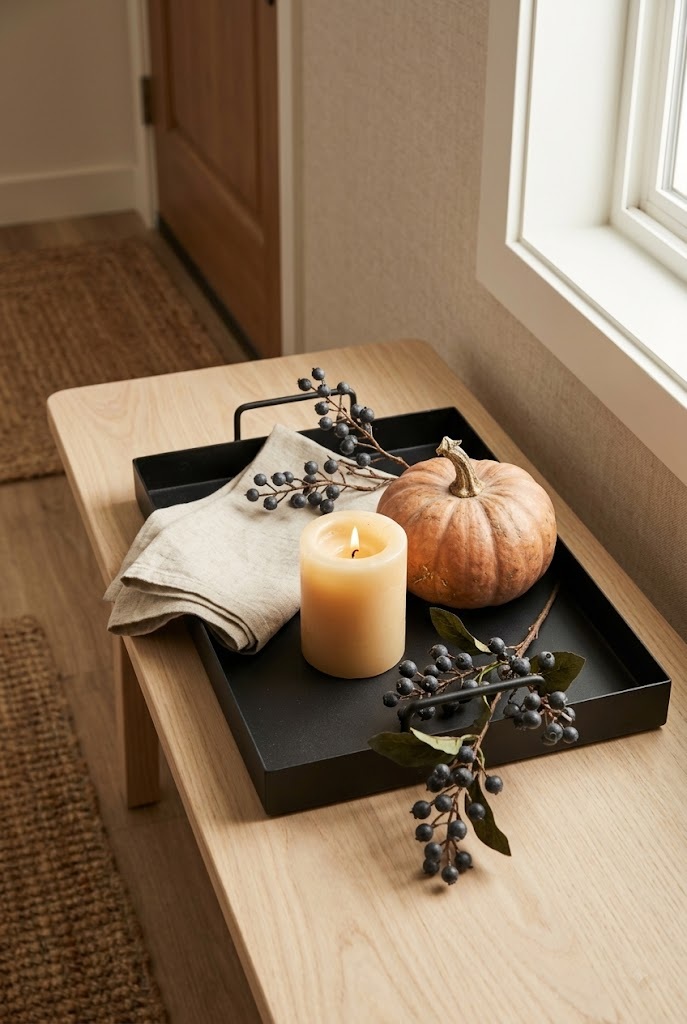
A tray gathers a handful of small Halloween objects into one composed unit that reads as decor rather than clutter, and it lifts off in one motion when you need the surface back. Pick a dark tray roughly 12 by 18 inches, then fill it like the cloche vignette in idea 17 but self-contained: a squat candle, a tiny pumpkin, a sprig of faux black berries, and a folded linen underneath for texture. The tray's edge is what does the work, drawing a frame around the grouping so the eye reads it as one thing. Set it on a bench, a stool, or even the floor by the door.
20. Lean a Full-Length Mirror and Wreathe It in Faux Vine
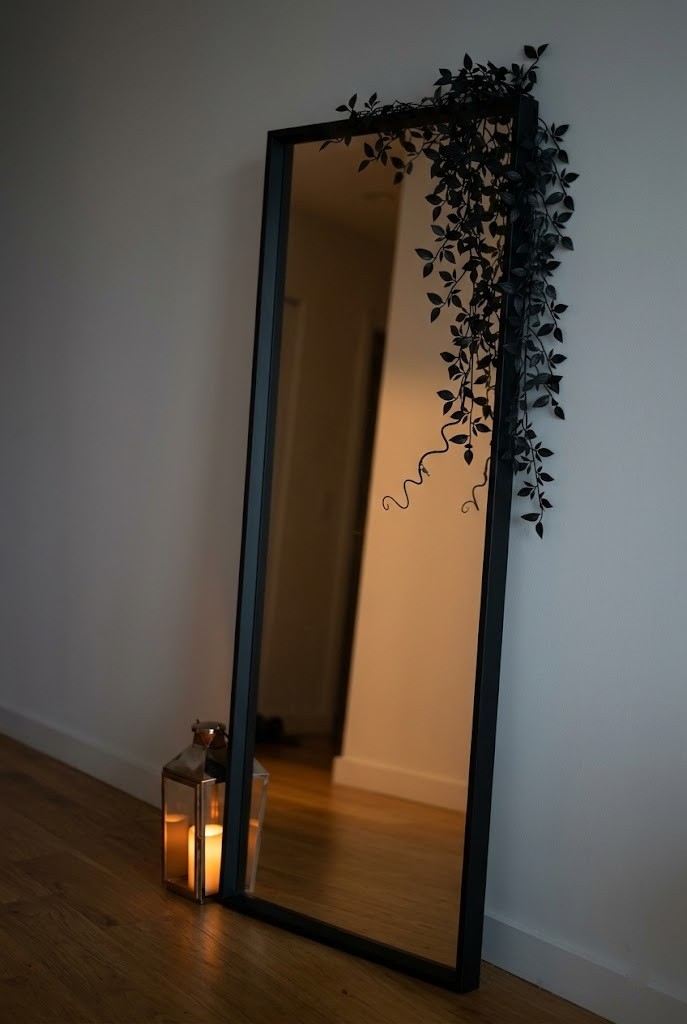
A leaning full-length mirror doubles the light in a dim entry and gives you a large vertical surface to decorate, propped against the wall with no hanging hardware at all. Wind a faux black vine or a thin garland loosely around the top two corners so it drapes down one side of the frame, and set a floor lantern beside the base to bounce warm light back into the glass. The mirror also visually widens a pinched hallway. On slick floors, use a mirror with a wide flat base or add a wall bumper so a leaned mirror can't creep and tip. Keep the vine off the glass so reflections stay clean.
21. Layer a Halloween Doormat Over a Bigger Natural Coir Mat
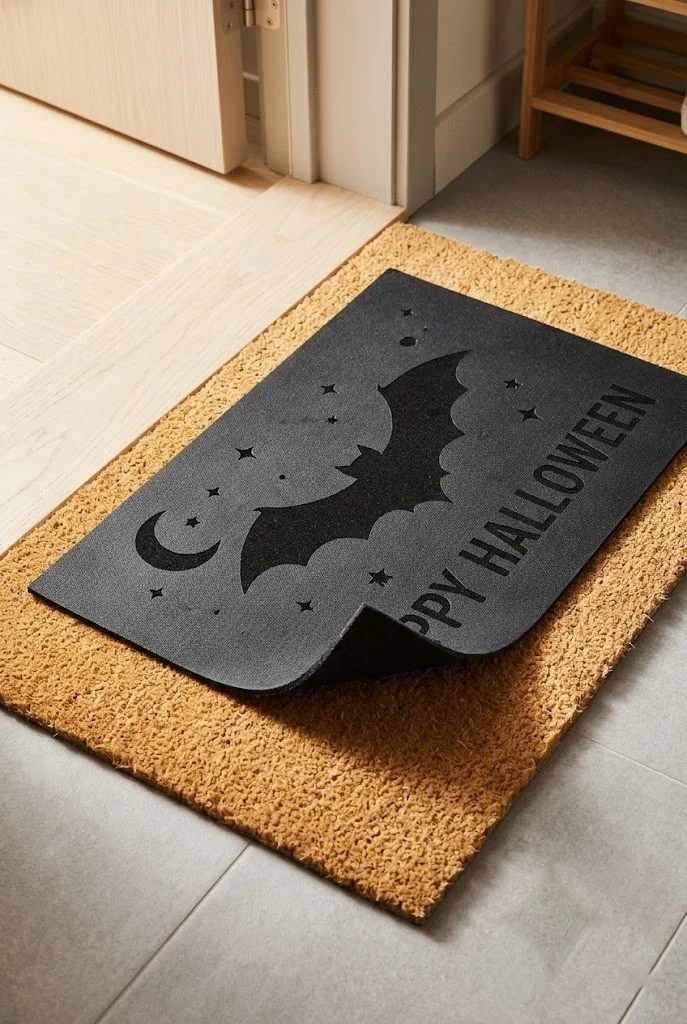
Layering a smaller printed Halloween doormat over a larger plain coir mat instantly makes a bare threshold look styled, and it's the lowest-effort, no-damage move on this list. The size contrast is the whole trick: a standard Halloween doormat centered on an oversized coir or jute mat reads deliberate, while a single mat alone reads like a builder default. Angle the top mat a few degrees off-square for a relaxed, un-staged look. A layered Halloween doormat also scrapes more grit off shoes, which protects the entry floor you're trying not to damage. Rubber-backed mats can trap moisture on some floors, so lift and air them after wet days.
22. Cluster Flameless Lanterns on the Floor at Staggered Heights
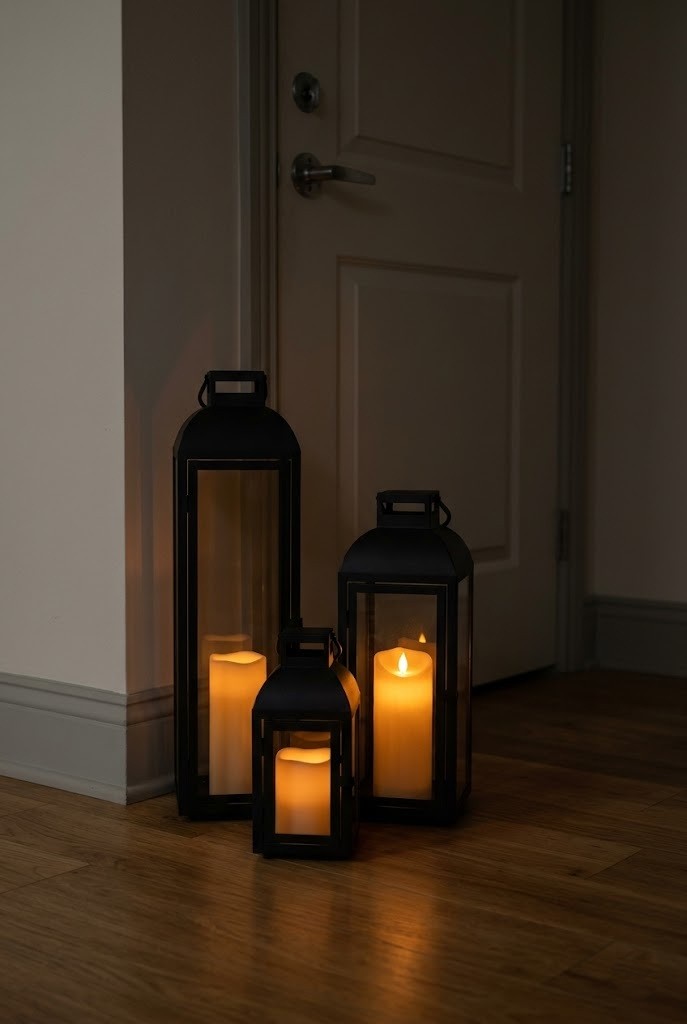
A tight floor cluster of three to five flameless lanterns at different heights pools warm light at the base of the entry and fills awkward empty floor without a console. Vary the heights hard, a tall lantern, a medium, and a couple of squat ones, so the group reads like a composition rather than a row, the same varied-height logic behind the hanging lantern in idea 8. Flameless lanterns are the right buy on the floor specifically, where a real flame near a doormat or a passing coat is a genuine hazard. Set them slightly off to one side of the door so no one kicks them coming in, and put them on a shared timer.
23. Fill a Floor Urn With Faux Black Branches
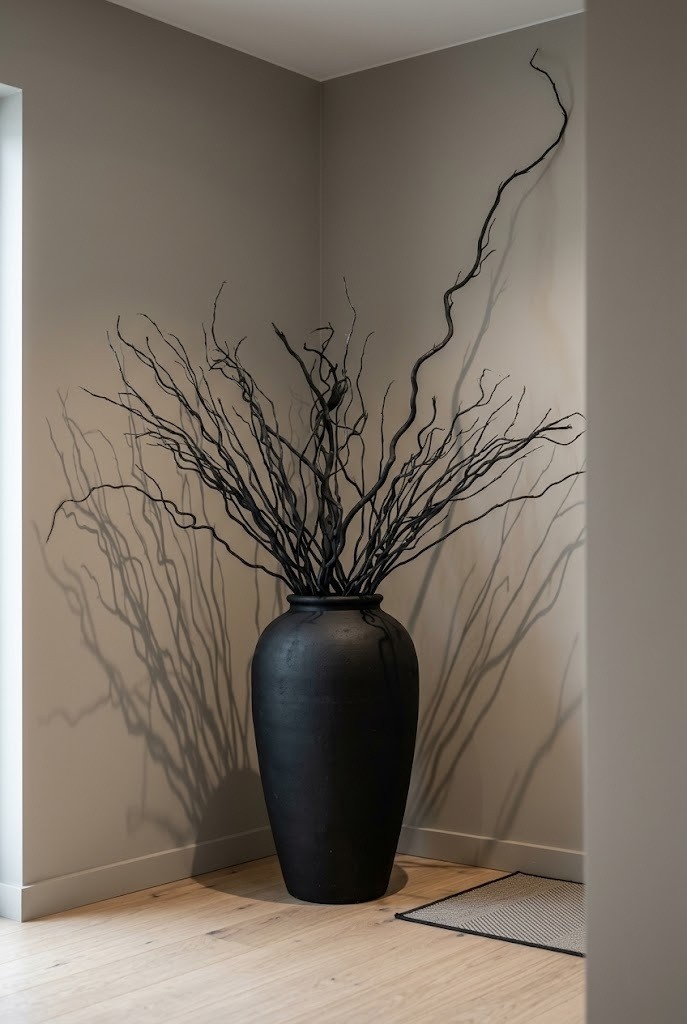
A tall floor urn packed with faux black branches or dead-looking florals gives a bare entry corner instant height and drama, and it needs nothing but floor space. Choose a vessel at least 18 to 24 inches tall so the arrangement clears knee height and actually registers; anything shorter disappears into the baseboard. Fill it with faux black curly willow, dyed branches, or dark faux florals fanned wide and uneven, taller at the back. Weight the base with sand or stones so a top-heavy urn can't tip in a busy entry. Everything stores dry and reusable, and the same urn carries other seasons with a swap of stems.
24. Group a Basket, a Throw, and Pumpkins on the Floor by the Door
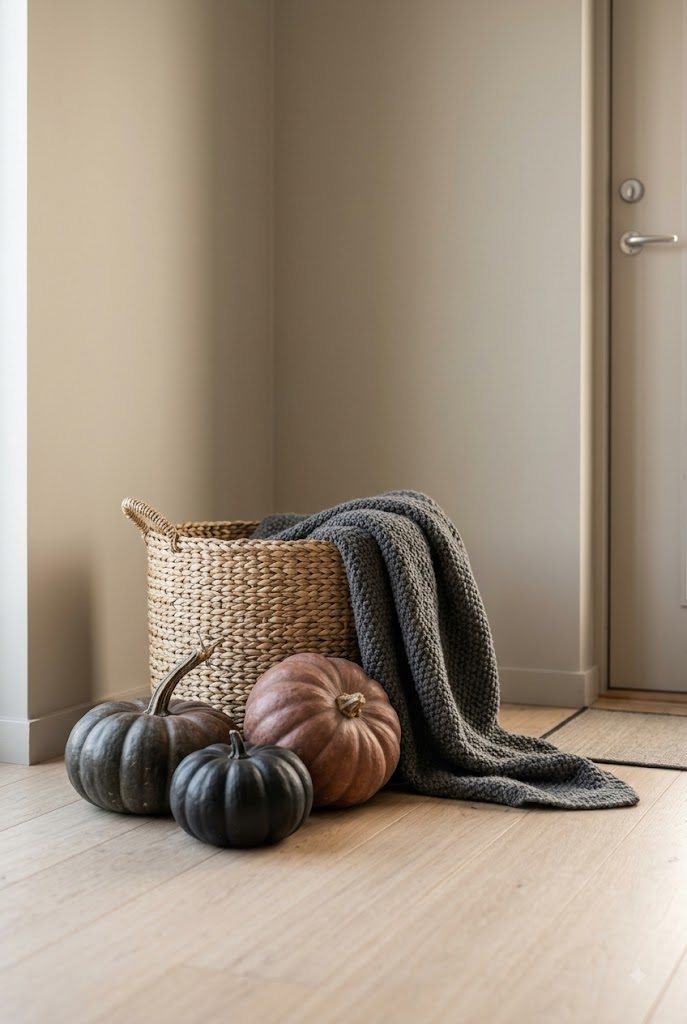
A woven basket holding a dark throw with a few pumpkins clustered beside it warms the floor of an entry and reads cozy-spooky rather than staged, using only floor space and things you likely own. Set the basket slightly off to one side, drape a charcoal or rust throw so it spills over the rim, and group three pumpkins of different sizes on the floor beside it, largest at the back. Odd numbers and varied sizes are what keep it from looking like a store display. The basket also hides shoes or an umbrella, so the styling earns its floor space. Keep the cluster clear of the door swing.
Final Thoughts
Renter Halloween decorating comes down to one rule: put the drama on surfaces you can undo, not on the wall paint. Work from the door face inward, lean on over-door hooks and damage-free strips, and let freestanding pieces carry the rest, and even a small entryway with no closet can look designed rather than dollar-store. Every idea here comes down clean and moves with you to the next place. When the season turns, the same hooks and freestanding pieces carry your fall entryway decor into November. Save this to Pinterest so it's ready when October sneaks up on you.
Frequently Asked Questions
how do i decorate an apartment door for halloween without damaging it?
Hang everything from the door's top edge with an over-the-door hook, or press on removable decals and static clings rated as no-residue. Skip adhesive hooks stuck to the door face and any real tape, since both lift paint when the door slams. Over-door hooks touch only the top rail, which no inspection ever checks.
what can i use instead of nails to hang halloween decor in a rental?
Over-the-door hooks, damage-free adhesive hooks and strips, spring tension rods inside door frames, and static-cling window film cover almost every spot. For weight, over-door hooks handle up to about 15 pounds, while small adhesive strips hold roughly a pound per pair. Test any adhesive on a hidden corner first and pull it off slowly to protect the paint.
how do i do halloween decor if my entry has no console and no floor space?
Treat the door as your surface. A wrapped door, an over-door wreath, a gauze curtain, static clings, or a banner all give a full look with zero furniture. If you have even a windowsill or radiator cover, add one tight cloche-and-candle vignette in a one-foot square. No console is needed for any of it.
are peel-and-stick decals and wallpaper safe for rental walls?
Usually, but only the ones labeled removable or fabric-based, and only over semi-gloss or satin paint. Flat and matte finishes sometimes bond to the adhesive and peel off with the paper or decal. Always test one small strip in a hidden corner for several days and remove it slowly at a low angle before committing to a full panel.