Fall kitchen counter decor ideas for a small kitchen have to survive dinner, so every idea here comes with a footprint in inches and a note on what to move first. My whole kitchen is one 4-foot stretch of laminate shared with a dish rack, which means a decorated counter and a usable counter are the same counter. Most fall kitchen posts are shot in rooms with an island and six feet of open shelving. This one is organized by zone (coffee corner, sink ledge, stove strip, windowsill, fridge top, cabinet fronts, one open shelf) and it deals with the toaster and the air fryer instead of pretending they aren't there. Save it to Pinterest before you start moving things.
1. A Mug Tree on a Wooden Riser Beside the Coffee Maker
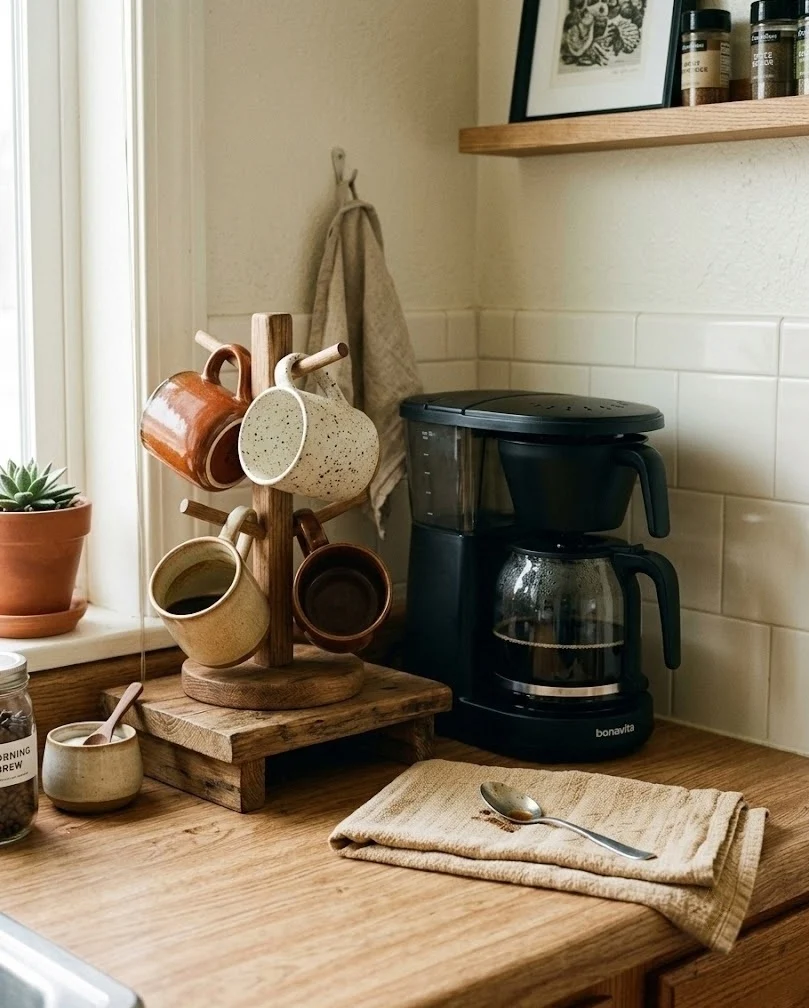
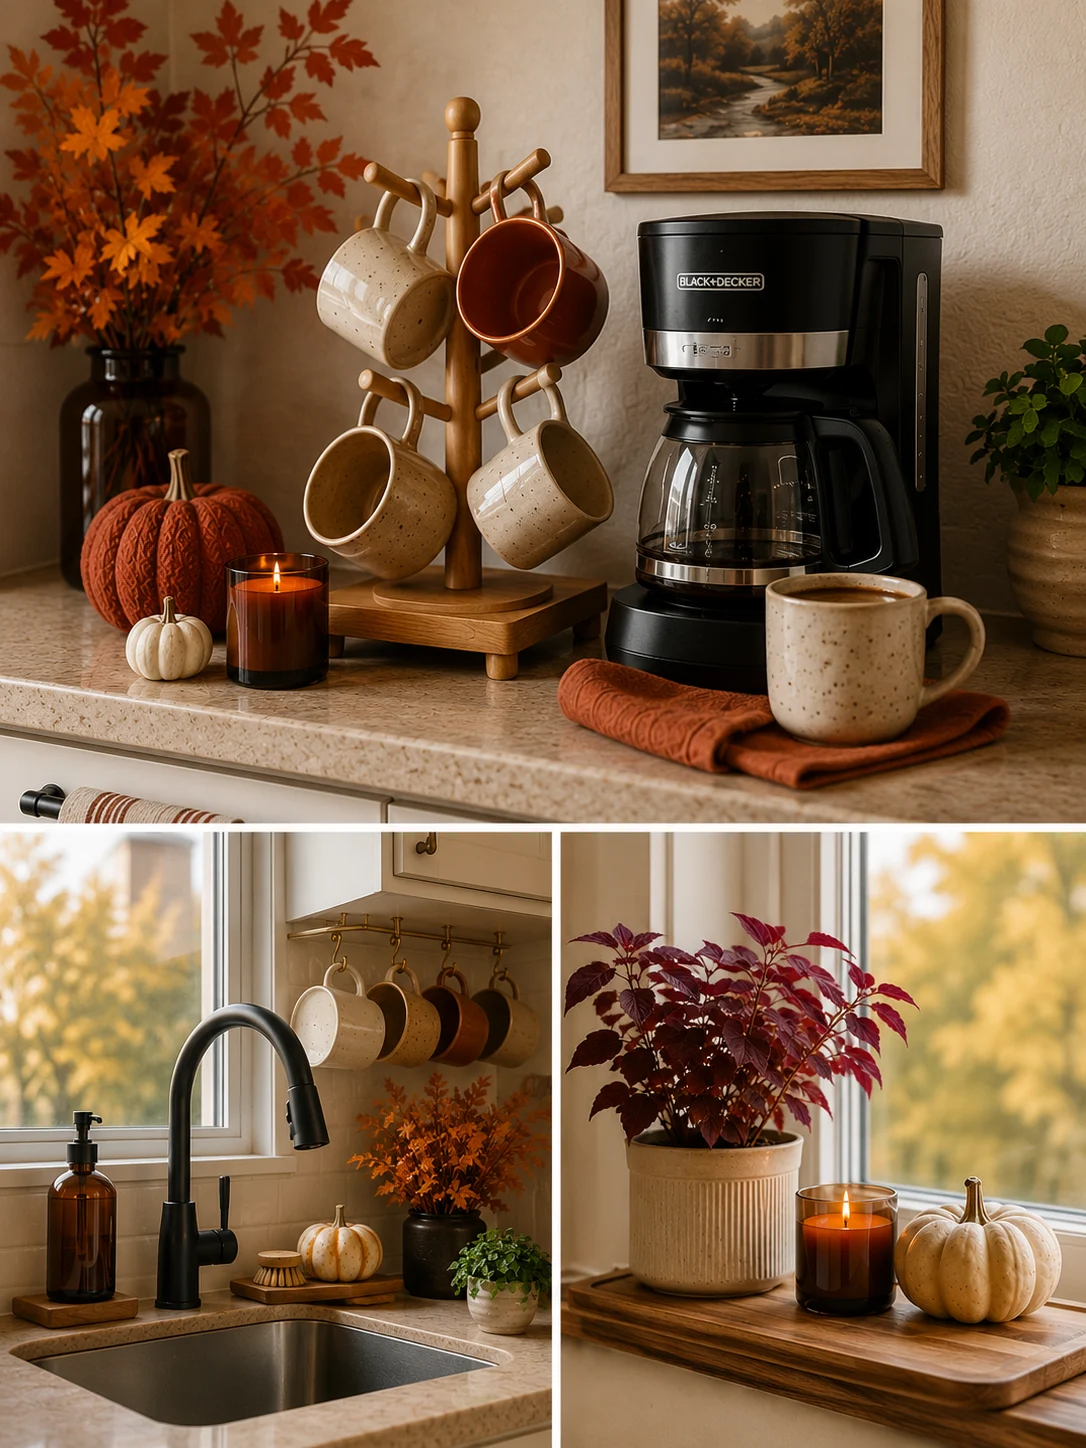
Stacking mugs vertically on a mug tree turns a 30-inch sprawl of coffee gear into a 7-inch square, which is the whole trick in a small kitchen. Four mugs sitting loose on the counter eat roughly a foot of linear space; the same four on a tree take about the footprint of a cereal bowl. Set the tree on a small wooden riser, around 4 by 8 inches, so the coffee corner reads as one intentional block instead of scattered objects. The riser also lifts the mug handles above the coffee maker's steam vent, which matters more than it sounds. Swap your everyday white mugs for two rust and two cream ones and the corner is fall without a single pumpkin.
2. Under-Cabinet Mug Hooks That Empty the Coffee Corner Entirely
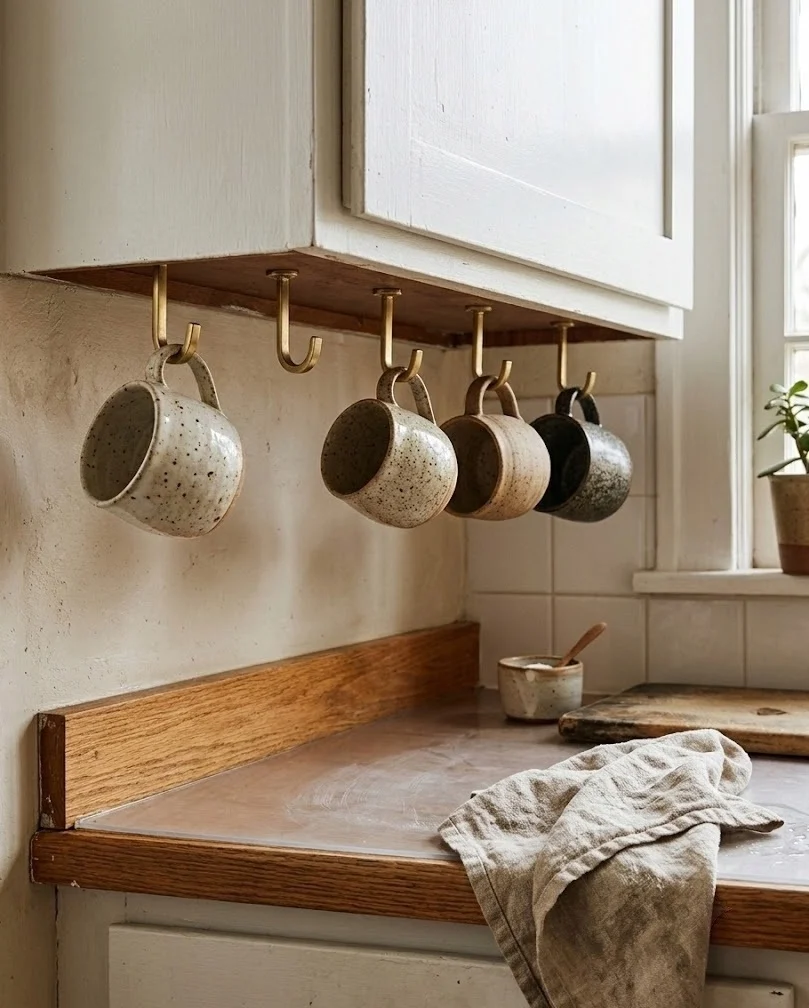
Screw-in or adhesive mug hooks under the upper cabinet move the entire mug collection off the counter and into dead air, which is the cheapest square footage in any kitchen. Space the hooks 4 inches apart so handles don't clink, and keep them at least 3 inches back from the cabinet's front edge or you will knock a mug with your forehead. Renters, take note: adhesive hooks rated for 3 pounds hold a standard 12-ounce ceramic mug fine, but they fail on textured or freshly painted cabinet bottoms, so test one with a full mug of water first. Hang six mugs in rust, cream and speckled brown and the row itself becomes the fall decor. The counter underneath stays completely clear for prep.
3. A Two-Tier Tray That Stacks the Whole Coffee Station Upward
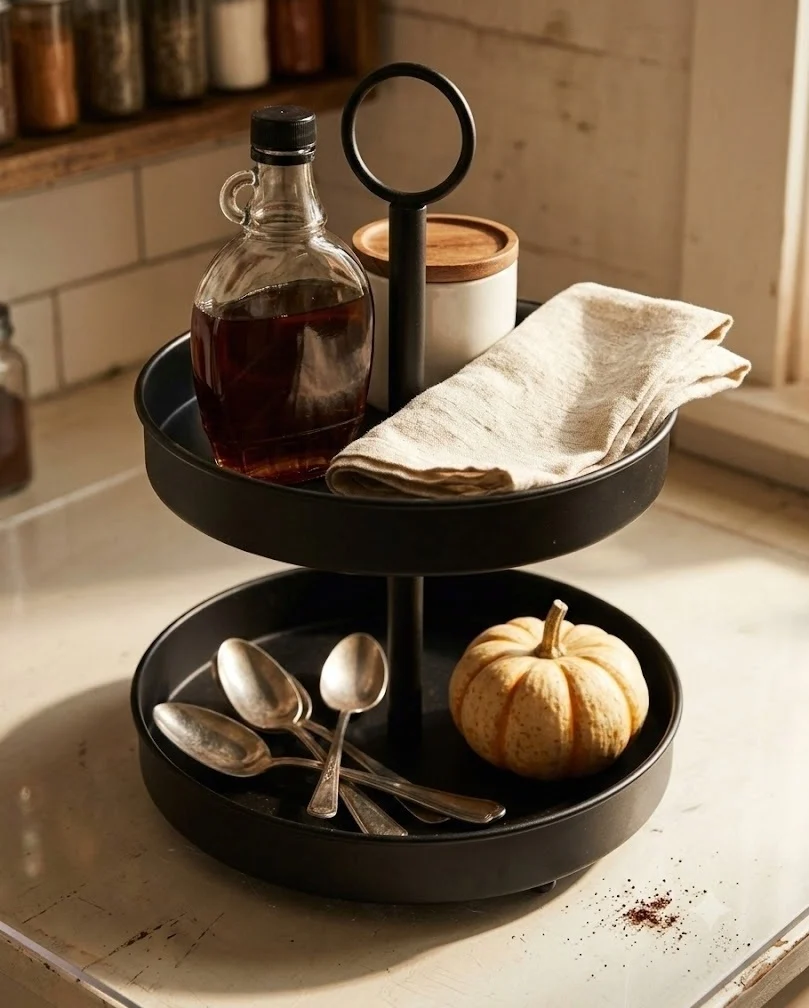
A two-tier tray holds sugar, syrup, spoons and a small gourd in the footprint of a single dinner plate, roughly 10 to 12 inches across. Bottom tier takes the tall and heavy items like the syrup bottle and sugar jar; top tier takes the small and seasonal, meaning a mini pumpkin, a folded rust napkin, a votive you actually light. Buy the 10-inch version rather than the 14-inch one that photographs better, because that extra 4 inches is exactly the space you need to set a cutting board down. Keep the tray to five objects total. Six is where it stops looking styled and starts looking like a shelf you gave up on.
4. An Amber Soap Bottle and Brush Crock on the Sink Ledge
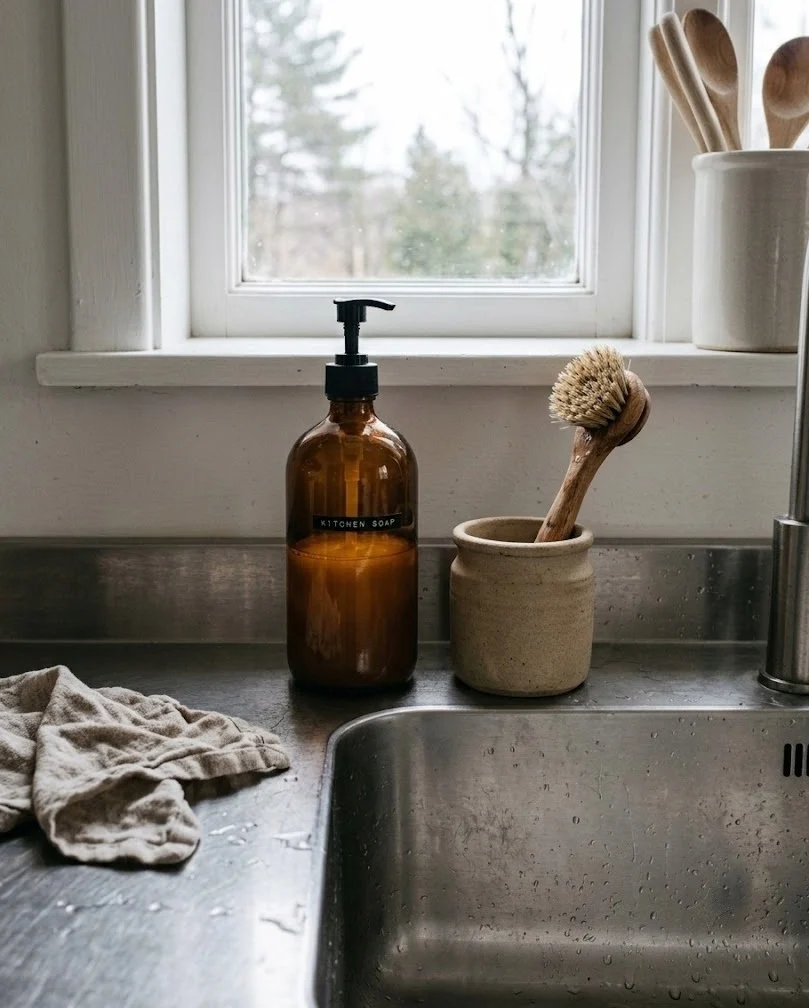
Decanting dish soap into an amber glass pump bottle is the highest-return fall swap in a small kitchen, because the sink ledge is space you already surrendered and the soap has to live there anyway. Amber glass reads as autumn against stainless steel in a way a plastic bottle never will, and an 8 or 12 ounce bottle matches the ledge depth on most standard sinks, which runs about 3 inches. Pair it with a short stoneware crock holding one wooden brush and one scrubber. Two objects, both working. Skip the third item, because the ledge is narrow and anything extra will end up knocked into the sink within a week.
5. A 6-Inch Round Tray Corralling Everything at the Sink Corner
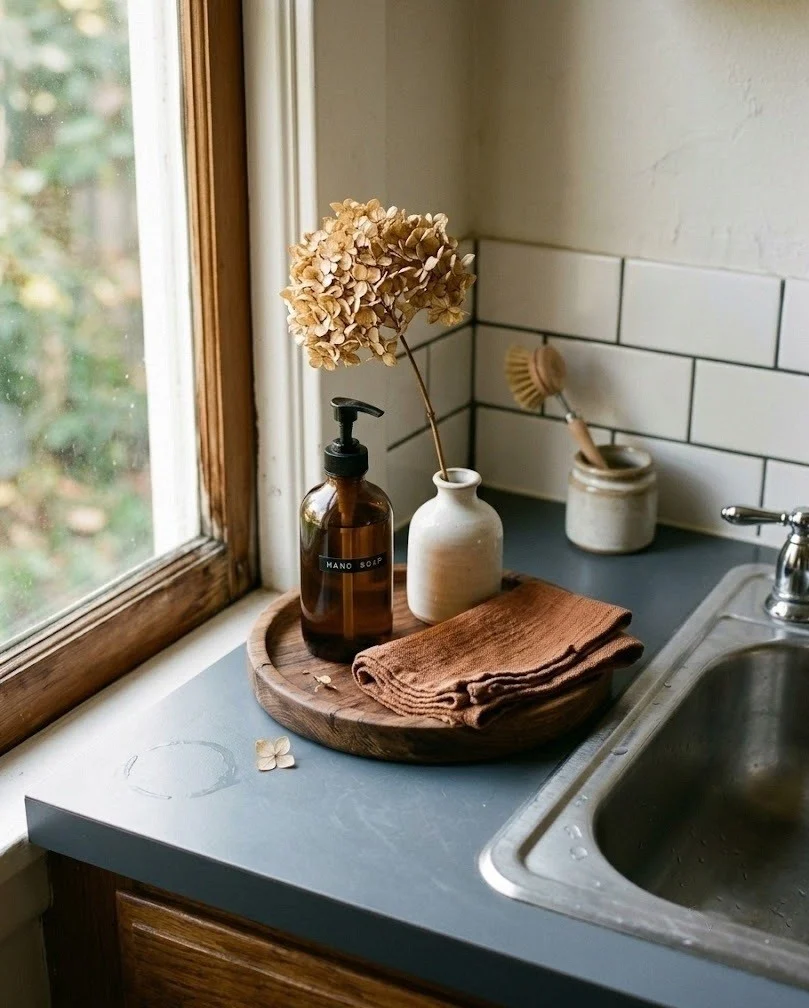
Everything that lives permanently at the sink corner goes on one small round tray, about 6 inches across, and the pile instantly reads as a deliberate group instead of clutter. Same logic as the two-tier tray in idea 3, scaled down for a spot where you cannot afford height near the faucet. A wooden or ribbed ceramic tray in a warm tone does the fall work by itself. On it: soap, one dried hydrangea head in a bud vase, a folded rust cloth. That is the limit. The real payoff shows up when you wipe the counter — you lift one tray instead of moving five objects, which means you will actually do it.
6. A Wall-Mount Rail Behind the Stove Holding Utensils and Herb Bundles
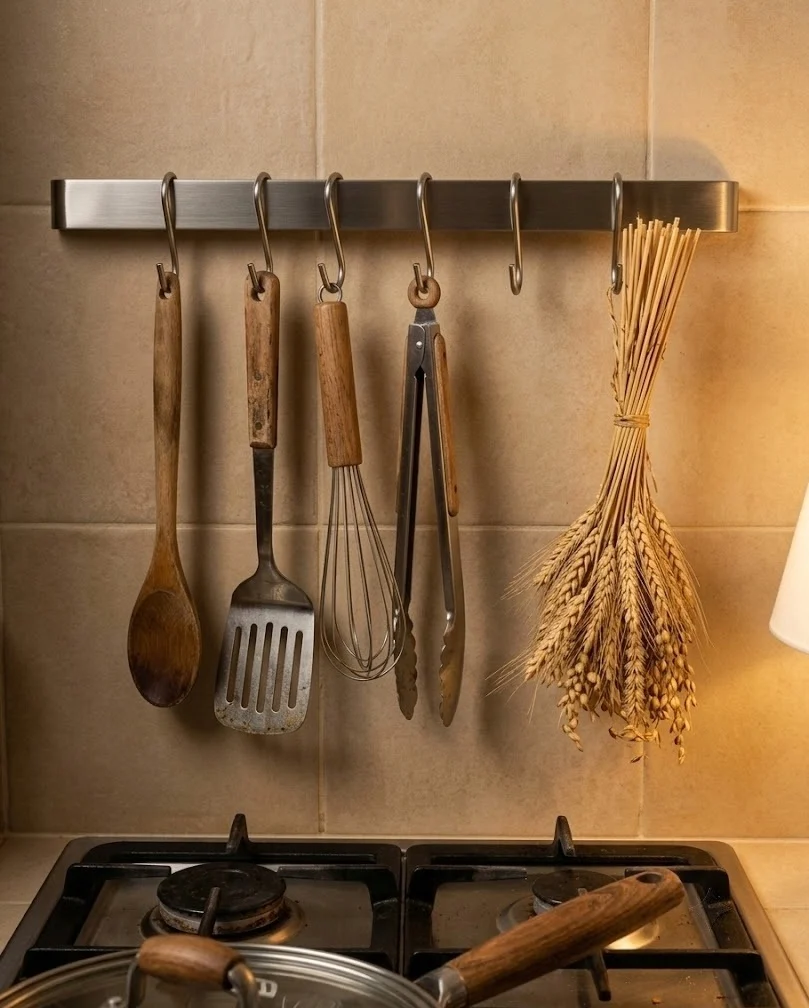
A wall-mount rail with S-hooks takes the utensil crock off the counter and hands back a solid 6-inch circle of prep space right where you need it most. Mount it 18 to 20 inches above the cooktop, which clears splatter and still lets you grab a spoon mid-stir. Hang the tools you use daily on the left, then one small bundle of dried herbs or wheat at the far right as the seasonal note. Do not hang anything dried directly over a burner. Renters can use a tension-mounted or adhesive rail rated for 5 pounds, though a hanging cast iron pan needs a drilled anchor. The strip behind a stove is usually the only free vertical wall a small kitchen has.
7. Two Amber Spice Jars on the Narrow Ledge Behind the Burners
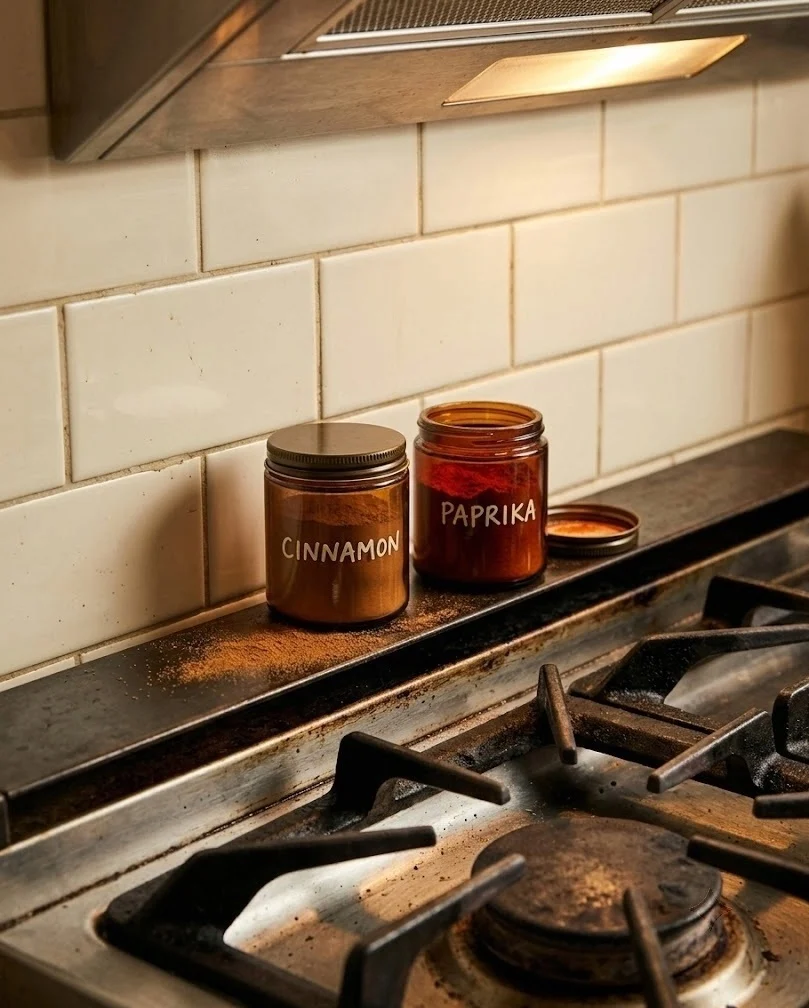
Two amber glass jars holding the spices you reach for constantly (cinnamon and smoked paprika, in my case) turn a functional strip into the warmest 4 inches of the kitchen. The ledge behind the back burners is usually 2 to 4 inches deep and otherwise does nothing but collect grease. Jars there stay within arm's reach while you cook and read as intentional from across the room. Label them on the bottom rather than the front so the glass stays clean-looking. Two jars, not six: a full spice lineup on that ledge becomes a wall of clutter and you will stop wiping behind it. Amber glass also blocks light, which genuinely keeps ground spices from fading.
8. The Cast Iron Skillet Left Out on a Wooden Trivet
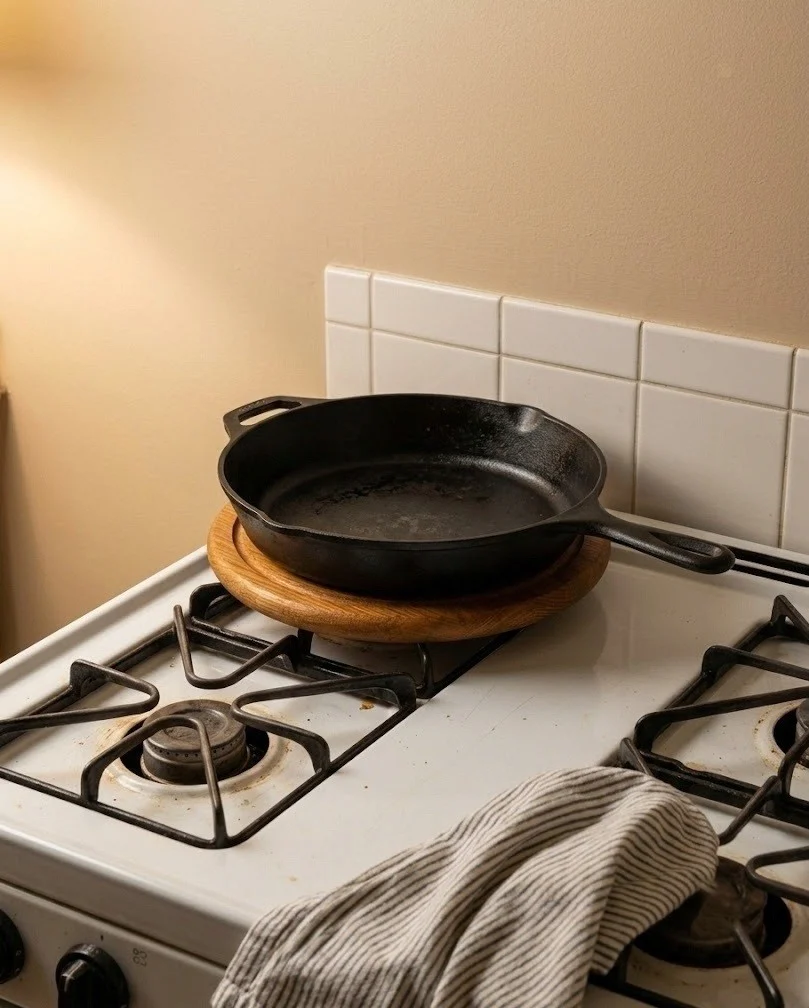
Leaving the cast iron skillet on a wooden trivet on the back burner is decor that costs zero counter inches, because the stove is not counter space and you were never prepping there anyway. Black iron against a wood round is the most autumn thing in most kitchens, and it happens to be the pan you use four nights a week. A 6-inch trivet under a 10-inch skillet looks right; a trivet the same diameter as the pan looks like packaging. With the rail from idea 6 already carrying your utensils, the skillet gives that wall its visual weight at the bottom. Keep a thin film of oil on the pan so it reads matte black instead of dusty grey.
9. The One-Appliance Rule for the Corner That Owns Your Counter
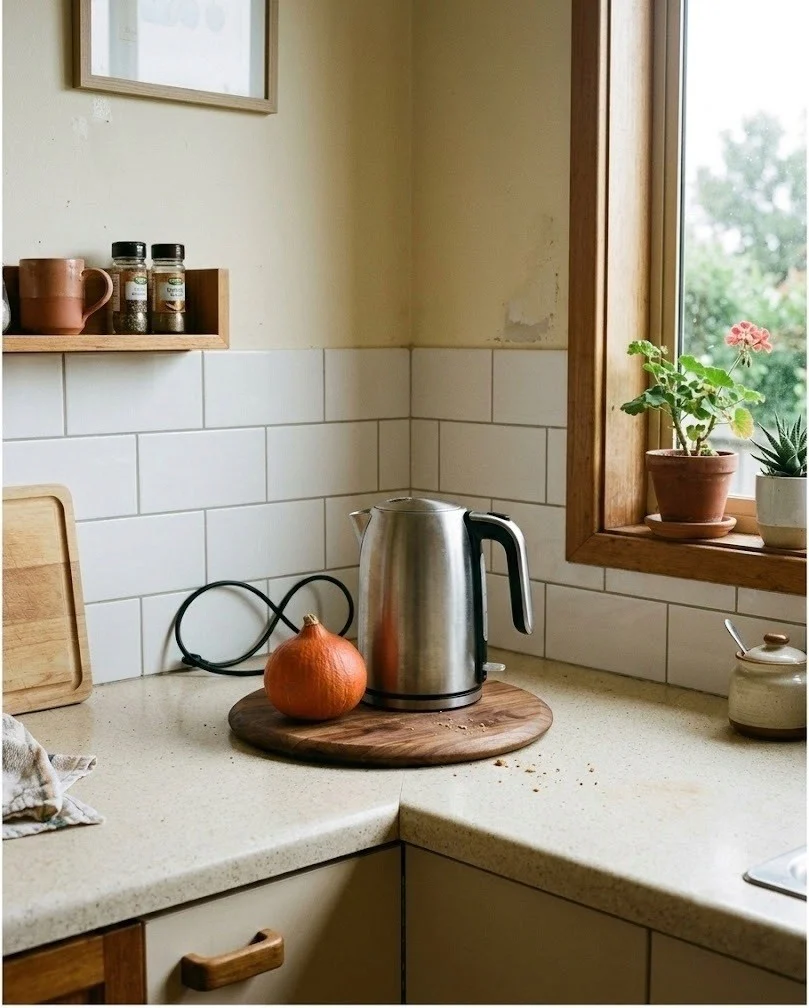
Pick the single appliance you use daily and let it stay out, then cabinet everything else, because in a 4-foot kitchen the toaster, air fryer and blender together take roughly 30 of your 48 inches. That removal step is the part no fall decor post mentions, and it has to come first. Mine is the kettle, so the air fryer lives under the sink and comes out twice a week. Once the corner holds one appliance, set it on a wooden riser or a small board so it looks placed rather than parked, and add one short object beside it: a squat candle, a small gourd, a stoneware jar. Ten minutes, and the appliance graveyard becomes a zone.
10. A Rust Linen Cover Over the Toaster You Can't Put Away
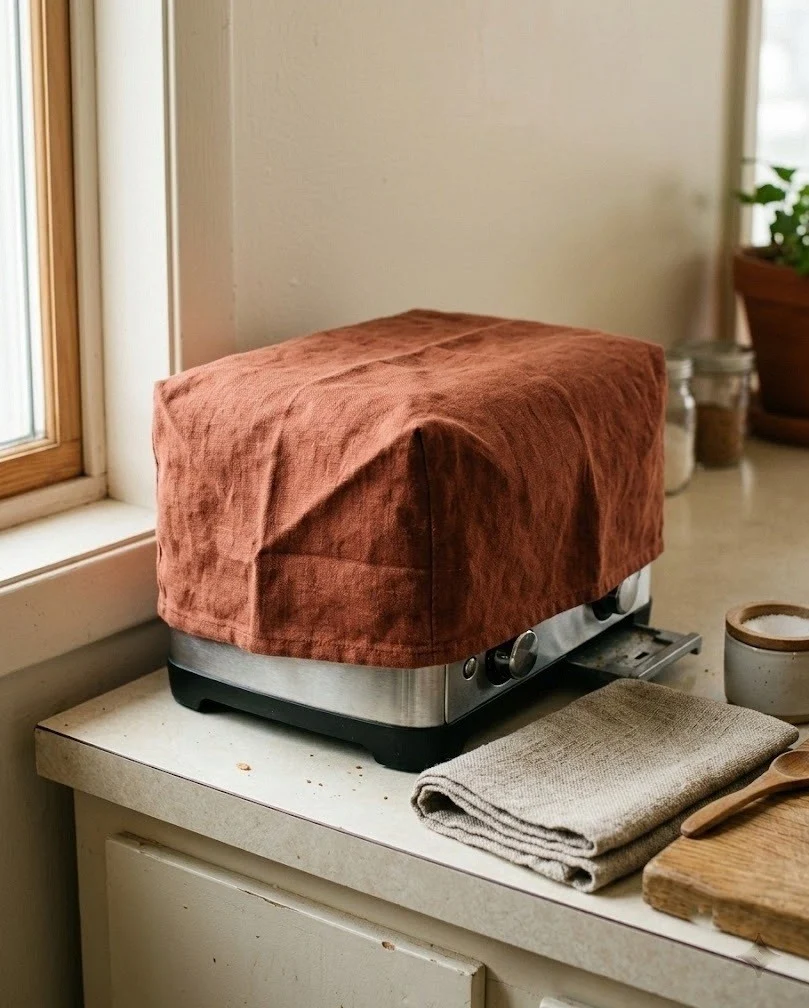
A fitted linen or cotton cover in rust turns the appliance you cannot cabinet into a soft-textured block instead of a chrome one, which is the cheapest way to make a working counter look seasonal. Standard two-slice toasters run roughly 11 by 7 by 8 inches, so a cover sized 12 by 8 by 9 drapes properly rather than clinging. Natural fibers only, and never put the cover on until the toaster has fully cooled, which takes about 15 minutes. The same trick works on a stand mixer or a coffee maker. Two covers in the same fabric across a small kitchen create a rhythm that reads as decorating; three starts to look like a fabric store.
11. Three Mini Pumpkins in Graduated Sizes on the Windowsill
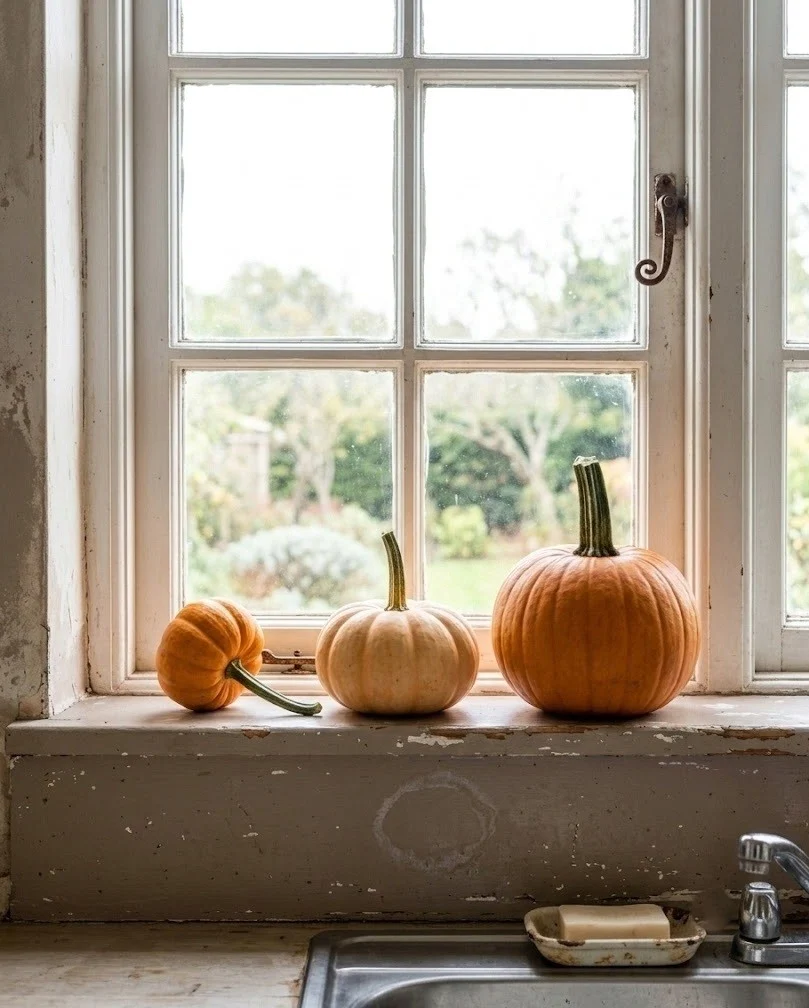
Three mini pumpkins spaced along the windowsill deliver the entire fall message without touching a single inch of counter, which makes the sill the highest-value real estate in a small kitchen. Most kitchen sills run 3 to 5 inches deep, so stay under a 4-inch diameter or the pumpkins get knocked into the sink. Odd numbers and graduated sizes read as arranged; three identical ones read as inventory. Push them toward the back edge against the glass so the front of the sill stays free for a wet sponge. Real pumpkins on a sunny sill sweat and mold in about three weeks, while a sill in indirect light will get you six to eight.
12. Rosemary and Sage in Terracotta Pots on the Sill
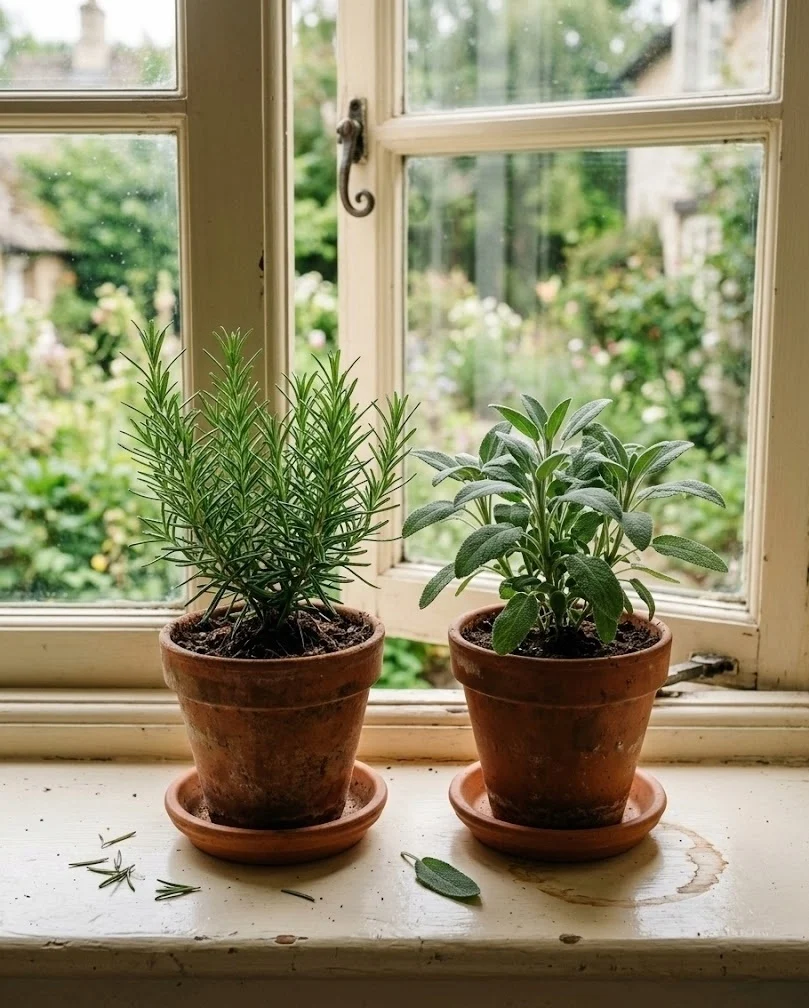
Two small terracotta pots of rosemary and sage on the windowsill are fall decor you actually cook with, which is the only kind that survives a kitchen where every object has to earn its space. Terracotta in a 4-inch size fits most sills, and the raw clay color sits perfectly between rust and cream. Rosemary wants the sunniest spot and hates wet feet, so use a pot with a drainage hole and a saucer under it. Sage is far more forgiving. Since the rail in idea 6 already carries dried bundles, keep the living pots on the sill so the two do not compete. Both plants smell like autumn every time you brush past them, which no faux stem manages.
13. A Woven Basket on Top of the Fridge Holding Onions and Garlic
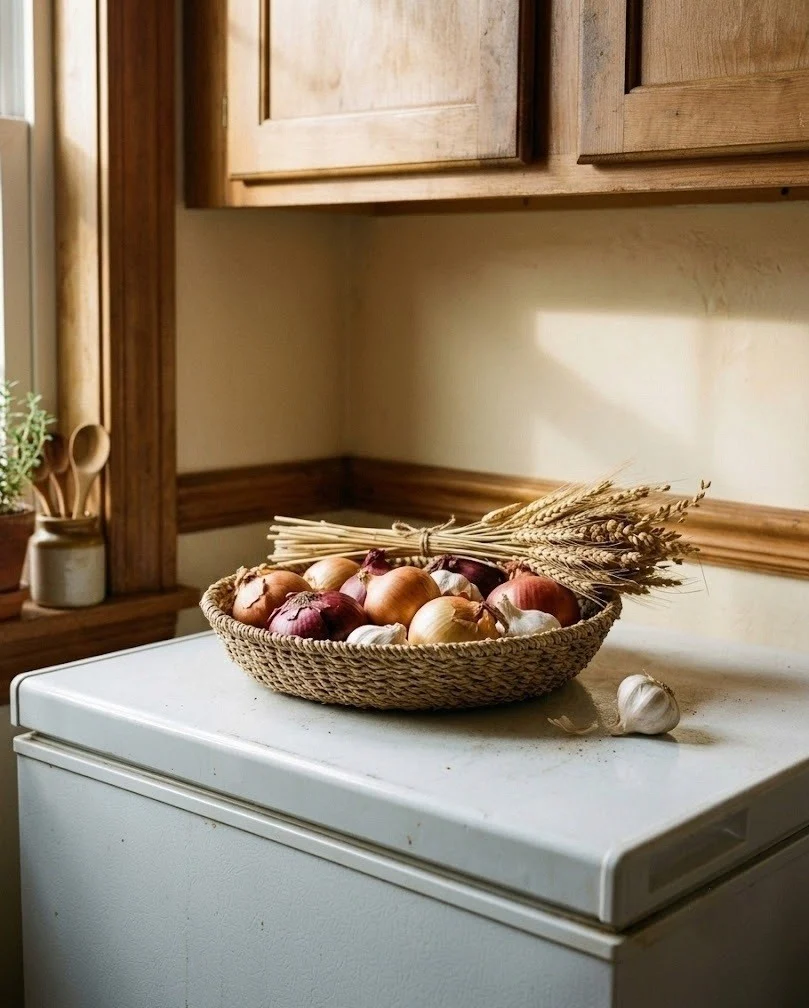
The top of the fridge is roughly 30 inches of flat surface most people leave empty or treat as a junk shelf, and one shallow woven basket up there moves your onions, garlic and shallots off the counter permanently. Keep the basket under 8 inches tall so it stays below the cabinet gap and you can still reach inside. Seagrass or split oak reads far warmer than wire. Tuck one dried wheat bundle along the back edge and the basket turns seasonal without anything precious sitting six feet up where you cannot dust it. Whatever goes there should be something you touch weekly; the fridge top is where forgotten objects go to gather grease.
14. Two Stacked Cookbooks and a Gourd on the Fridge Top
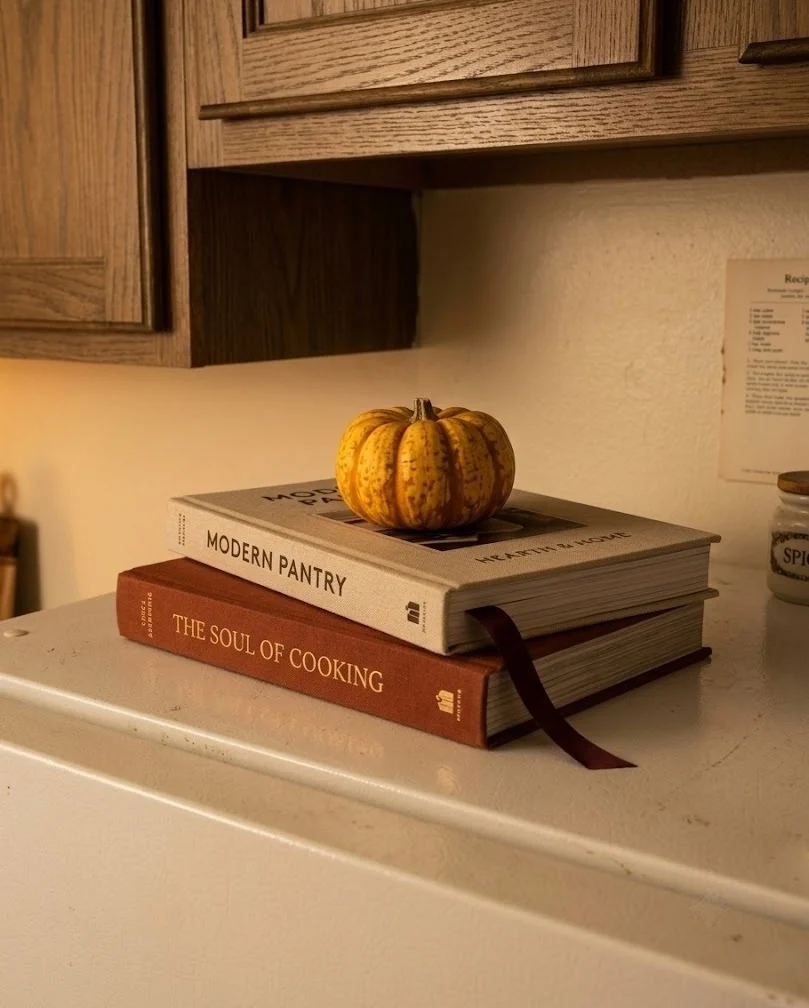
Two hardcover cookbooks stacked flat with a small gourd on top fills the fridge's other half with height, which is what stops a fridge top from looking like a shelf you forgot about. Books lie flat rather than standing, because upright books above eye level tip over every time the door slams. Choose covers in warm tones, cloth or matte rather than glossy, and turn the spines outward so you can actually find them. Same instinct as the one-appliance rule in idea 9: the object earns its place by being useful before it gets to be decorative. Grease is the real enemy up there, so keep paper off the fridge top if it sits within 3 feet of a stove.
15. A 10-Inch Wreath Hung on the Cabinet Door with Ribbon
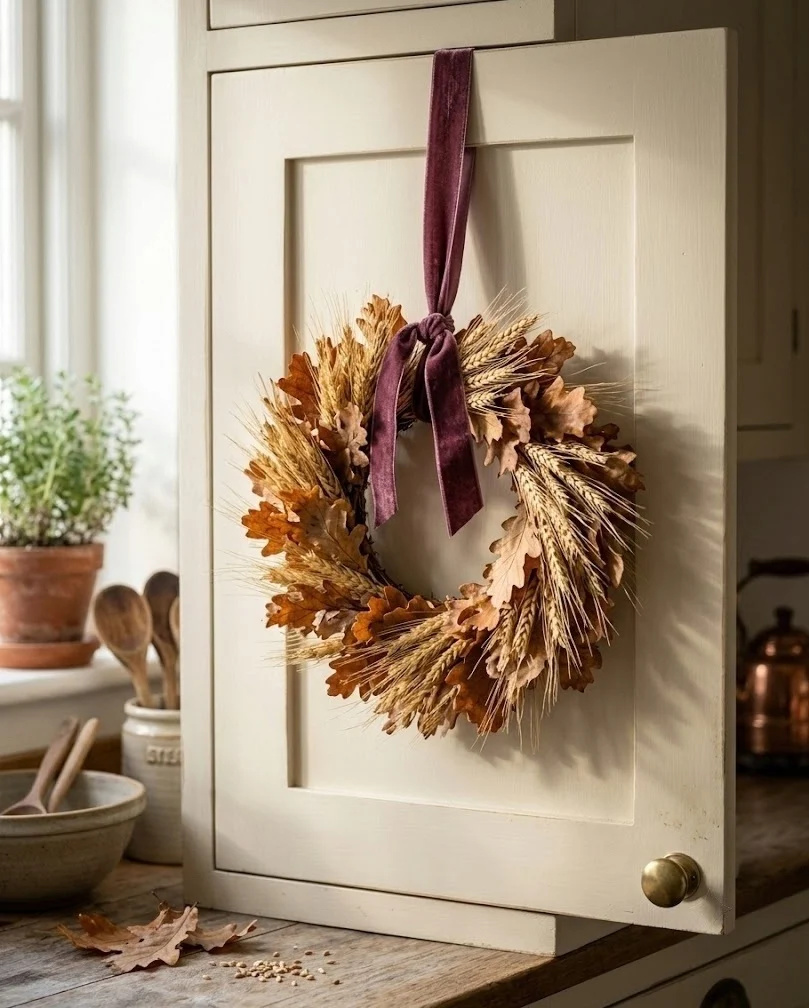
A small wreath hung on a cabinet door puts fall at eye level using a surface that holds nothing and costs nothing in usable space. Ten inches is the ceiling for a standard 12 to 15 inch cabinet door; anything bigger overlaps the frame and catches on the neighboring door every time you open it. Hang it from a length of velvet or grosgrain ribbon draped over the top of the door rather than an adhesive hook, so there is zero residue and you can pull the whole thing down in two seconds. Pick the cabinet you open least. Dried wheat, eucalyptus and preserved oak leaves hold up far better in kitchen humidity than fresh greenery.
16. Adhesive Hooks on the Cabinet Side Panel for Rust Oven Mitts
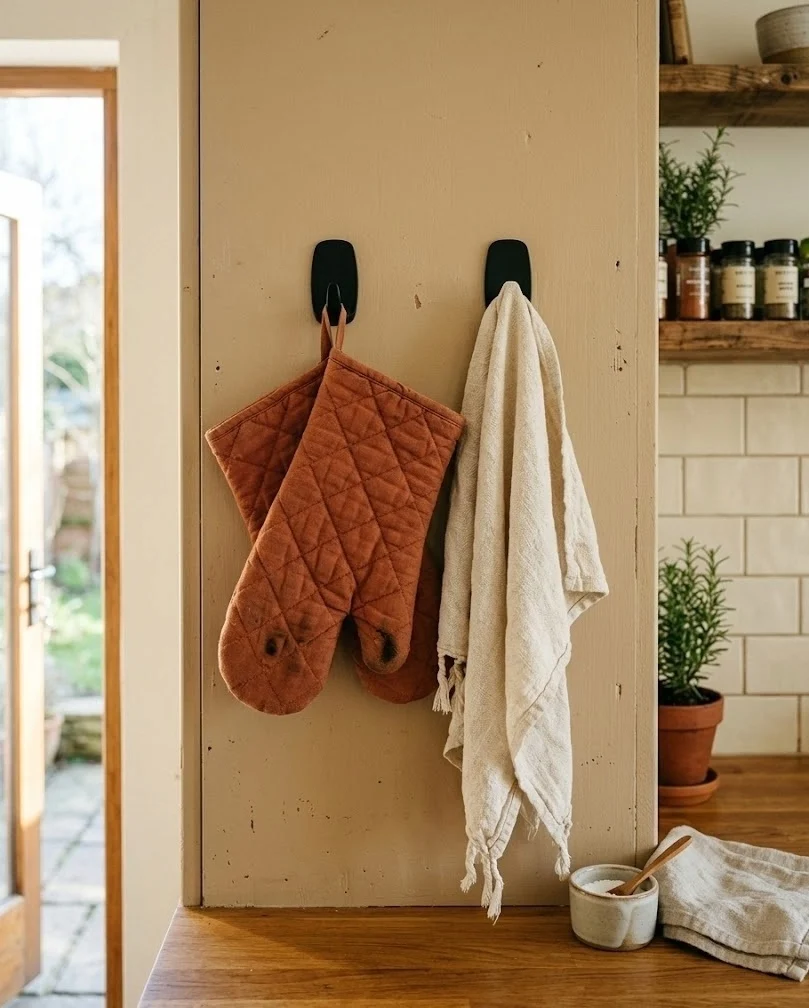
Two adhesive hooks on the exposed side panel of an end cabinet hold your oven mitts and a linen towel in rust and cream, converting a blank vertical panel into storage and color at once. That side panel is the most overlooked surface in a small kitchen and it is usually the first thing you see walking in. Place the hooks about 12 inches apart and roughly at shoulder height so a hanging mitt does not brush the counter. Wipe the panel with a degreaser before you press the adhesive down or it lets go inside a month, which is the single most common failure here. Rotate the textiles by season and the whole kitchen changes color for the price of two towels.
17. One Open Shelf Styled in Cream and Rust Stoneware
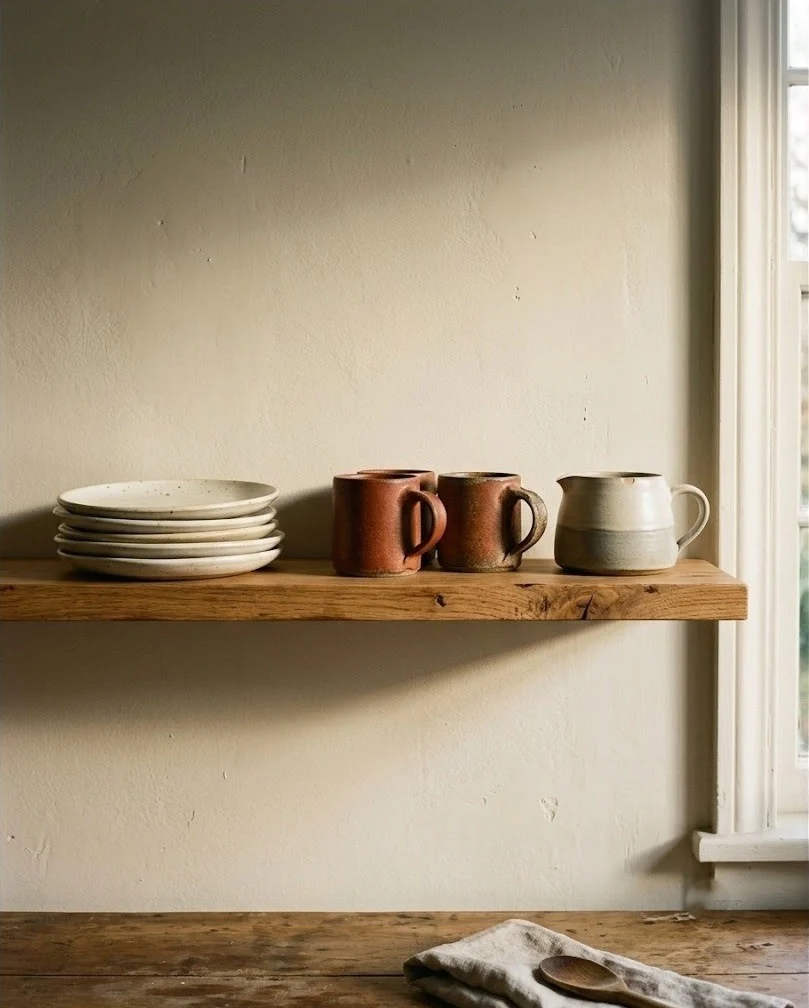
One open shelf styled in three groups with breathing room between them does more seasonal work than a whole counter of objects, because it puts color at eye level and leaves the working surface alone. Work in a left-center-right rhythm: a short stack of plates with a bowl on top, then a cluster of two mugs and a stoneware pitcher, then one leaning board or a framed print. Leave at least 4 inches of empty shelf between groups. With the under-cabinet hooks in idea 2 already holding your mugs, pull the mug cluster off the shelf entirely and let that gap stay open. Cream and rust stoneware together read fall without a single fall object involved.
18. A Leaning Wooden Board and One Candle at the Shelf's End
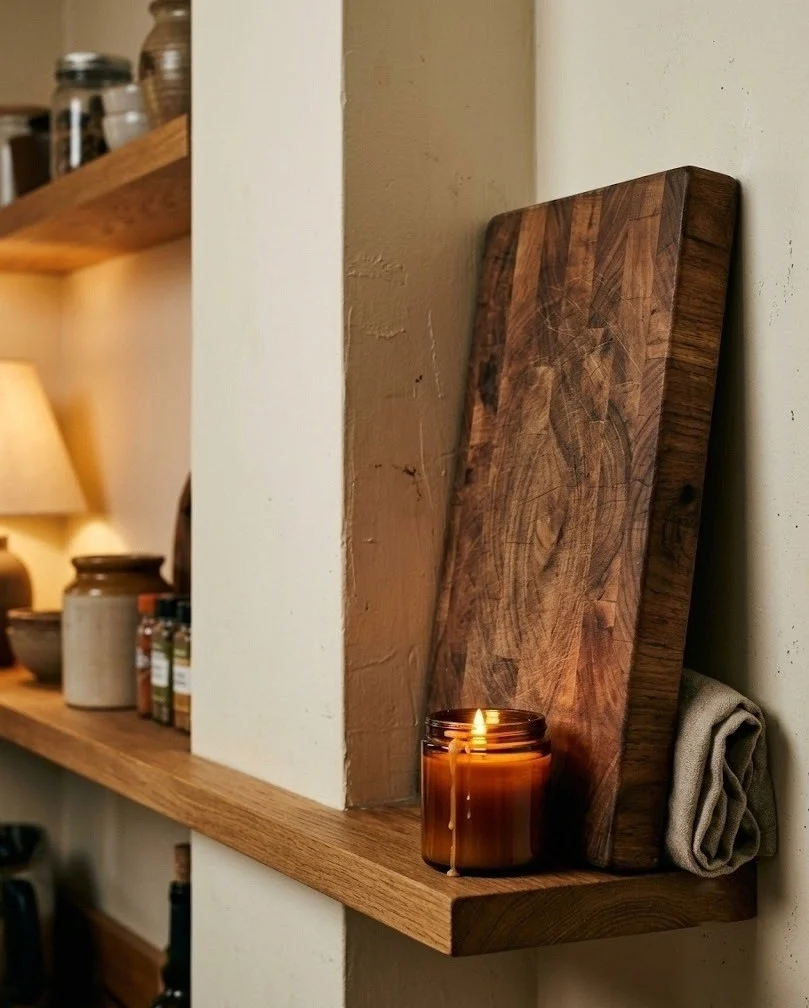
A wooden cutting board leaned against the wall at the end of the open shelf gives the whole arrangement a vertical backstop, and it is still a board you take down to chop on. Angle it about 15 degrees off the wall so it reads as leaning rather than sliding, and set something with weight in front of the bottom edge so it cannot slip. One squat candle in amber or clay does that job and adds the only flame in the room. Treat this as the finishing move on the shelf in idea 17, not a separate project. Boards left leaning for months warp slightly on the exposed face, so flip which side touches the wall every few weeks.
Final Thoughts
The counter is still where you chop, and that is the point: every idea here sits on a sill, a wall, a fridge top, or inside the footprint of something already working. If you do only two things, hang the mugs and pick one appliance to keep out. That alone buys back roughly a foot of prep space, and a foot is enough for a wooden board with three pumpkins on it and still room to cook dinner. Save this to Pinterest so you have the zone list with you when you start moving things.
Frequently Asked Questions
How do I decorate a small kitchen counter without losing prep space?
Decorate the surfaces around the counter instead of the counter itself: the windowsill, the wall behind the stove, the cabinet fronts, the top of the fridge, and the underside of the upper cabinets. Anything that does land on the counter should sit on a single tray or riser so it moves as one piece when you need the space. Aim to keep at least two feet clear.
What should I take off my kitchen counter first?
Take off the appliance you use least, which for most people is the air fryer, blender or stand mixer. A toaster, air fryer and blender together take roughly 30 inches, so removing two of them frees more room than any decorating decision will. After that, move the mugs to hooks and the utensil crock to a wall rail.
Where do I put the toaster if I want fall decor on the counter?
Leave the toaster out and cover it with a fitted linen cover in a fall color, which makes it part of the decor instead of a thing to hide. If you use it less than twice a week, it belongs in a cabinet or in a basket on top of the fridge. Never store an appliance until it has fully cooled.
How many fall decorations are too many in a small kitchen?
Three to five seasonal objects is the ceiling for a kitchen under about 60 square feet, and they work best spread across different zones rather than clustered on the counter. One per zone at most: a wreath on a cabinet, pumpkins on the sill, a gourd beside the appliance, a wheat bundle on the fridge. Past five it reads cluttered.