Every neo deco decor idea on this list costs under $100, and I checked that ceiling before anything earned a spot. I went looking for neo deco decor ideas on a budget because the trend posts I kept finding did the same two things: explain what neo deco is, then hand over a shopping list where a $600 mirror does all the visual work while the $30 items ride along underneath. This post skips the definition lecture and gets specific about the part nobody says out loud, which is that some neo deco elements survive being bought cheap and some announce their price the second you walk past them. Save this to Pinterest so you have it when you are mid-project.
1. Fluted Glass Sconces Flanking a Plain Bathroom Mirror
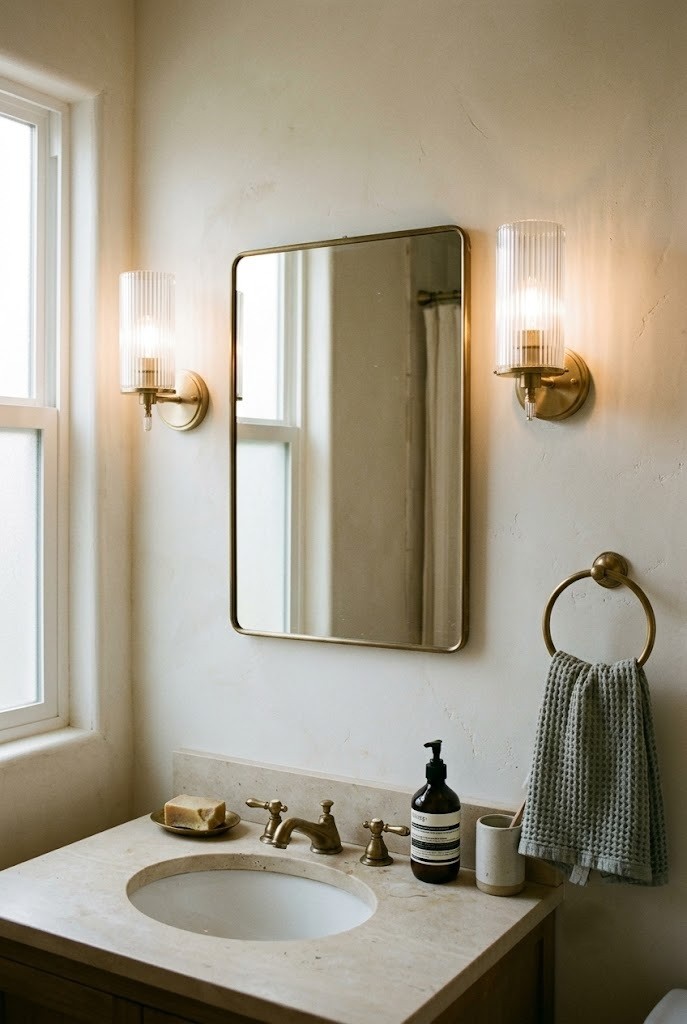
Two fluted glass sconces on either side of a builder-grade bathroom mirror do more deco work than any single statement piece, because the repetition reads as intentional and the ribbing throws light in soft vertical bands. Mount them at eye level, roughly 60 to 66 inches from the floor, and 36 to 40 inches apart so light hits your face from the sides instead of dropping shadows from above. Plug-in versions with a fabric cord cover run $30 to $60 a pair and skip the electrician entirely. The finish is where cheap shows: a shiny lacquered gold sconce looks plated at any distance, while brushed or antique brass hides its own thinness and ages in your favor.
2. Stepped Brass Table Lamp with a Cream Linen Drum Shade
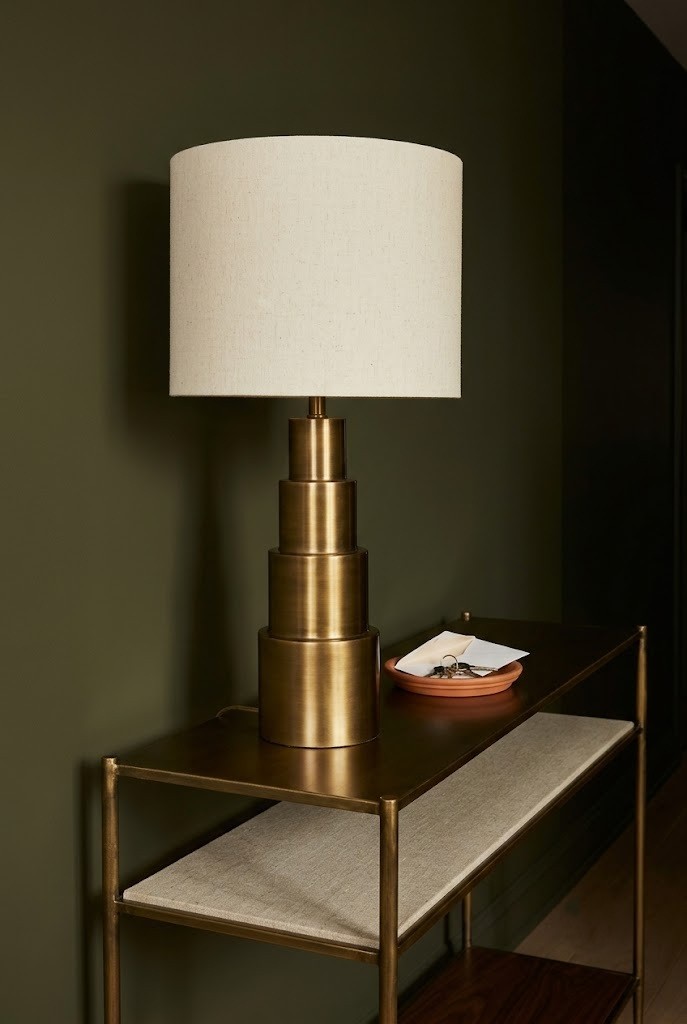
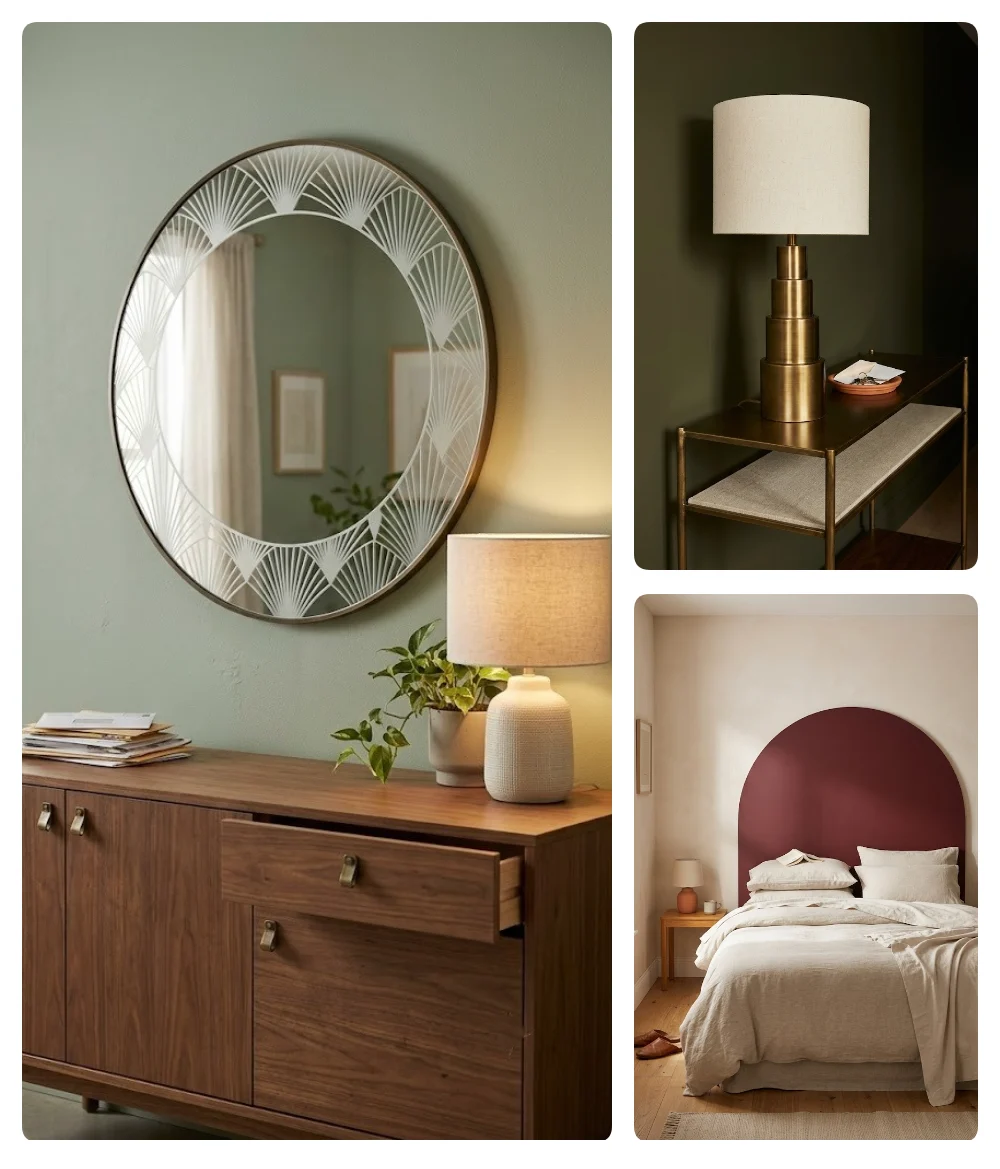
A stepped or tiered lamp base is the fastest way to get a real deco silhouette into a room, because the shape lands before anyone examines the material. Thrift stores and estate sales are full of them at $20 to $45, almost always wearing a scorched or yellowed shade, and a $25 cream linen drum replacement makes the whole lamp read as new. Size the shade so its width is roughly twice the width of the base at its widest point, and so the bottom edge sits level with your eye when you are seated near it. Avoid bases with a plastic collar at the joint, since plastic catches light differently from metal and gives the piece away up close.
3. Opal Glass Globe Ceiling Light Replacing a Builder Dome
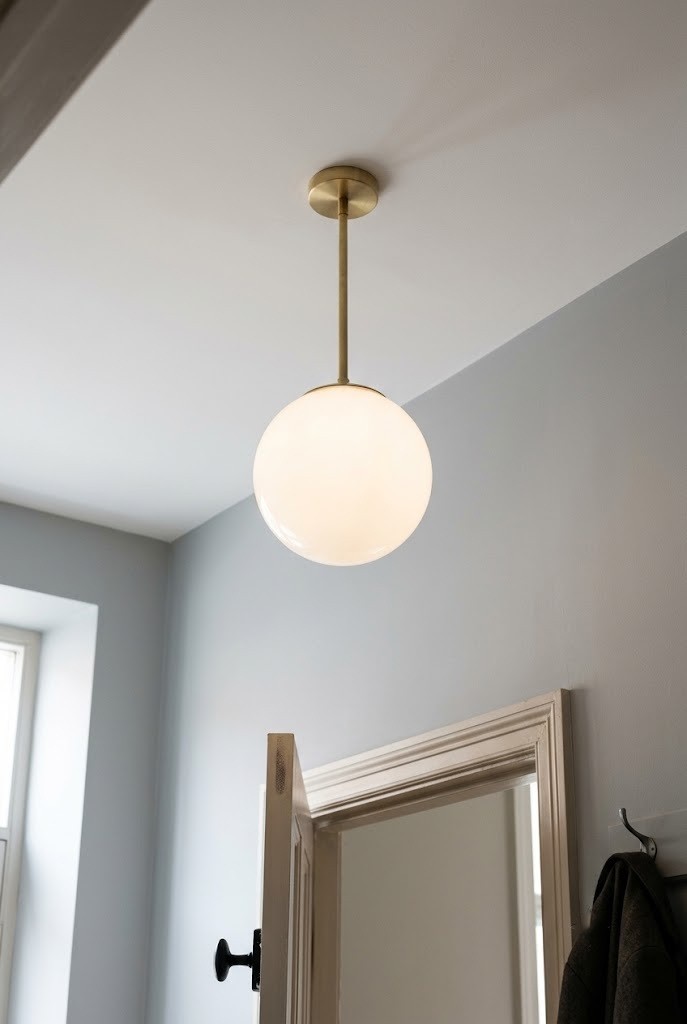
Swapping a builder-grade dome for an opal glass globe on a brass stem turns the ceiling from a blank into a fixture, and semi-flush versions in that style start around $55 to $90. Measure ceiling height before ordering: under 8 feet, stay with a drop of no more than 10 to 12 inches or you will clip it every time you carry something through. Opal glass matters more than the metal at this price, because frosted white diffuses evenly while cheap clear glass shows the bulb, the socket and every fingerprint. If the existing fixture sits on a standard junction box with a crossbar, the whole swap is a twenty minute job with the breaker off.
4. Slim Brass Picture Light Over a Framed Print
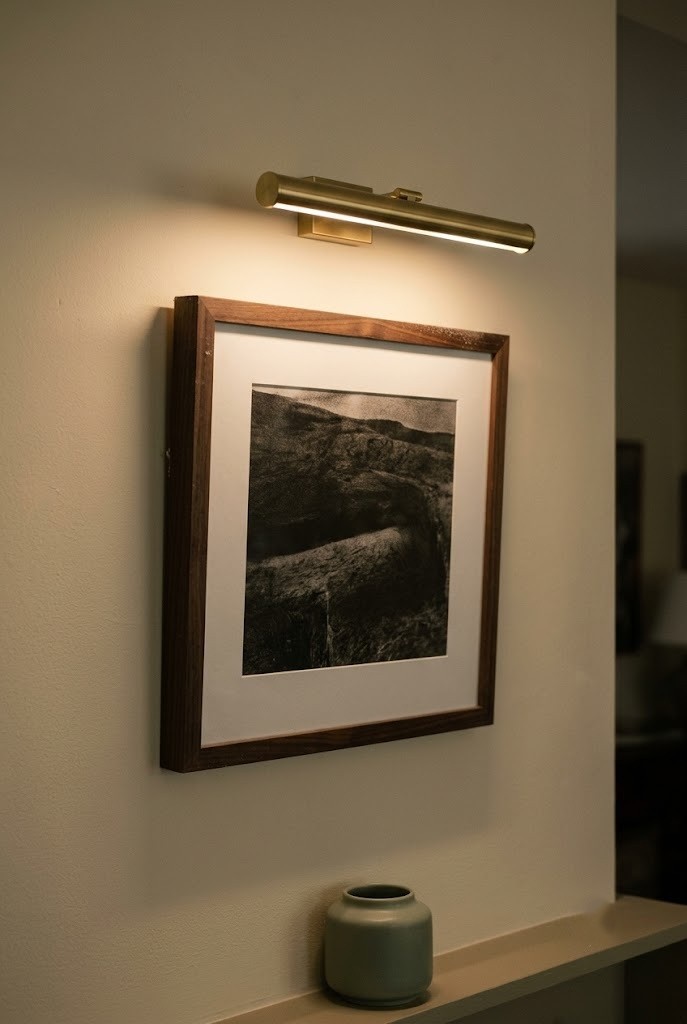
A slim brass picture light over a framed print delivers the gallery effect that reads deco without a single fan motif or curve in the room. Rechargeable and battery models clamp to the frame top or stick to the wall above it, run $25 to $60, and require no wiring and no conversation with a landlord. Center the light on the frame and aim the beam so it falls across the lower two thirds of the artwork; angled too steeply, it lights the mat board and leaves the image itself dim. Unlacquered brass is the better buy here because it patinas unevenly and reads as age, while $30 lacquered gold chips at the clip point within a year.
5. Knurled Brass Knobs on Flat-Front Kitchen Cabinets
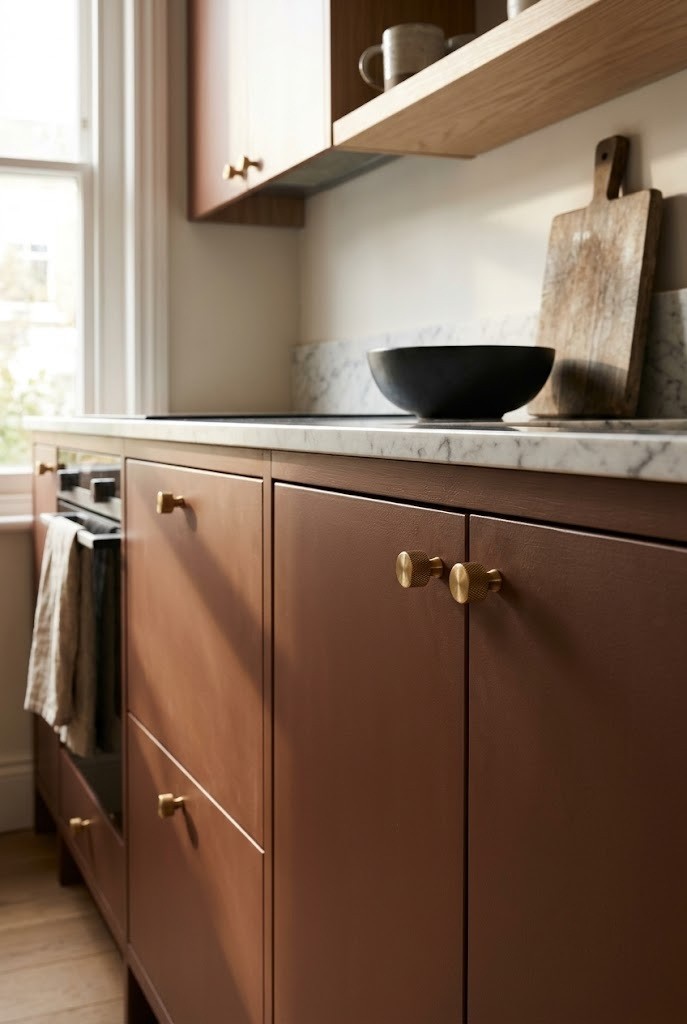
Brass cabinet knobs and pulls on flat-front doors are the cheapest change with the biggest return in the entire deco toolkit, because hardware is jewelry and a plain door is a blank setting for it. Knurled knobs, the ones with fine vertical ridges cut into the head, cost $4 to $9 each in multipacks, so a ten-door kitchen lands between $60 and $90. Order a single knob first and hold it against your cabinet color in daylight before committing. Solid brass costs more than plated zinc and survives dishwater and hands, while plating wears through at the grip point inside a year and goes silver in patches. The ridges also hide fingerprints far better than smooth polished domes.
6. Long T-Bar Pulls Running Down a White Bathroom Vanity
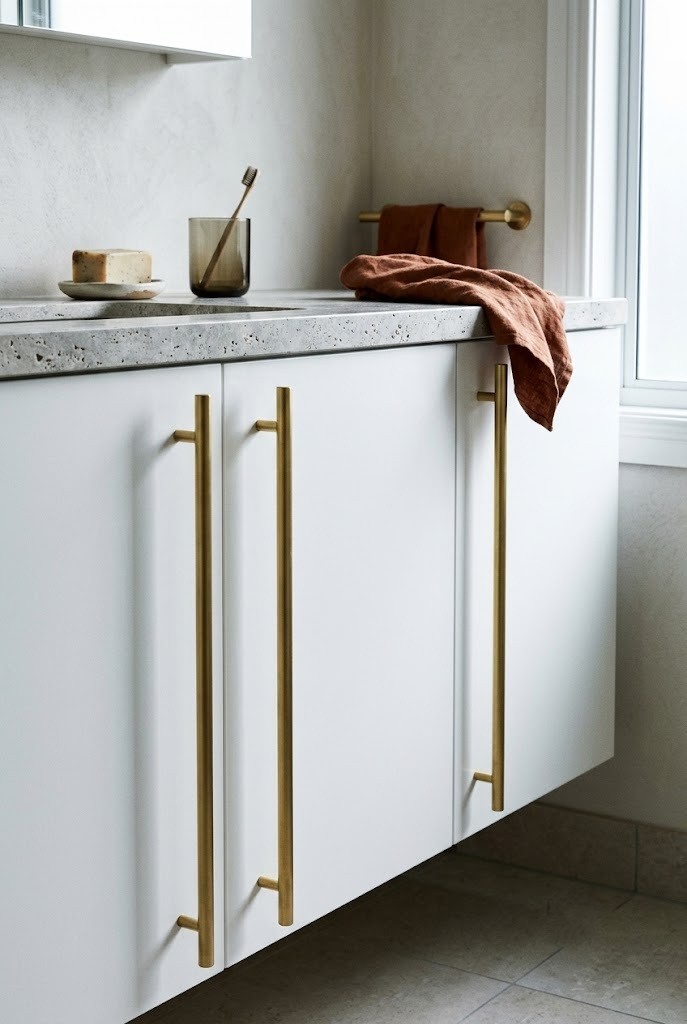
Long T-bar pulls mounted vertically on vanity doors stretch the door line and give a bathroom the tall banded look that deco leans on. Standard hole spacing is 96mm or 128mm on center, so measure your existing holes before buying anything, and if the doors are undrilled, a $6 hardware jig will save you from a visibly crooked row. Drawer fronts are a different call: run those pulls horizontally and centered, or the vanity starts to look like a filing cabinet. Keep the same finish family as the knurled knobs from idea 5 wherever two rooms share a sightline, because antique brass next to bright polished brass reads as an accident rather than as layering.
7. Brass Lever Handles on Plain Interior Doors
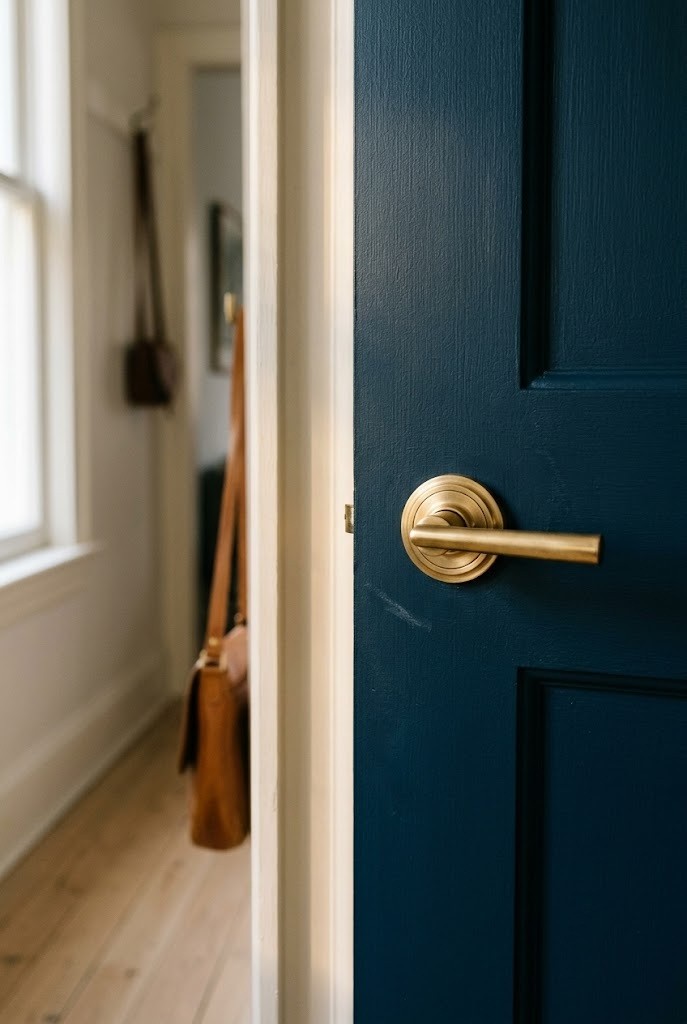
Brass lever handles are the deco upgrade nobody photographs and everybody feels, at $18 to $40 per set. Buy privacy sets for bathrooms and bedrooms and passage sets everywhere else, then check the backset before ordering, which is the distance from the door edge to the center of the bore; 2 3/8 inches is standard on most US interior doors and 2 3/4 inches shows up on older ones. Levers with a stepped or fluted collar where they meet the rose carry the period detail much better than a plain round escutcheon. This is one of the few places where inexpensive brass finish survives, because hands polish the high points naturally and the wear looks deliberate.
8. Brass Edge Trim Along the Front Lip of a Floating Shelf
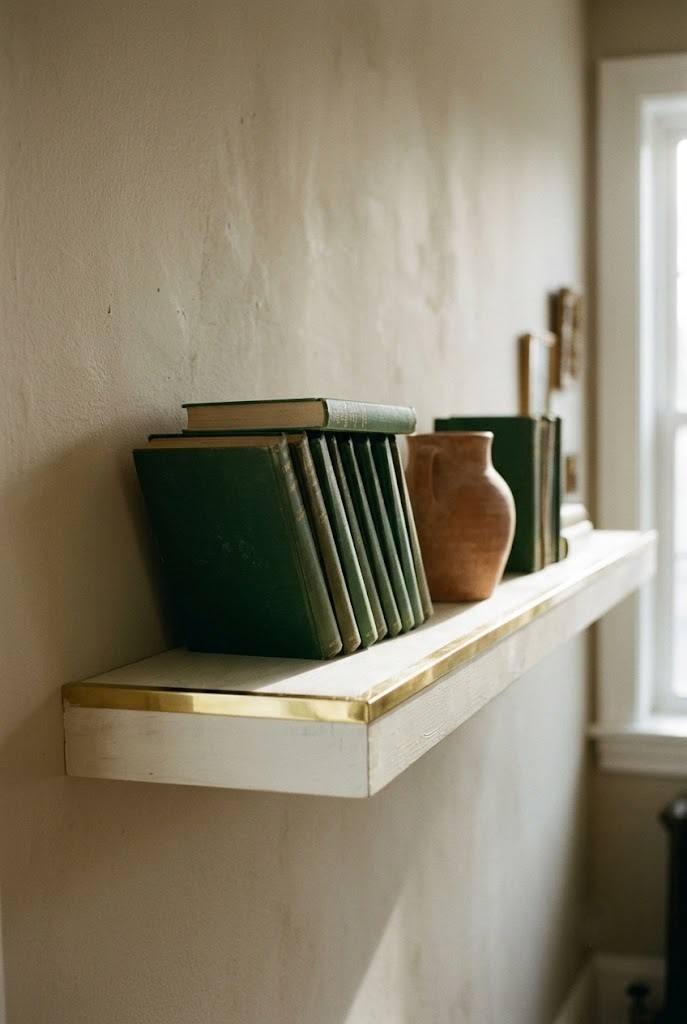
A strip of brass edge trim glued to the front lip of a plain floating shelf turns a $20 board into something that looks specified rather than bought. Adhesive-backed brass U-channel and flat bar sell by the foot at $3 to $6, so an eight foot run stays under $50 including waste from the miter cuts. Clean the shelf edge with rubbing alcohol first or the adhesive lifts within a month, and clamp or tape the strip for a full hour while it cures. On a white painted shelf the contrast is sharp and graphic; on warm walnut it goes quiet and reads as trim. Do this to one or two shelves in a stack, never all five.
9. Full-Length Arched Floor Mirror Leaned in a Corner
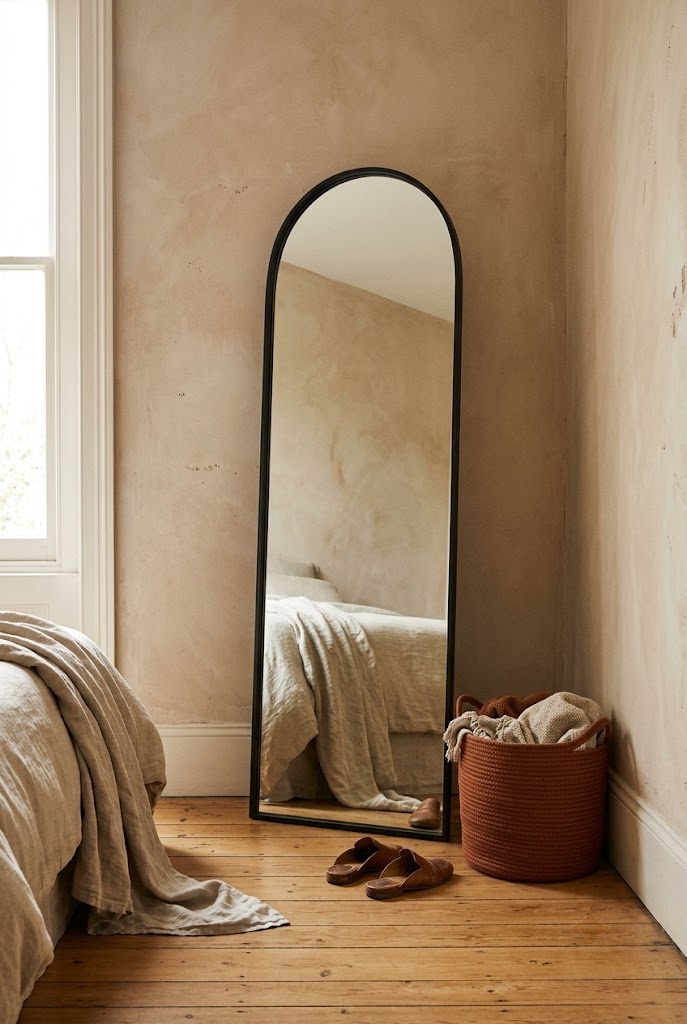
A full-length arched floor mirror leaned against the wall doubles the usable light in a corner and makes a small room read taller, and the arch does the deco work by itself with no brass, fan or fluting attached. Under $100 buys a 55 to 65 inch mirror with a thin metal frame; skip the chunky faux-wood frames at this price, because printed grain is exactly where cheap announces itself. Lean it at a shallow angle, no more than 5 to 10 degrees off the wall, and strap the top to a stud, since a mirror this size is genuinely dangerous when it goes over. Place it perpendicular to a window rather than facing it, so it spreads light instead of throwing glare, which is the same logic behind the sconce placement in idea 1.
10. Fan-Etched Round Mirror Above a Sideboard
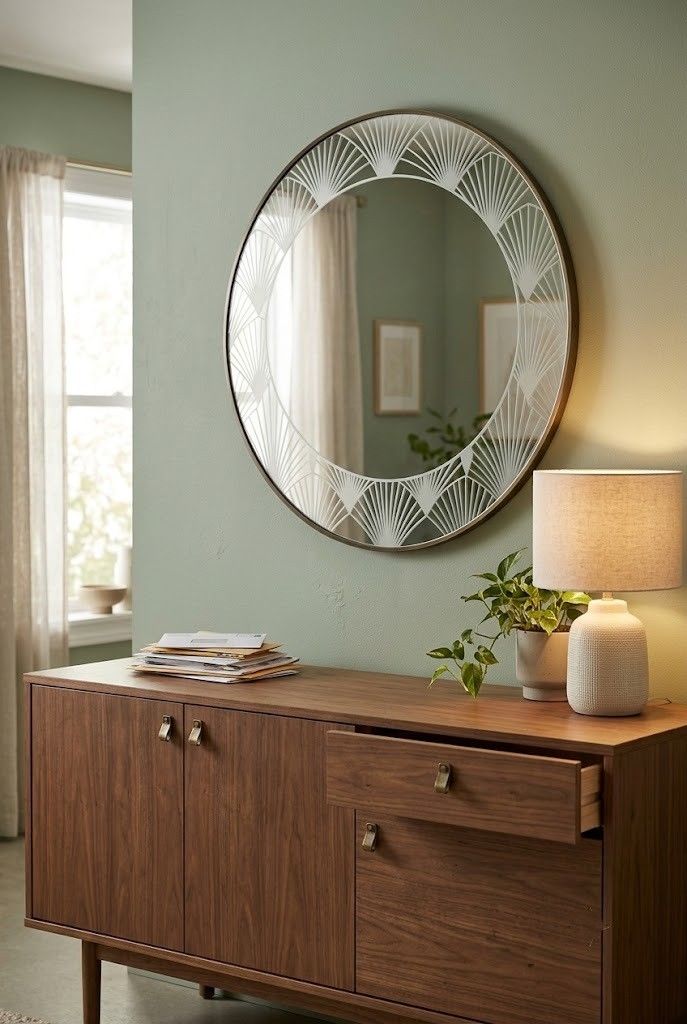
A round mirror with fan or sunburst etching over a sideboard carries deco pattern at eye level without committing an entire wall to it. Etched and sandblasted designs at $40 to $85 hold up far better than applied vinyl decals, which peel at the outer edge and trap dust along the seam within a season. Hang it so the center of the glass sits 57 to 60 inches from the floor, and leave 6 to 10 inches between the sideboard top and the bottom of the mirror, because closer than that and the two pieces merge into one lump. Antique or lightly smoked glass hides dust and water spotting much better than clear, which matters on a hallway piece more than people expect.
11. Three Fluted Glass Vases Grouped on a Coffee Table Tray
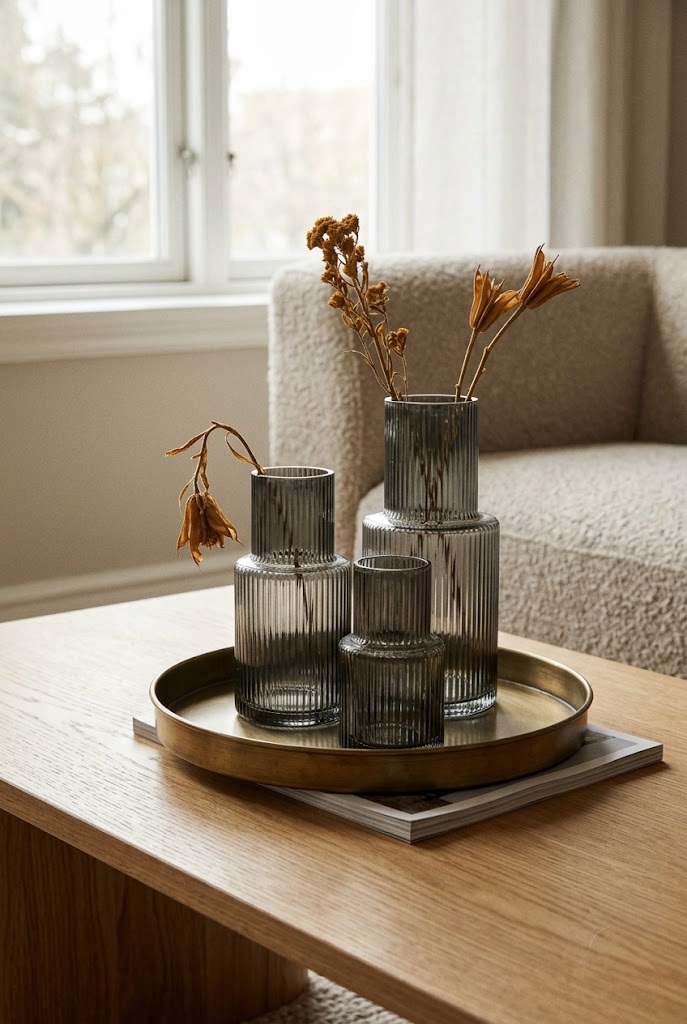
Three fluted glass vases in stepped heights on a tray is a $40 to $70 arrangement that reads as styled rather than as clutter, because the ribbing repeats a deco line at small scale where it costs almost nothing. Buy them in one color family and vary height by at least 3 inches between pieces so the group has a stepped profile instead of a flat row. Clear and smoke glass are the safest budget buys; colored glass at this price often shows a visible mold seam and an uneven pour at the base, both of which catch light badly. Leave one vase empty. Filling all three turns the group into a florist display instead of part of the room.
12. Ribbed Glass Film Applied to Cabinet Door Panels
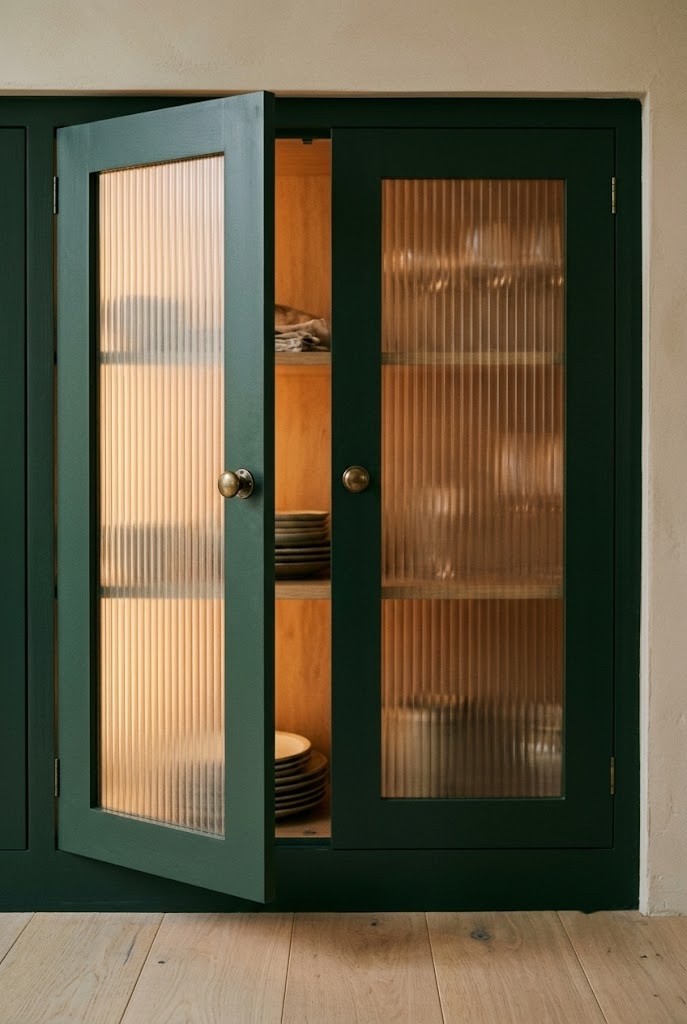
Ribbed glass film on cabinet door panels buys you the reeded look for $15 to $30 a roll, and ribbed glass catches light in vertical stripes that conveniently blur whatever mess sits behind the door. Cut the film slightly oversized, spray the glass with soapy water, squeegee from the center outward, then trim the edge against a steel ruler with a fresh blade. Apply it to the interior face of the glass wherever the door design allows, since film on the outside collects cooking grease and lifts at the corners within months. It sits naturally alongside the fluted vases in idea 11 if the two share a sightline, though one room rarely needs film, vases and a fluted console all at once.
13. Geometric Fan-Motif Area Rug Under a Coffee Table
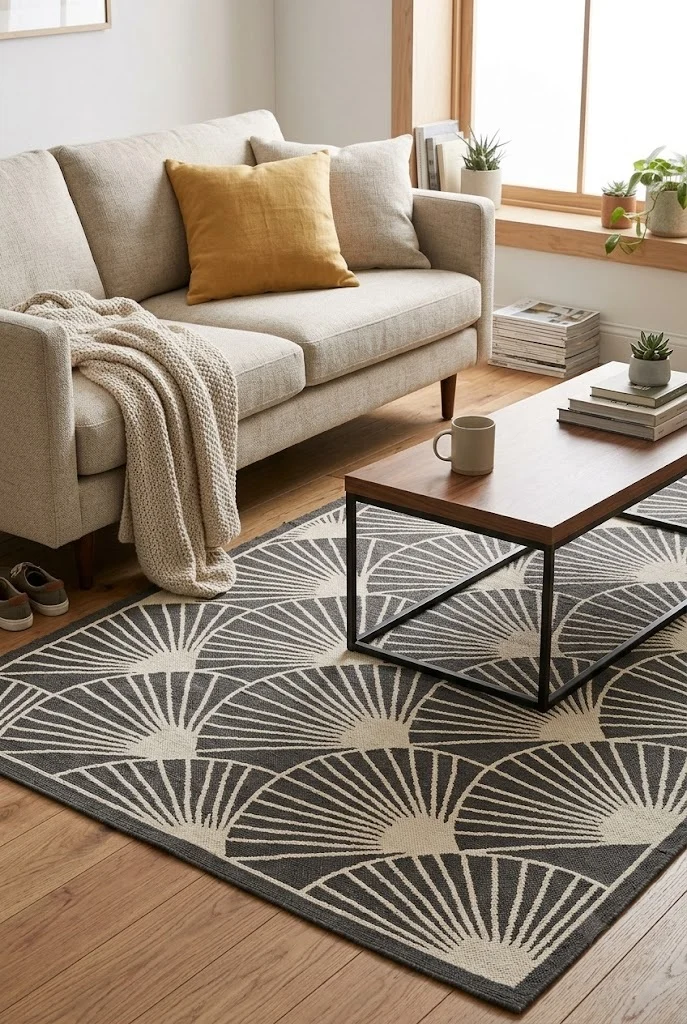
A geometric area rug with a fan, scallop or stepped-arch motif anchors an entire scheme for less than any furniture piece can, and machine-woven 5x7 versions land between $60 and $95. Scale is where budget rugs fail: a small busy repeat looks like a bathmat once a coffee table sits on it, so choose a pattern whose repeat measures at least 12 inches across. Low-pile flatweave lies flat on hardwood without curling and hides the seams that give cheap tufted rugs away, though a $20 pad is still worth it to stop the sliding. Keep the front legs of the sofa on the rug rather than floating it in the middle of the floor.
14. Stepped Picture-Frame Moulding Painted the Wall Color
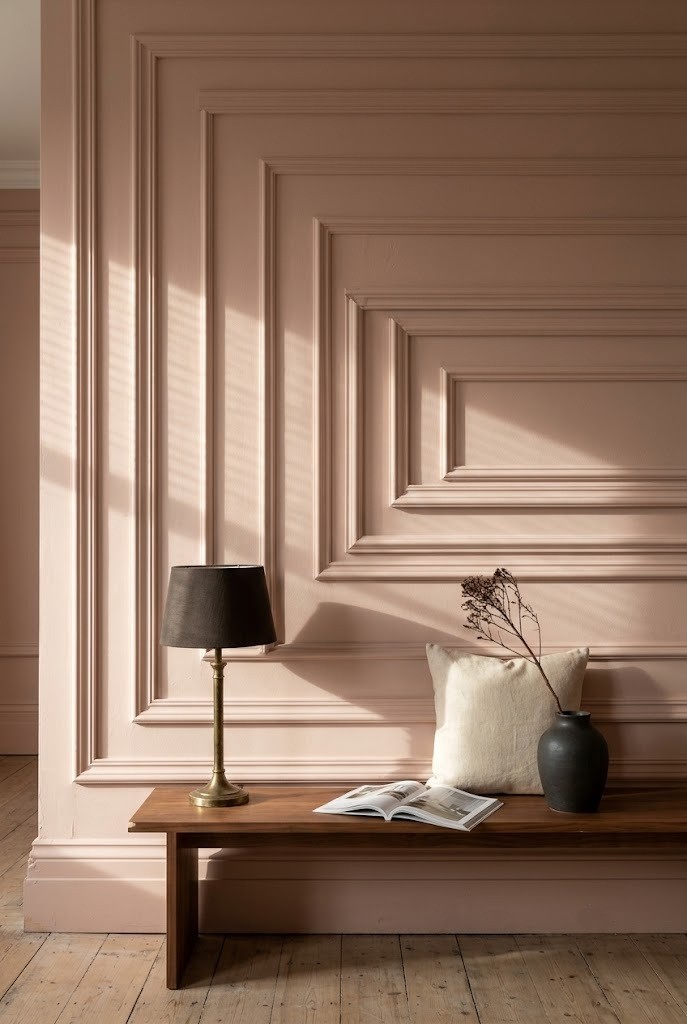
Stepped picture-frame moulding painted the same color as the wall gives you deco geometry for the price of trim, roughly $40 to $80 for a full feature wall. Stack two different profile heights to create the step rather than using one thick piece, because the shadow line between the two profiles is the entire effect. Keep the boxes proportional: a 4 to 6 inch reveal from ceiling and baseboard, equal gaps between boxes, and no box narrower than 18 inches or the wall looks improvised. Paint wall and moulding in one eggshell finish so light does the outlining instead of color contrast. It is the same stepped-profile trick as the lamp base in idea 2, scaled up to a wall.
15. Chevron and Fan-Quilted Velvet Cushions on a Neutral Sofa
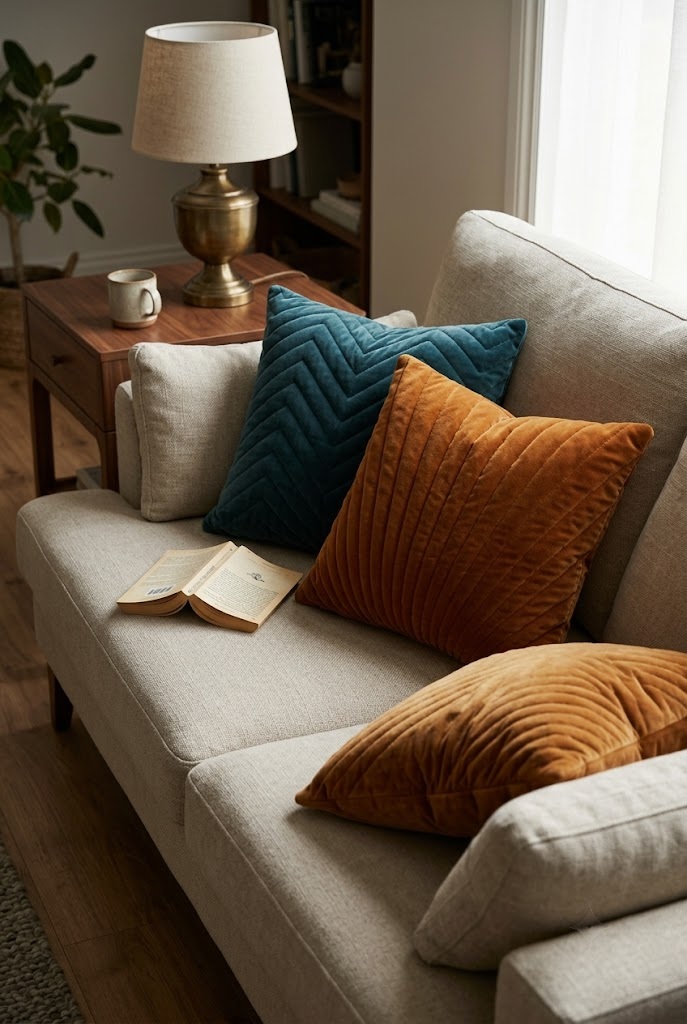
Chevron or fan-quilted velvet cushion covers introduce deco pattern you can remove in ten seconds when you tire of it, at $20 to $35 each. Buy covers rather than complete cushions and keep one set of 20 by 20 inch inserts, since two covers cost less than two new cushions and store flat in a drawer. Polyester velvet holds color and resists crushing better than cotton velvet at this price, though every velvet will show a pressure mark where somebody sat. Hold the ratio at two patterned covers against three plain ones. Go past that and the sofa becomes the loudest object in the room, which leaves the lighting and the hardware with nothing left to say.
16. Peel-and-Stick Fan Tile Behind a Bar Cart
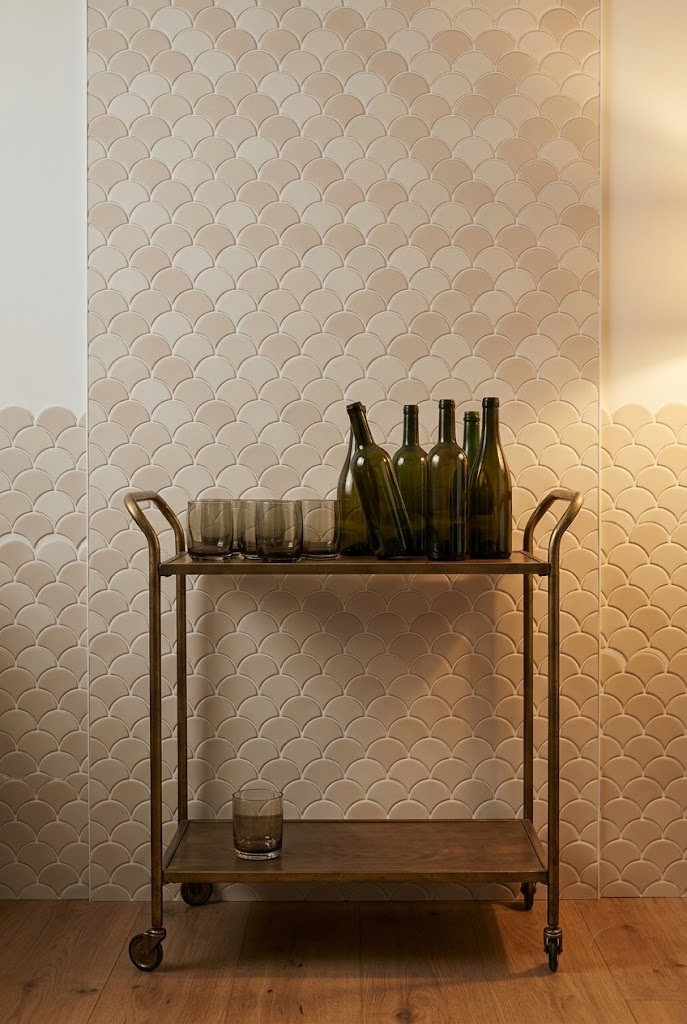
Peel-and-stick fan or scallop tile behind a bar cart lets a two foot patch of wall carry the whole deco reference, and one $30 pack usually covers it. Treat the patch as a defined panel with a clear start and end aligned to the cart width, rather than letting the tile fade out somewhere in the middle of the wall. Wipe the surface with degreaser and let it dry completely, then work up from a level pencil line instead of the baseboard, which is almost never straight. Matte finishes pass for real tile; high-gloss vinyl reflects light and reveals every ripple in the drywall behind it. Keep the motif large enough that one whole fan reads from across the room, because a tiny repeat at this scale stops looking like tile and starts looking like busy wallpaper.
17. Arched Headboard Cut from a Single Sheet of Plywood
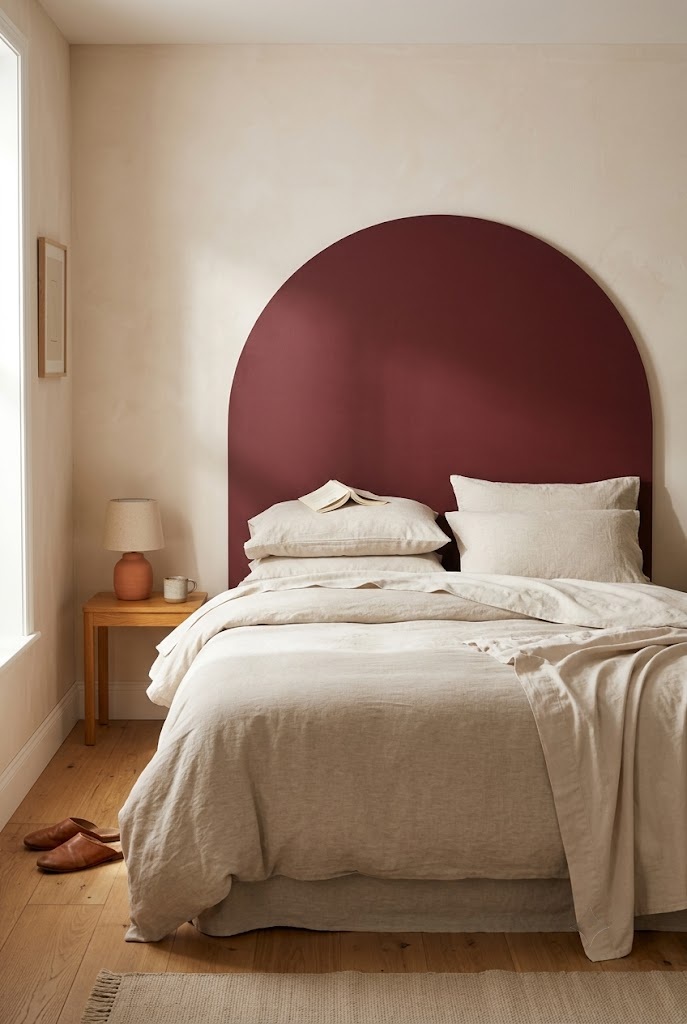
An arched headboard cut from one sheet of half-inch plywood costs around $45 in materials and reproduces at furniture scale the same shape that makes the arched floor mirror in idea 9 work so hard. Draw the curve with a pencil tied to a string anchored at the center of the board, cut it with a jigsaw, then sand the edge in three passes finishing at 220 grit, because a rough curve is precisely what makes homemade furniture look homemade. Height matters more than width: the top of the arch should land 20 to 28 inches above the mattress on a queen. Paint it a deep flat color instead of staining it, since plywood edge grain drinks stain unevenly and conditioner only half fixes it.
18. Curved-Back Thrifted Armchair Under a Stretch Boucle Cover
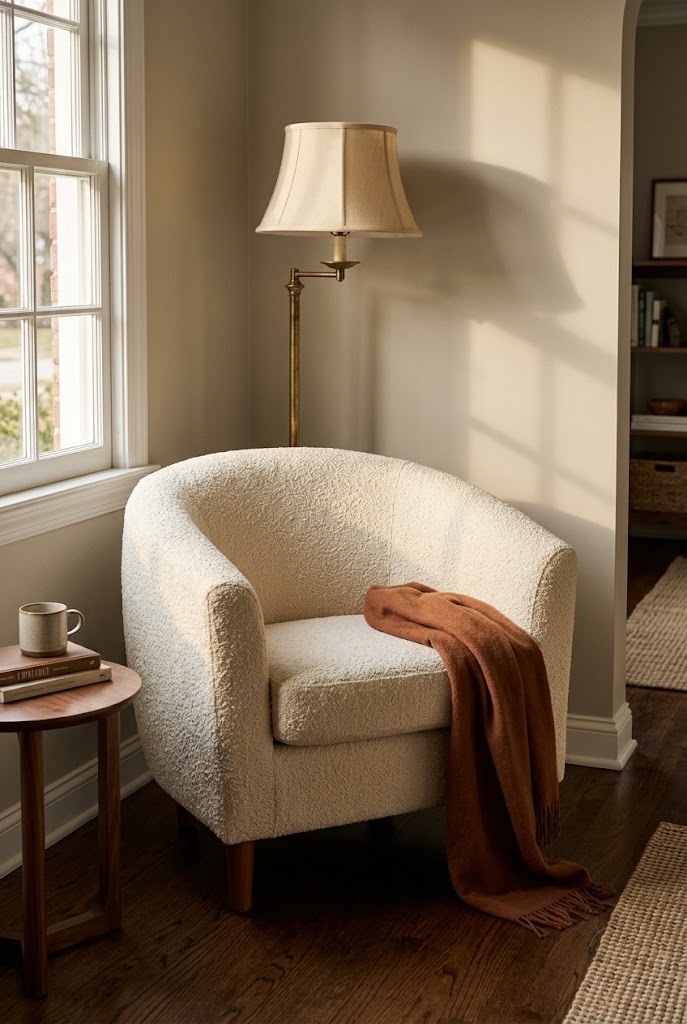
A curved-back armchair from a thrift store carries more deco silhouette than any new chair at this price can, because the shape has to be built into the frame and budget furniture is built straight. Look for barrel backs, rolled arms and short tapered legs in the $40 to $90 range. Test the frame by lifting one front leg two inches off the floor; if the opposite leg stays down, the frame is racked and no cover will save it. Ugly fabric is cheap to fix and a broken frame is not, so judge on structure alone. A fitted stretch boucle cover runs $35 to $60 and takes a dated chair current without any reupholstery.
19. Fluted Console Built from Half-Round Moulding on a Flat-Pack Base
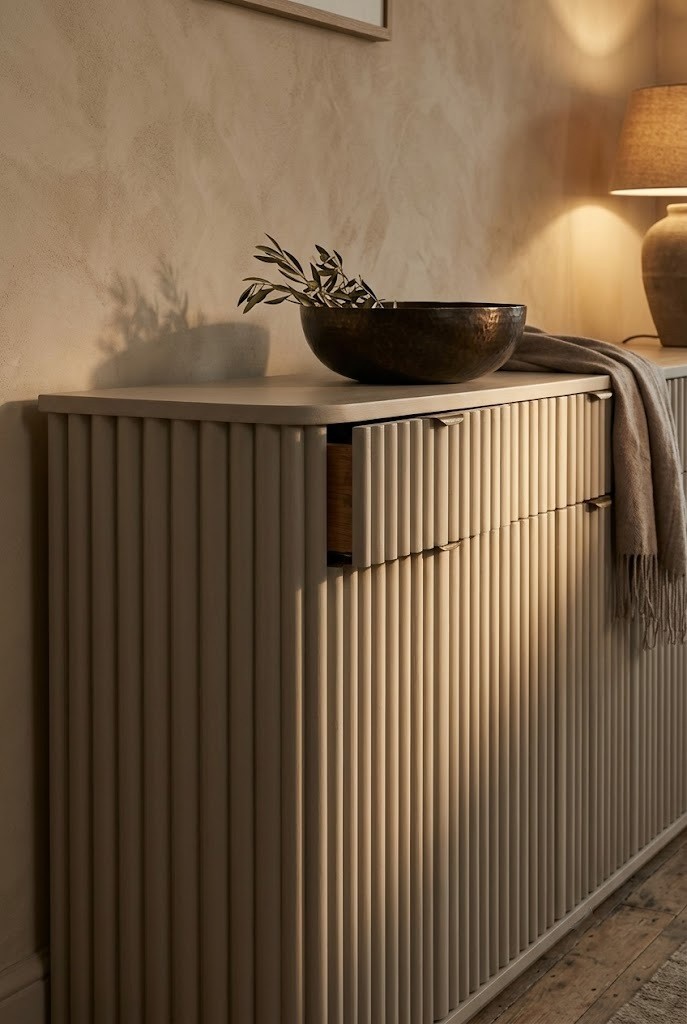
A fluted console made by gluing half-round wood moulding to a flat-pack base is the largest visual return on this list for about $60 in trim. Space the half-rounds so they touch along their full length with no gap at all, since an uneven reveal between them is the difference between a fluted piece and a striped one, and use a cut spacer block rather than trusting your eye across a four foot run. Prime before painting, because raw pine soaks unevenly and the ridges will show every dry patch under a lamp. This is the vertical-line logic of the brass shelf trim in idea 8 scaled up to furniture, so pick one fluted surface per room and stop there.
Final Thoughts
The pattern across all nineteen of these is the same: shape and repetition survive a small budget, while finish and material do not. An arch, a step, a rib or a fan costs nothing extra to buy, which is why they carry a room. Plating, printed grain and glossy vinyl are the three places where a low price becomes visible from across the room, so spend your ceiling there and save everywhere else. Start with hardware, since it is the least reversible-feeling change that is actually completely reversible. Save this post to Pinterest so it is there when you start.
Frequently Asked Questions
what is neo deco, in plain terms?
Neo deco is a softened, modern reading of art deco that keeps the geometry and the metallic accents but drops the formality and the high gloss. Think arches, stepped profiles, fluting, fan motifs and brass, applied to ordinary rooms in warm neutral colors rather than to hotel lobbies in black and gold.
which neo deco pieces should I not buy cheap?
Anything relying on a plated metal finish or a printed wood grain. Cheap plated brass wears silver at the touch points inside a year, and faux-wood mirror frames show their print at close range. Shapes cost nothing extra, so buy arches, fluting and stepped profiles cheap and spend your money on real metal.
does neo deco only work in big rooms?
No, and small rooms often carry it better. The style relies on vertical lines, arches and repetition, all of which make a low or narrow room read taller. The limit is quantity, not square footage: one fluted surface, one arch and one metal finish is plenty for a small space.
is brass hardware going to look dated in a few years?
Unlacquered and antique brass ages rather than dates, because the patina keeps changing and never freezes at one trend moment. Bright polished gold-tone plating is the finish that reads as a specific year. If you want the safest long-term buy, choose solid brass in a brushed or aged finish.