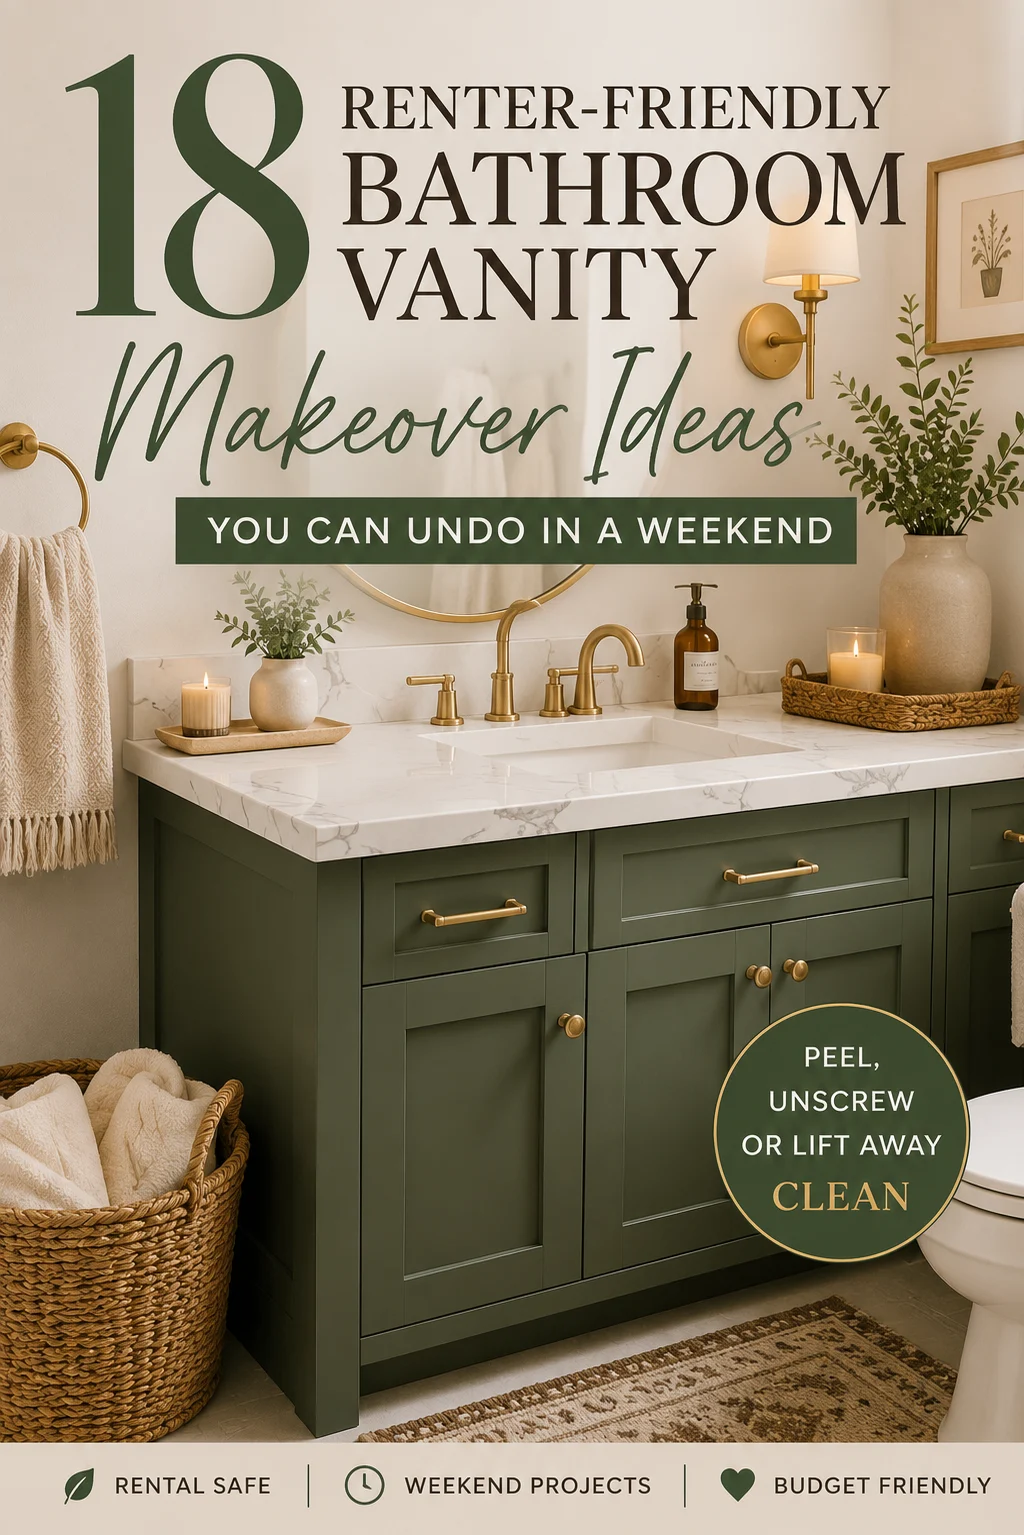
Every renter friendly bathroom vanity makeover guide I found while living through three rentals buried the vanity in a whole-bathroom roundup. This bathroom vanity makeover list does the opposite: 18 ideas for the vanity alone, and every single one is tagged by how it comes off — peels off, unscrews, or lifts away — so the deposit question is answered per idea, not in a disclaimer at the end. I have removed most of these at move-out myself, and I will tell you which came off clean and which needed a hairdryer and patience. The ideas run from surface wraps to hardware swaps to pure layering. Save this post to Pinterest so it is waiting when your lease and your ugly vanity finally push you over the edge.
1. Carrara Marble Peel-and-Stick Countertop Over Builder Beige
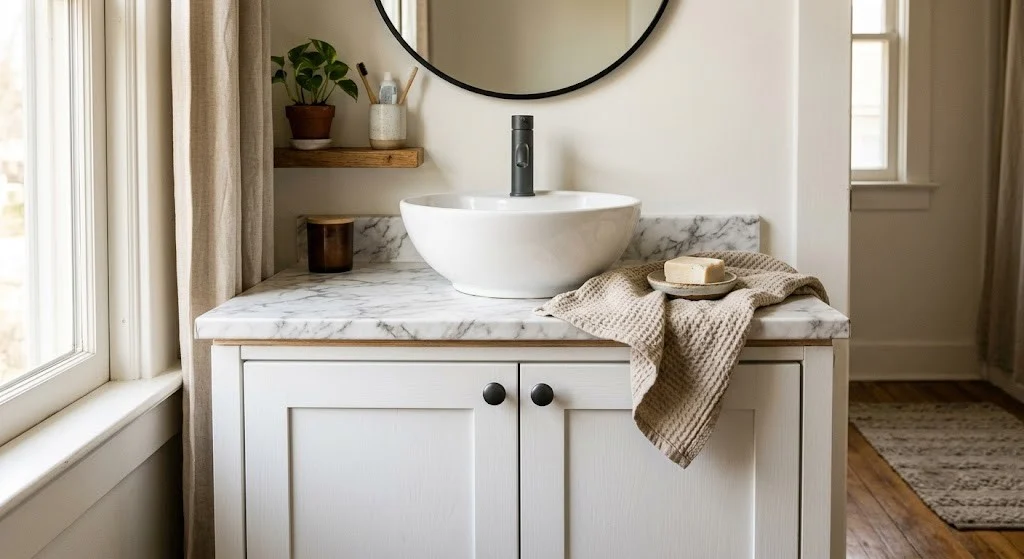
My first rental had a beige laminate counter that made the whole bathroom feel like 1994. A Carrara-look peel-and-stick countertop film fixed it in one afternoon, and at move-out it lifted off with a hairdryer and left zero residue. The trick is the base: this only works over smooth laminate, not textured or tiled counters. Clean with rubbing alcohol first, cut the film with two inches of overhang on every edge, and push bubbles out with a plastic squeegee as you go, not after. Wrap the front edge down and under so the seam hides below sight line. Removal rating: peels off clean if you warm it, ten minutes total.
2. Matte Black Contact Paper Cabinet Doors
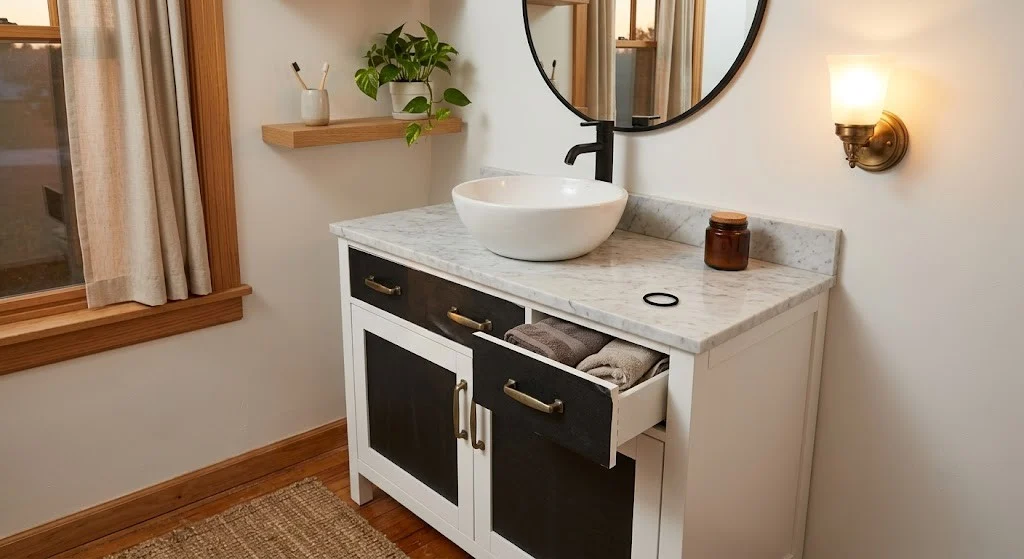
Builder-grade oak doors read dated mostly because of the orange tone, not the shape. A roll of matte black contact paper covers that tone completely and photographs like painted cabinetry. Buy more than you think: one standard roll covers roughly two doors once you account for wrapping the edges. Pull the doors off their hinges and wrap them flat on a table, because vertical application on a hung door is how you get creases. Wrap edges around to the back face so nothing catches when drawers brush past. I did this in two rentals; both times it peeled off in sheets at move-out and the finish under it looked untouched. Removal rating: unhinge, warm, peel.
3. Butcher Block Vinyl Countertop Wrap
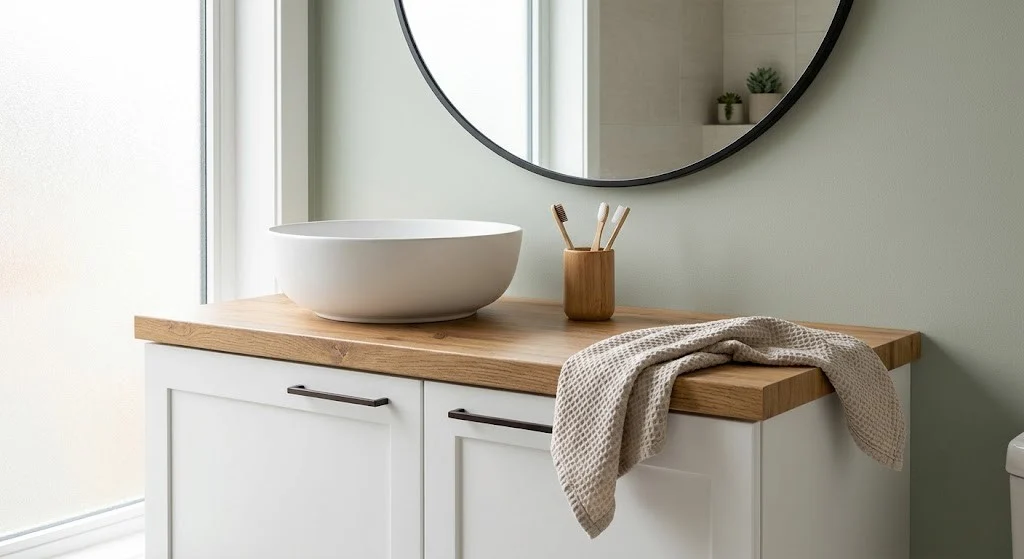
If marble feels cold for your space, a butcher-block vinyl wrap warms the whole vanity zone without a single tool. Prep is identical to the marble wrap in idea 1: alcohol wipe, dry fully, work from the sink outward. The difference is pattern matching. Wood grain runs one direction, so plan your seams to run with the grain, ideally at the sink cutout where the eye already breaks. Choose a mid-tone oak print over dark walnut in small bathrooms; dark film shows water spots faster and makes a 24-inch vanity feel smaller. Pair it with white doors and it reads Scandinavian instead of cabin. Removal rating: same clean peel as marble.
4. Peel-and-Stick Zellige Backsplash Behind the Faucet
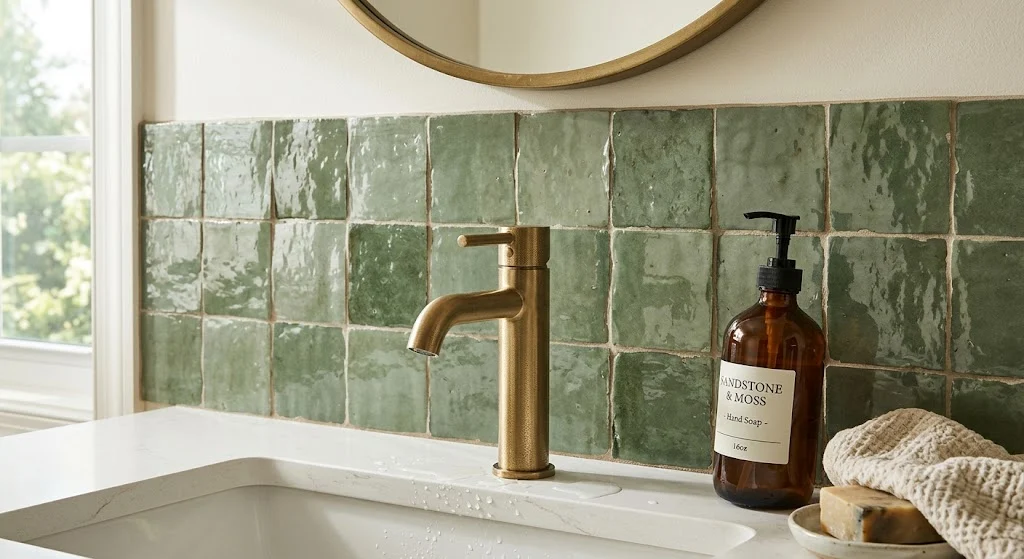
The strip of wall behind a rental faucet collects toothpaste spray and nobody ever addresses it. Peel-and-stick zellige-style tile panels give that zone a handmade, glossy texture that catches light the way real glazed tile does. Run them from the counter up 18 to 24 inches, ending on a full tile row, never mid-tile. Corners matter: cut panels to meet in the corner rather than bending one around it, because bent vinyl lifts within a month in bathroom humidity. Greens and creams photograph best against white counters. I left one of these up for two years; it wiped clean the entire time and came off with dental floss and a hairdryer.
5. Moody Forest Green Vinyl-Wrapped Vanity Doors
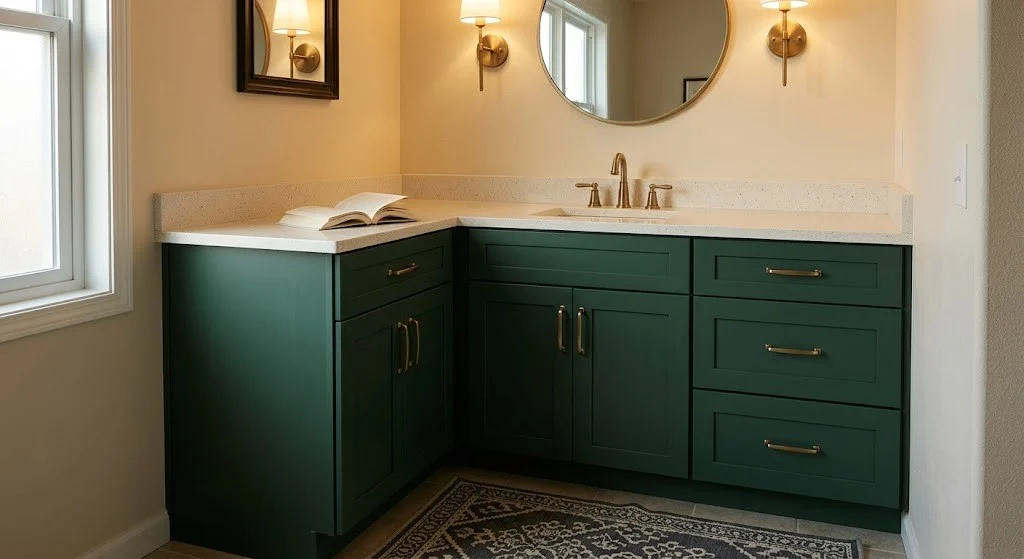
Painting rental cabinets risks your deposit, but a deep green vinyl wrap gets you the same moody, custom look with none of the risk. Go darker than feels safe: forest or pine green, not sage, because bathroom lighting washes out mid-tones. Keep the counter light so the room does not close in, and let brass accents do the warming. This is the one idea people always assume was a professional paint job when they see it. Apply in slightly overlapping horizontal runs on wide drawer fronts, and score along panel edges with a plastic card so the wrap sits into the door profile instead of tenting over it. Removal rating: slow peel, no residue.
6. Fluted Wood-Look Adhesive Panels on Flat Doors
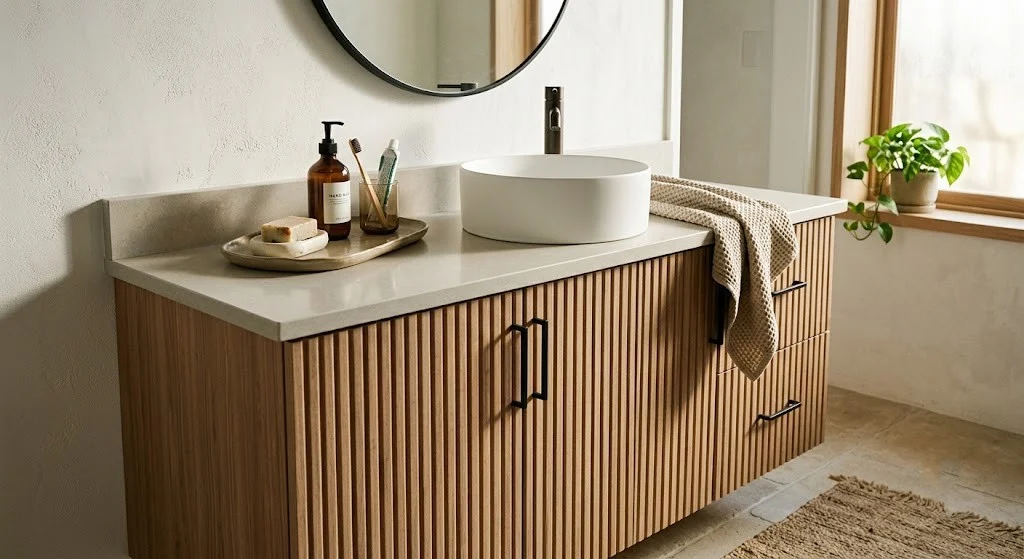
Fluted wood paneling is everywhere in high-end bath design right now, and adhesive fluted panels fake it convincingly on flat cabinet doors. They add real dimension, not printed texture, which is why this reads more expensive than any flat film. Dry-fit every panel first and mark cut lines on painter's tape, because the flutes must run dead vertical; even a two-degree lean is visible from across the room. Trim with a fine-tooth saw or heavy shears, not a utility knife, which chips the flutes. Stick to doors only and leave drawer fronts flat for contrast. On removal, these pull off slowly and cleanly if you go gently and warm the adhesive strips first.
7. Terrazzo Peel-and-Stick Counter With Quiet Styling
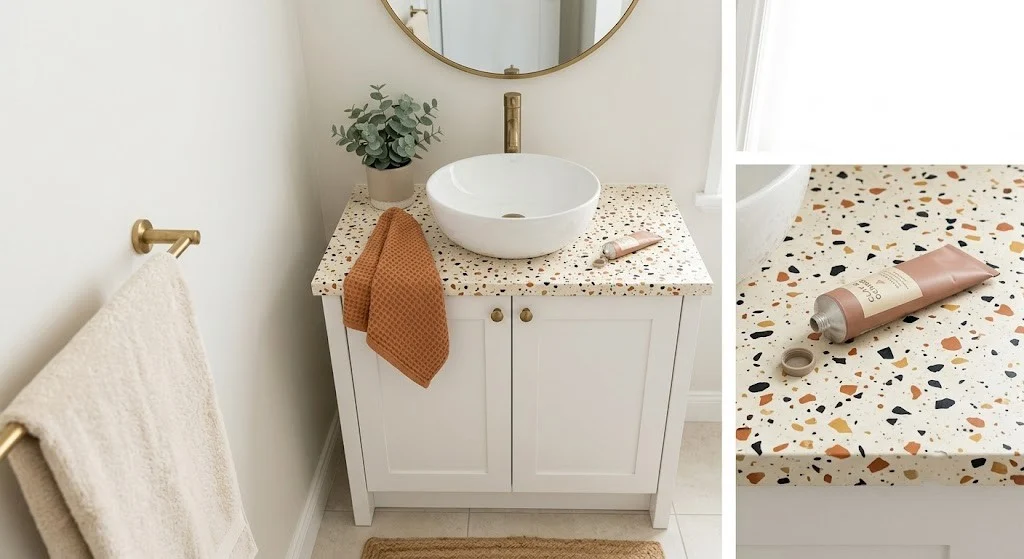
Terrazzo peel-and-stick film is the playful pick, and it hides sins better than any solid pattern. The speckle camouflages seams, small nicks in the base counter, and the faint bubbles that haunt first-time appliers. Choose a print with a white or cream base and multicolor chips no bigger than a quarter; oversized chips look cartoonish in photos. Keep everything else in the room quiet, one chip color echoed in the towels is enough. This is also the most forgiving film to install around a sink cutout, since pattern matching is irrelevant. It came off my Austin rental counter in one sheet after ninety seconds with a hairdryer. Removal rating: the easiest peel here.
8. Matte Black Hardware Swapped Into the Same Holes
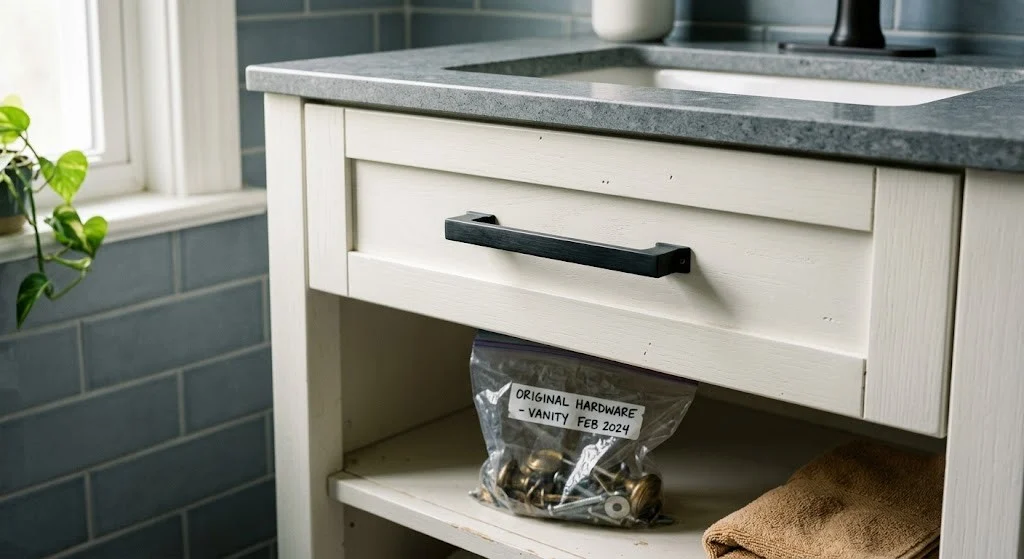
Swapping hardware is the highest return per minute in this entire post. Builder pulls unscrew from the back of the door; a matte black hardware pull set with the same hole spacing drops straight into the existing holes, no drilling, no filling. Measure center-to-center on your current pulls before ordering, three inches and 3.75 inches are the common sizes, and a mismatch means visible old holes. Drop every original pull and screw into a labeled zip-top bag taped inside the cabinet, because at move-out you will not remember which screws went where. Reinstall takes ten minutes and the landlord never knows. Removal rating: perfect, by definition.
9. Brushed Brass Faucet Swap With the Original Boxed
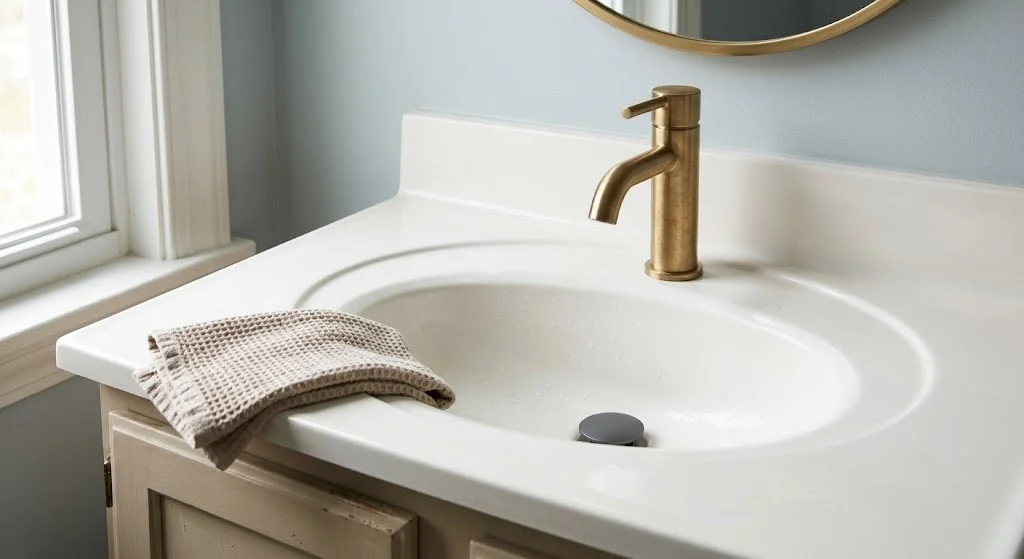
A brass faucet swap sounds like a plumber job, but on most rental vanities it is two supply lines and a mounting nut. Shut the valves under the sink, photograph the connections before touching anything, and hand-tighten plus a quarter turn with a wrench, since over-tightening cracks plastic nuts. Store the original faucet in its box under the sink using the same labeled-bag logic from idea 8. Check for drips at the supply connections after one hour and again the next morning before calling it done. Brushed brass hides water spots far better than polished. This one earned me an actual compliment from a landlord at inspection, reinstalled original and all.
10. Framed Arch Mirror Replacing the Clip-Mounted Plate
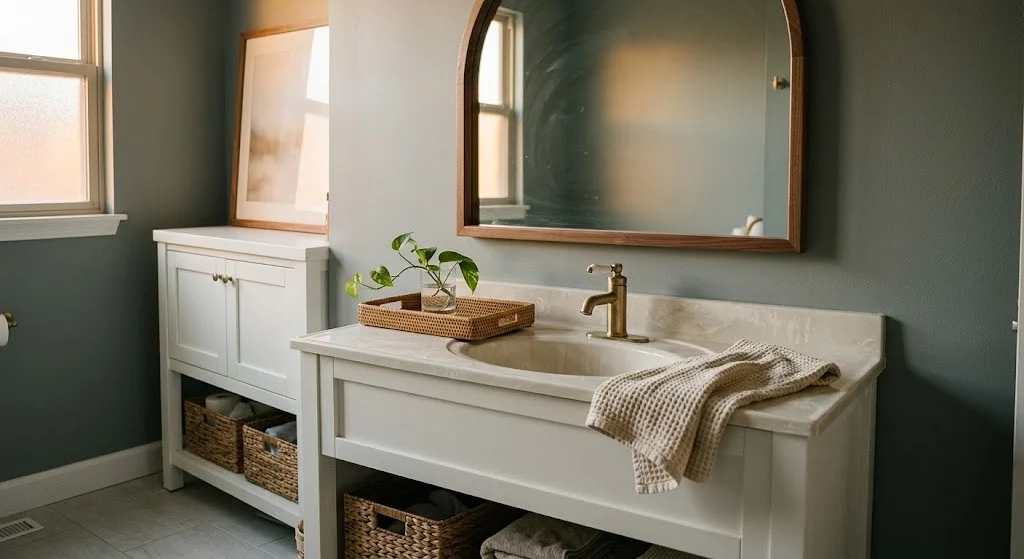
If your plate mirror hangs on clips instead of glue, you can lift it off in thirty seconds and hang a framed arch mirror from a single anchor point. The arch shape softens all the hard rectangles a bathroom stacks up: counter edge, door panels, tile lines. Size it to roughly two-thirds the vanity width and hang it so the center sits at eye level for the household's shorter adults, about 62 inches from the floor. Store the plate mirror flat under a bed wrapped in a moving blanket, never leaning in a closet. A wood or rattan frame here warms the whole room more than any towel ever will.
11. Stick-On Frame Kit Over a Glued Builder Mirror
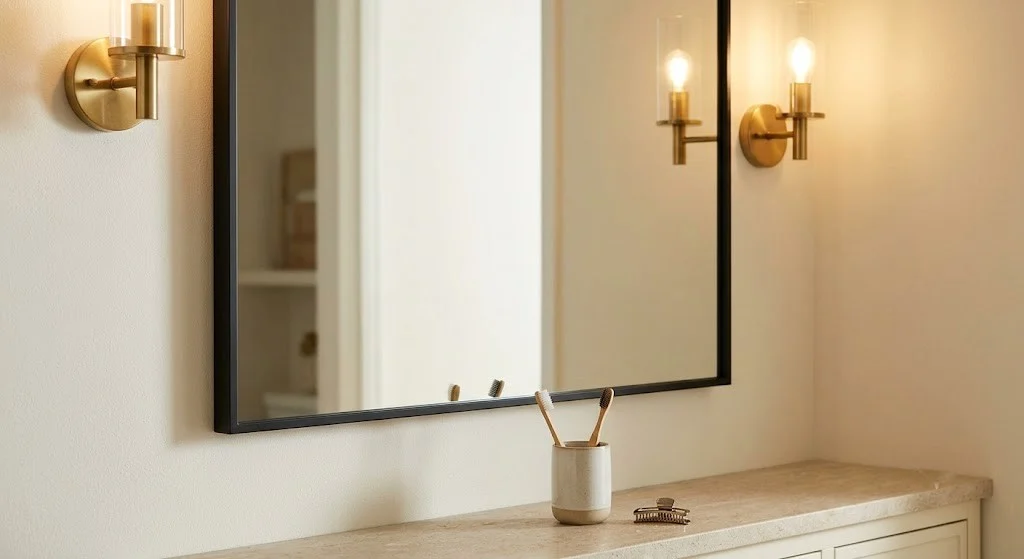
When the plate mirror is glued to the wall, which is common, idea 10 is off the table and a stick-on mirror frame kit becomes the move. These kits are pre-cut mitered strips that adhere directly to the glass face, framing the existing mirror so it reads custom instead of contractor-grade. Measure your mirror twice and order the kit sized to it; corners are where cheap kits fail, so check reviews specifically for corner alignment. Choose a finish that matches your new hardware, since mixed metals only work when they look intentional. The adhesive releases from glass cleanly with fishing line at move-out. Total working time is about twenty minutes.
12. Plug-In Sconces Flanking the Mirror at Eye Level
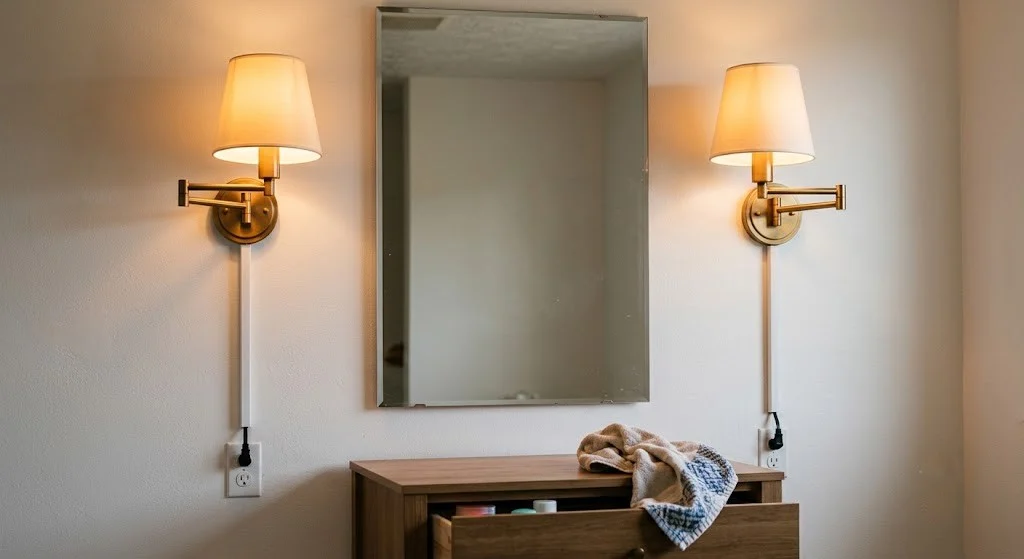
Overhead vanity lighting is why rental bathroom selfies look like interrogation footage. Plug-in wall sconces mounted at eye level on either side of the mirror fix the shadows, and each needs only a small anchor hole, the same footprint as hanging a picture. Run the cords down inside a paintable cord channel so the setup reads intentional rather than improvised. Warm bulbs only, 2700K, since anything cooler turns skin gray. Mount the sconce centers about 60 to 66 inches from the floor and 36 to 40 inches apart. At move-out you fill two small holes with a dab of spackle, which is standard picture-hanging wear in any lease I have signed.
13. Doors Off: Open-Shelf Vanity With Matched Baskets
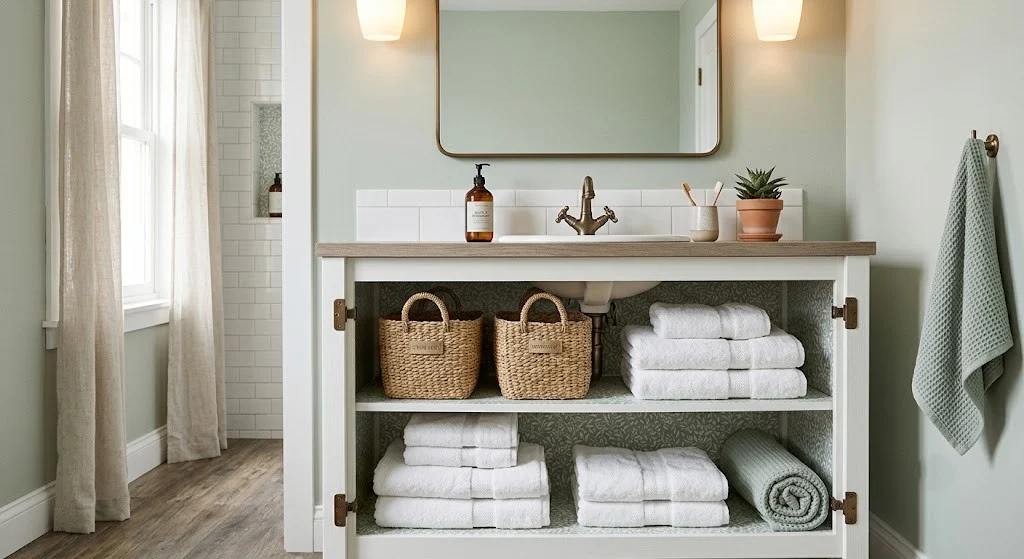
The most dramatic free makeover in this list is removing the cabinet doors entirely and running the vanity as open shelving. It works only if you commit to the styling: matched baskets, folded towels, nothing plastic in sight. Unscrew the hinges from the cabinet side, keep hinges taped to their own door, and store the doors flat under a bed or in a closet, labeled left to right. Line the interior with a peel-and-stick paper in a small print so the inside reads designed. This survived two lease inspections for me because reinstalling doors takes fifteen minutes. It also forces tidiness, which a small rental bathroom needs anyway.
14. One-Tray Counter Styling With Amber Glass Decants
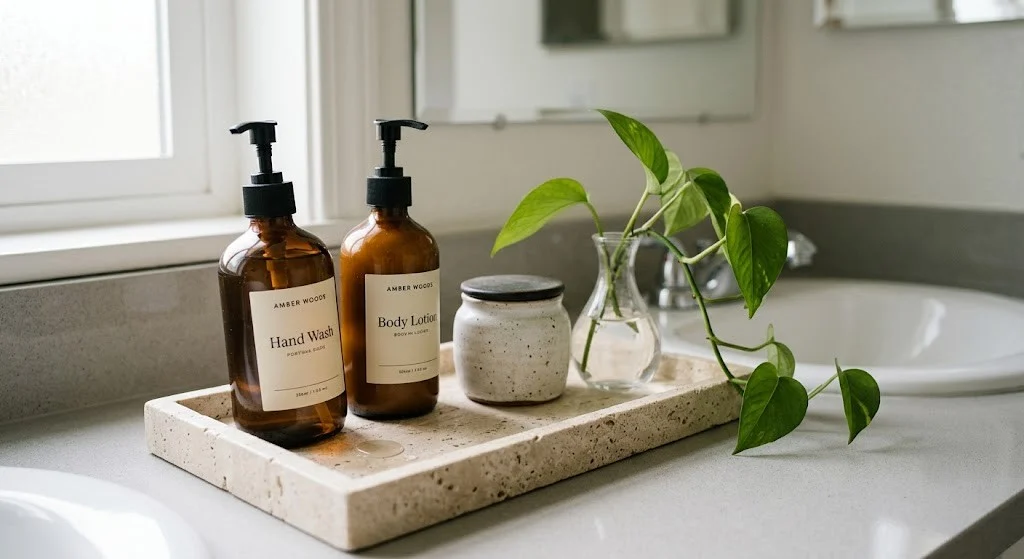
Everything that sits loose on a rental counter looks like clutter; the same objects on a tray look curated. That is the entire trick. Use one tray sized to about a third of your counter length, corral the daily-use items there, and decant anything with loud packaging into amber glass or ceramic. Add exactly one piece of life: a small stem vase or a trailing plant cutting in water. This costs almost nothing and moves with you to every future rental, which is why it is my highest-recommended zero-install upgrade. The vanity underneath can stay builder-grade beige and the counter still photographs like a boutique hotel shelf.
15. Rolling Two-Tier Organizers Around the P-Trap
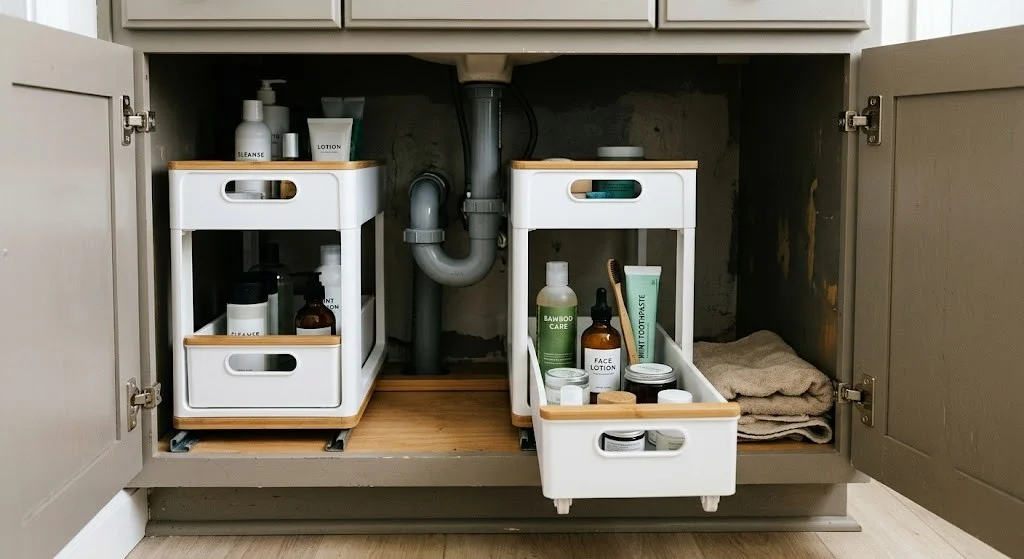
Under the sink is where rental storage goes to die: one awkward cabinet interrupted by a P-trap. Two-tier rolling drawer organizers built to straddle plumbing turn that dead zone into real storage without touching a screw. Measure three numbers before buying: cabinet opening width, depth to the back wall, and clearance under the trap. Sliding drawers beat stacked bins because you can reach the back row without unloading the front. Put daily items in the top tier at the front and bulk backstock behind. Nothing installs, nothing marks the cabinet, and the whole system lifts out in one minute on moving day. This is the least glamorous idea here and the one I use most.
16. Tension-Rod Skirt Under an Open-Base Vanity
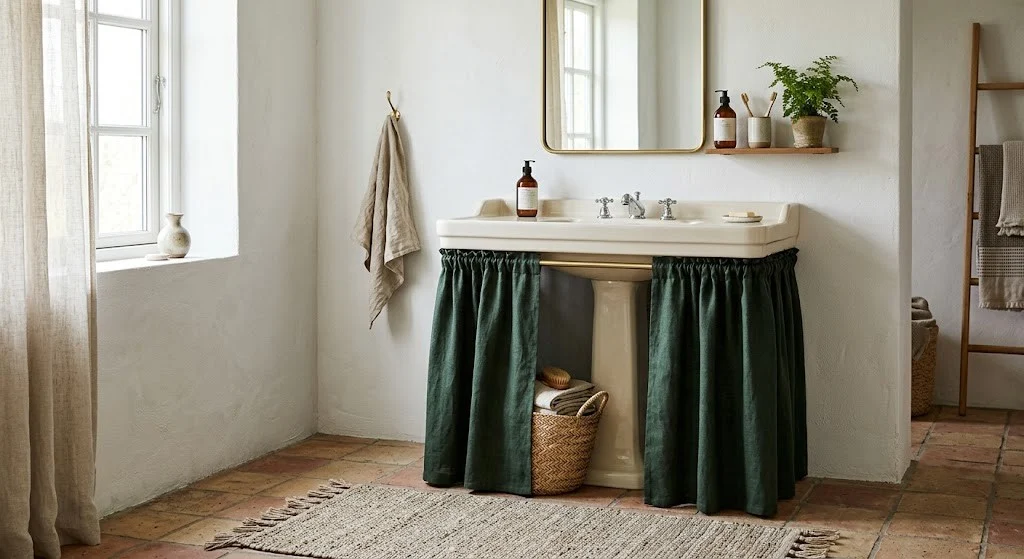
For pedestal sinks or vanities with an open base, a tension-rod skirt adds storage and softness with zero hardware. Spring a tension rod between the side walls or legs, hang a hemmed curtain panel, and the visual noise below the sink disappears. Choose a washable fabric with real weight, linen blend or canvas, because thin cotton clings and looks like a bedsheet. If you wrapped your doors in the deep green from idea 5, echoing that tone in the skirt fabric ties the two zones together. Hem it to hover half an inch off the floor so it never wicks water. Lift the rod out at move-out and there is literally nothing to undo.
17. Four-Inch Riser Shelf Faking a Built-In Ledge
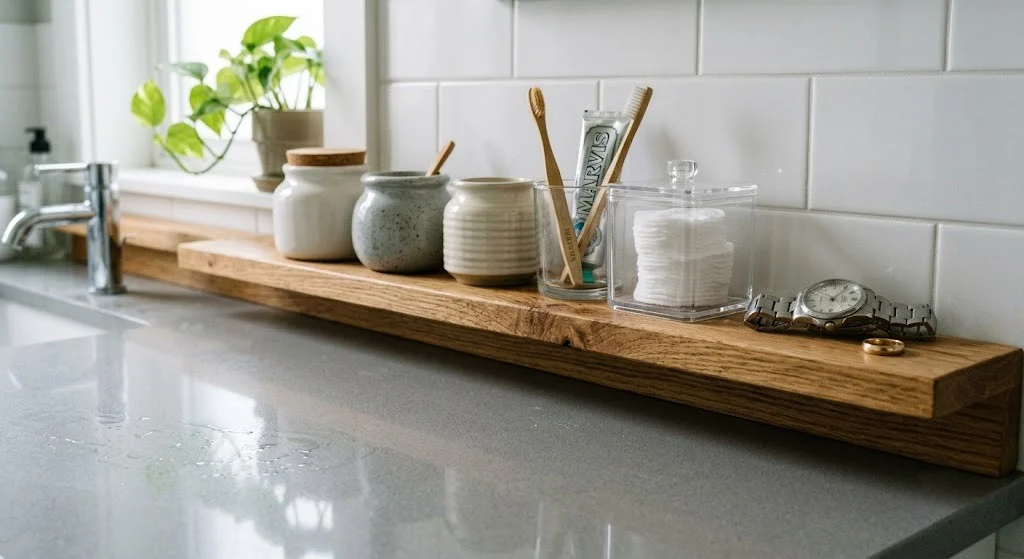
A small acrylic or wood riser shelf at the back of the counter fakes the built-in ledge that expensive bathrooms have. It lifts your everyday items off the counter surface, which makes cleaning faster because you wipe under one shelf instead of around nine objects. Keep it to four inches deep so it never crowds the faucet zone, and load it with the things you touch daily at easy reach height. Acrylic disappears visually in small bathrooms; wood adds warmth but needs a coaster habit near the sink. This is the upgrade guests never consciously notice and always react to. It rides in a moving box like a kitchen item.
18. Two-Color Towel and Rug Story Anchoring the Vanity
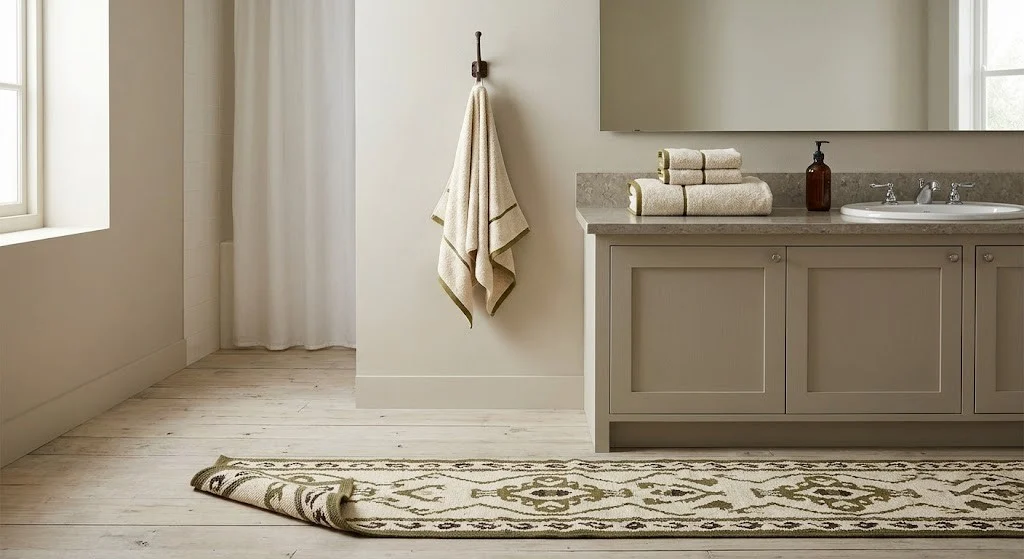
Towels and a bath mat are doing more for your vanity's look than you think, because they sit inside every photo and every sightline of it. Pick a two-color story pulled from whatever you did above, one dominant neutral and one accent, and buy all towels in those two colors only. A washable rug with pattern grounds the vanity zone the way a glued-down floor never could in a rental. Swap the accent color seasonally for a whole new room at towel prices. Tie the story back to your counter styling from idea 14 so tray, towels and rug read as one decision. This layer moves out in a laundry basket.
Final Thoughts
The pattern across all 18 ideas: nothing here requires permission, and everything reverses in a weekend or less. Start with hardware if you want instant proof, or a countertop wrap if the beige laminate is the real problem. Keep every original part in one labeled box from day one, because future you at move-out will be grateful. Your vanity can look custom for the entire lease and vanish back to builder-grade in an afternoon. Save this post to Pinterest so the full list is there when you are ready to start peeling.
Frequently Asked Questions
Will peel-and-stick countertop film damage a laminate counter?
Not if the base is smooth laminate and you remove it with heat. Warm the film with a hairdryer on low, peel slowly at a 45-degree angle, and any leftover tack wipes off with rubbing alcohol. Avoid applying it over real wood veneer or textured surfaces, where adhesive can pull the finish.
Am I allowed to change the faucet or hardware in a rental?
Most leases allow it as long as you reinstall the originals before move-out, but read your lease first and ask in writing if it is unclear. Photograph every connection before you start, box the original parts, and reinstall them exactly. The written record protects your deposit if a dispute comes up.
How do I remove contact paper without leaving residue?
Heat is everything. Run a hairdryer on low over a corner for thirty seconds, lift the edge, and pull back slowly against itself rather than straight up. Keep warming as you go. Any sticky patches left behind come off with rubbing alcohol on a soft cloth, not a scraper.
Do small nail or anchor holes count against my security deposit?
In most US states, a few small picture-hanging holes fall under normal wear and tear, but landlords vary. Fill each hole with a dab of spackle and touch up if you have matching paint. Take dated photos at move-in and move-out so the condition record is yours, not theirs.